Raspberry Pi - Keypad - Relay
Deze handleiding legt uit hoe u een keypad, relay en Raspberry Pi combineert. Wanneer de gebruiker het juiste wachtwoord invoert op het keypad, zal de Raspberry Pi de relay inschakelen.
De tutorial bevat ook de Raspberry Pi-code die een relay gedurende een bepaalde tijd activeert en daarna weer uitschakelt. Bovendien kan de Raspberry Pi-code meerdere wachtwoorden verwerken.
Door een relay aan te sluiten op een Electromagnetic Lock, Solenoid Lock, Linear Actuator, Heating Element, Pump, of Fan... kunnen we deze vervolgens bedienen met een keypad.
Hardware vereist
Of u kunt de volgende kits kopen:
| 1 | × | DIYables Sensorkit (30 sensoren/displays) | |
| 1 | × | DIYables Sensorkit (18 sensoren/displays) |
Over Keypad en Relay
Als u niet vertrouwd bent met het keypad en de relay (inclusief pinout, functionaliteit, programmeren, enz.), kunnen de volgende tutorials nuttig zijn:
- Raspberry Pi - Keypad tutorial
- Raspberry Pi - Relay tutorial
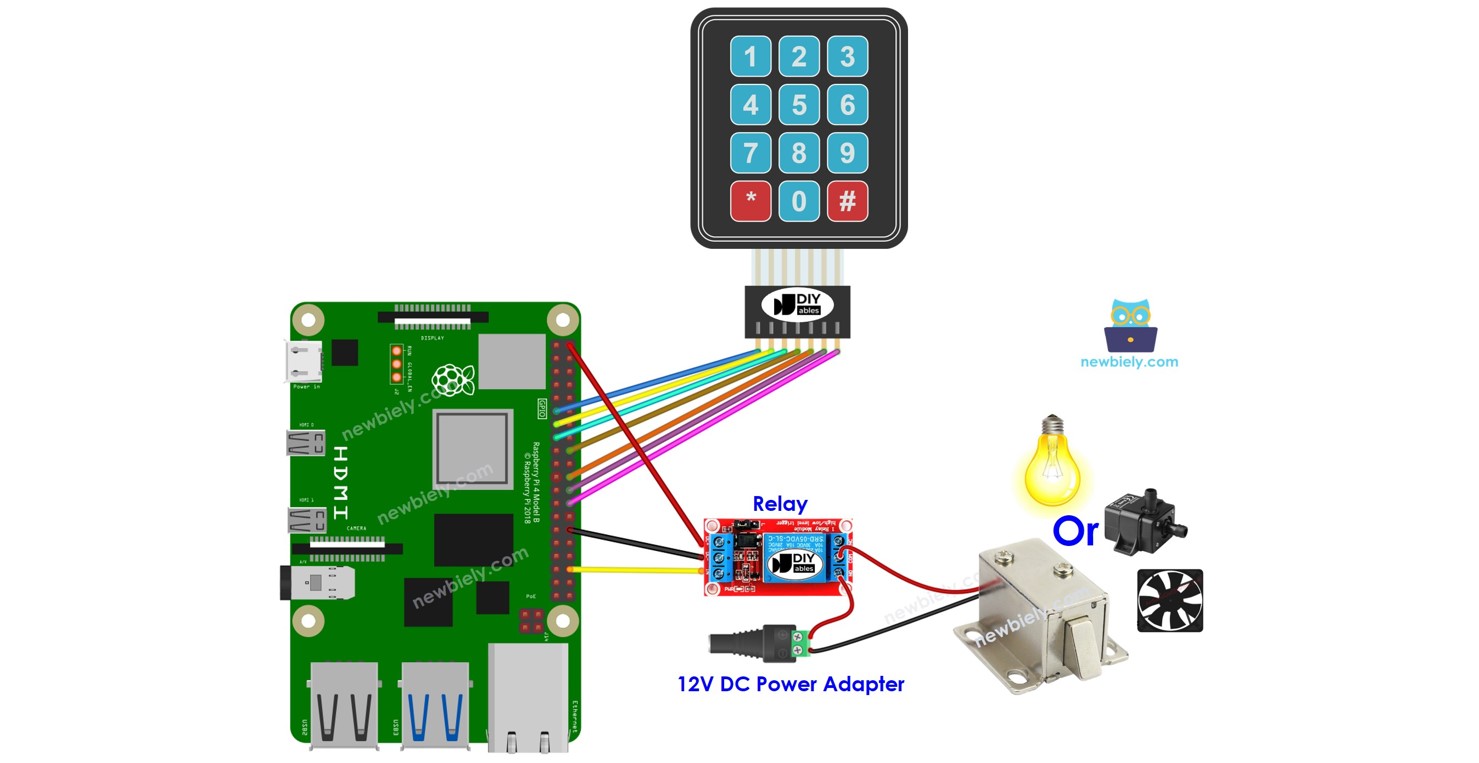
Bedradingsschema
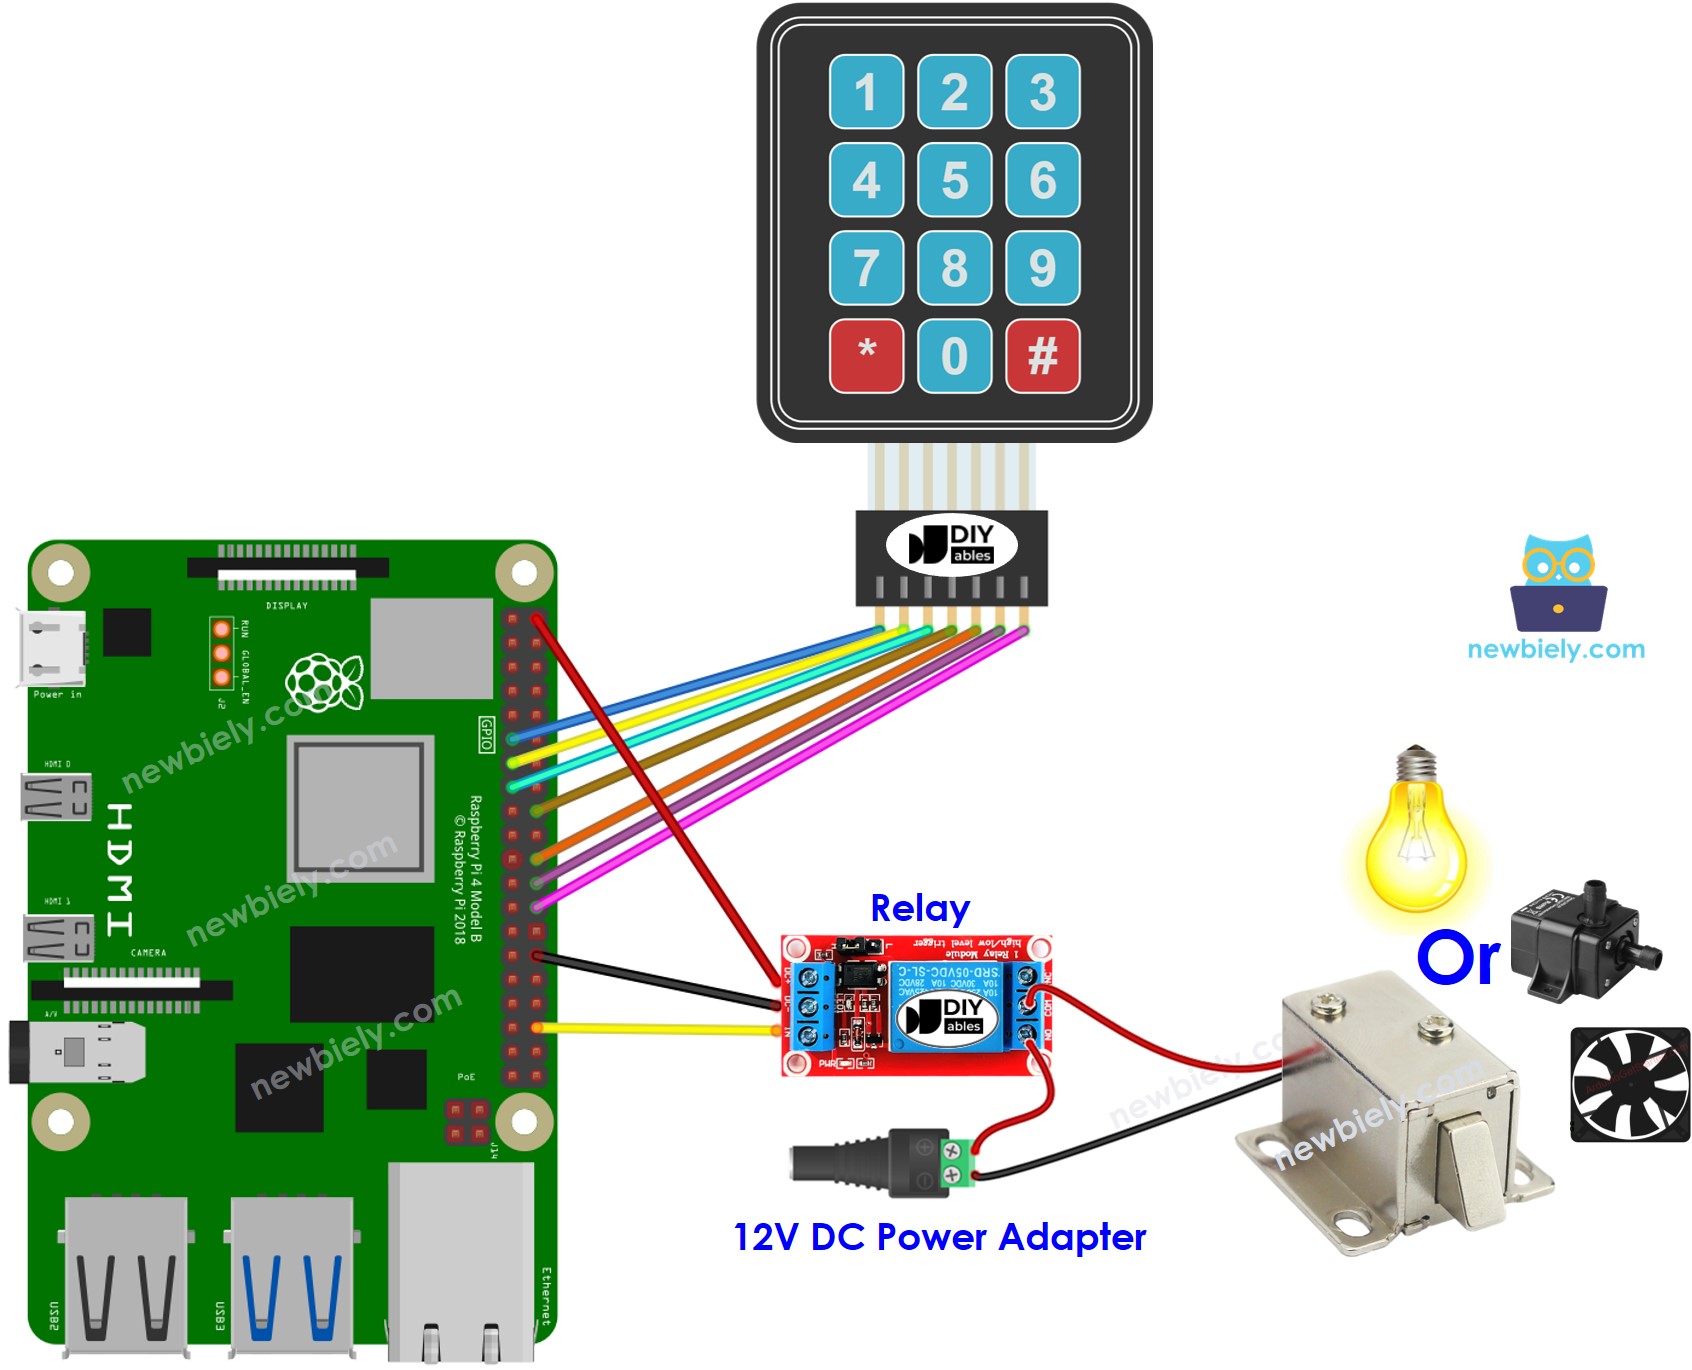
Deze afbeelding is gemaakt met Fritzing. Klik om de afbeelding te vergroten.
Raspberry Pi Code - Schakel relay aan bij correct wachtwoord
Snelle stappen
- Zorg dat u Raspbian of een ander met Raspberry Pi compatibel besturingssysteem op uw Pi hebt geïnstalleerd.
- Zorg ervoor dat uw Raspberry Pi verbonden is met hetzelfde lokale netwerk als uw pc.
- Zorg dat uw Raspberry Pi internettoegang heeft als u bibliotheken moet installeren.
- Als dit de eerste keer is dat u de Raspberry Pi gebruikt, bekijk dan hoe u de Raspberry Pi instelt.
- Verbind uw pc met de Raspberry Pi via SSH met de ingebouwde SSH-client in Linux en macOS of PuTTY in Windows. Zie hoe u uw pc verbindt met de Raspberry Pi via SSH.
- Zorg dat de RPi.GPIO bibliotheek geïnstalleerd is. Is dit niet het geval, installeer deze dan met het volgende commando:
- Maak een Python-scriptbestand met de naam keypad_relay.py en voeg de volgende code toe:
- Sla het bestand op en voer het Python-script uit met het volgende commando in de terminal:
- Voer 9765 in gevolgd door de # toets, daarna 1234 gevolgd door de # toets.
- Controleer de terminal voor het resultaat en de status van de relay.
Het script draait in een oneindige lus totdat u Ctrl + C indrukt in de terminal.
Uitleg van de code
Geautoriseerde wachtwoorden zijn vooraf gedefinieerd in de Raspberry Pi-code. Een string wordt gebruikt om het door gebruikers ingevoerde wachtwoord op te slaan, de zogenaamde input string. Op het keypad worden twee toetsen (* en #) gebruikt voor speciale functies: wachtwoord wissen en wachtwoord beëindigen. Wanneer een toets op het keypad wordt ingedrukt:
- Als de ingedrukte toets niet een van de twee speciale toetsen is, wordt deze toegevoegd aan de input string.
- Als de ingedrukte toets * is, wordt de input string gewist. Dit kan worden gebruikt om het invoeren van het wachtwoord (opnieuw) te starten.
- Als de ingedrukte toets # is:
- Verifieert de Raspberry Pi of de input string overeenkomt met één van de vooraf gedefinieerde wachtwoorden, dan wordt de relay ingeschakeld.
- Ongeacht of het wachtwoord correct is of niet, wordt de input string gewist voor de volgende invoer.
Raspberry Pi Code - Schakel relay aan gedurende een bepaalde tijd bij correct wachtwoord
Als het wachtwoord correct is, wordt de relay gedurende 5 seconden ingeschakeld. Na deze tijdsduur schakelt de relay weer uit.
Video Tutorial
We overwegen het maken van videotutorials. Als u videotutorials belangrijk vindt, abonneer u dan op ons YouTube-kanaal om ons te motiveren de video's te maken.
Bekijk onze video-tutorial voor een visuele begeleiding bij dit project! De video biedt extra inzichten en helpt u om stap voor stap de verbindingen te maken en de code te begrijpen.