Arduino Nano - DotStar LED Strip
In deze tutorial leren we hoe u Arduino Nano gebruikt om een DotStar RGB LED-strip aan te sturen. We behandelen in detail:
- Hoe u Arduino Nano aansluit op de DotStar LED-strip
- Hoe u Arduino Nano programmeert om de kleur en helderheid van elke individuele LED op de strip te regelen
- Hoe u met Arduino Nano een komeet-effect maakt voor de DotStar LED-strip
Hardware Benodigd
Of u kunt de volgende kits kopen:
| 1 | × | DIYables Sensorkit (30 sensoren/displays) | |
| 1 | × | DIYables Sensorkit (18 sensoren/displays) |
Over de DotStar RGB LED Strip
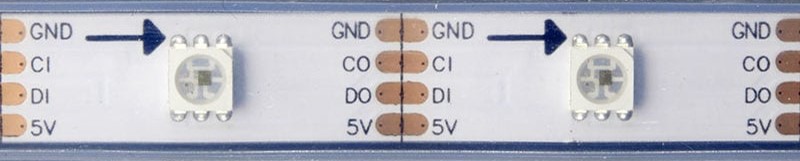
Pinout
De DotStar RGB LED Strip heeft vier pinnen:
- GND pin: moet worden verbonden met GND (0V)
- CI pin: Clock-pin die het kloksignaal ontvangt. Deze moet worden aangesloten op een pin van de Arduino Nano.
- DI pin: Data-pin die het besturingssignaal ontvangt. Deze moet worden aangesloten op een pin van de Arduino Nano.
- 5V pin: moet worden aangesloten op 5V van een externe voeding
Bedradingsschema
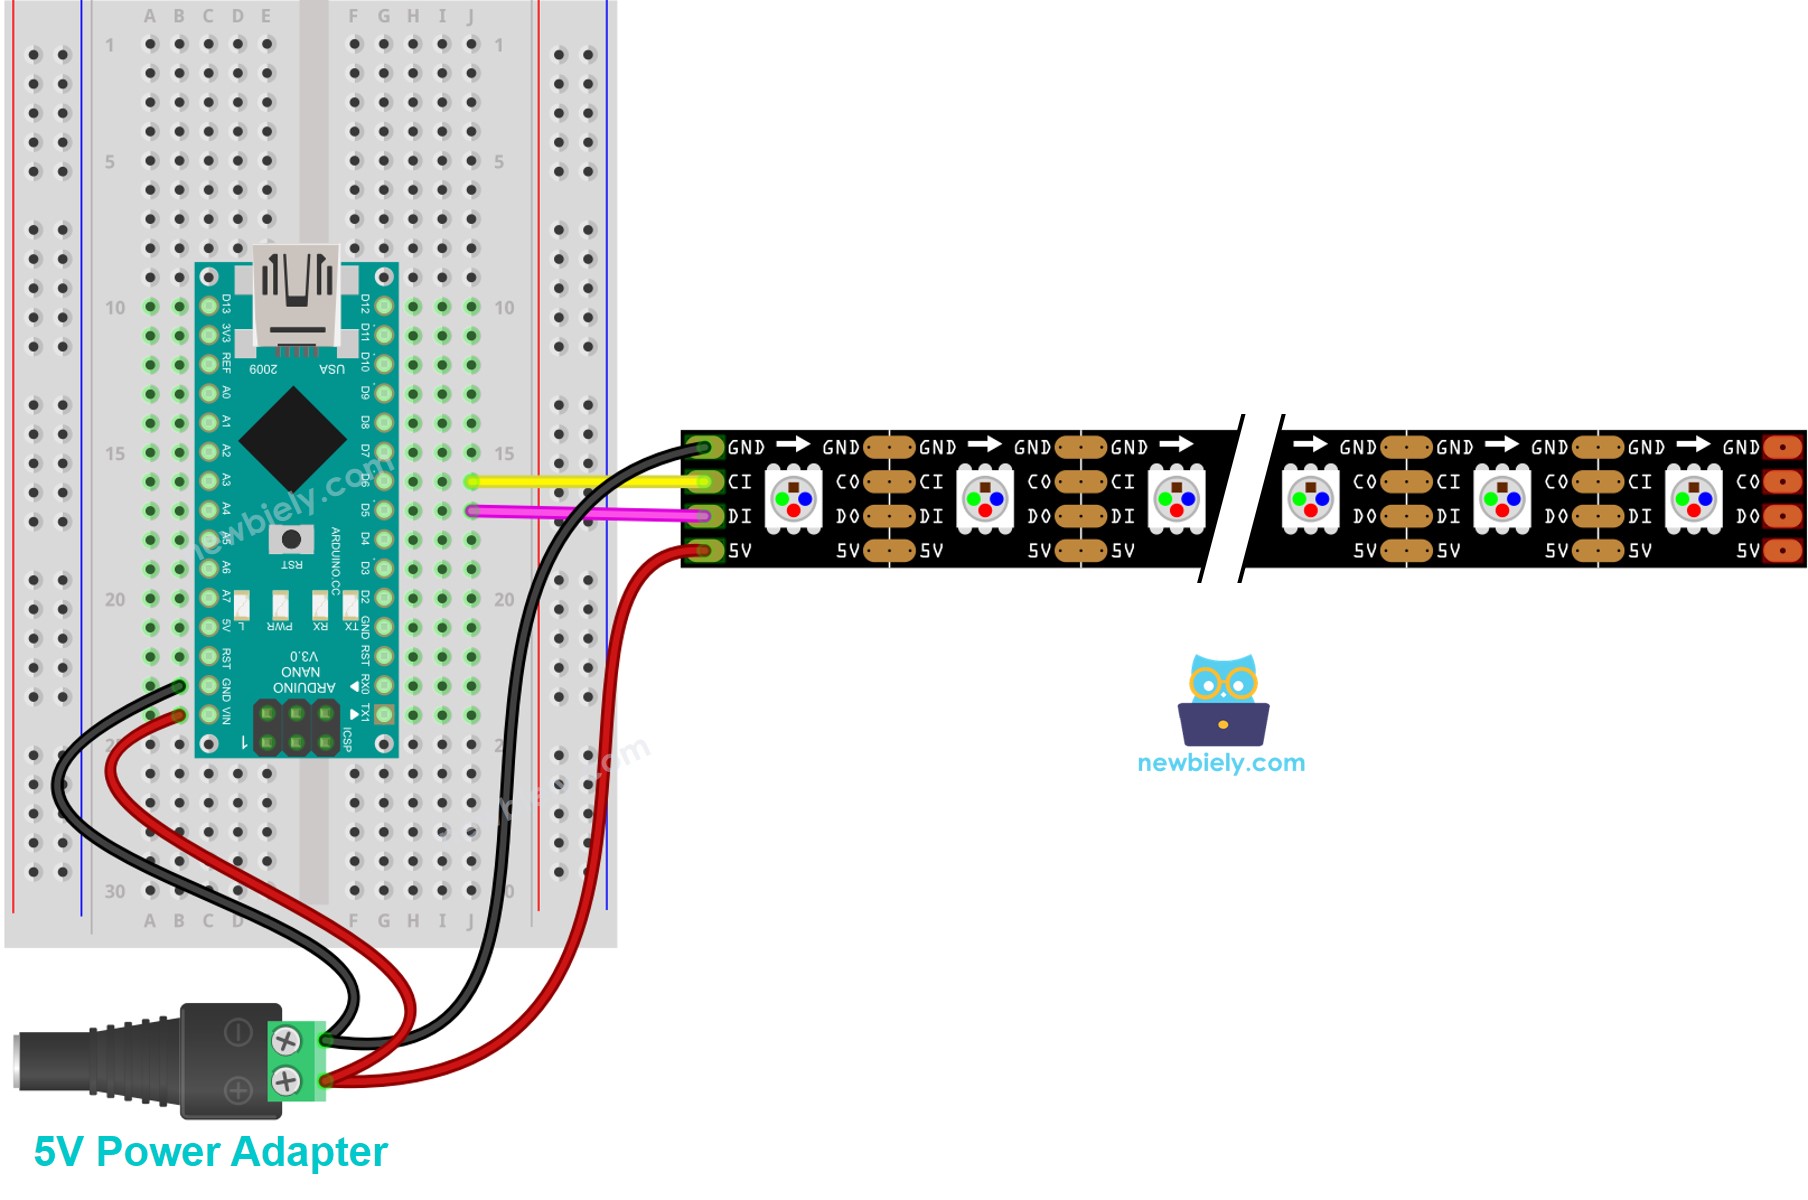
Deze afbeelding is gemaakt met Fritzing. Klik om de afbeelding te vergroten.
Hoe te programmeren voor de DotStar RGB LED Strip
- Voeg een DotStar bibliotheek toe
- Declareer een DotStar object
- Initialiseer de DotStar
- Stel de kleur (r, g, b) in van elke individuele LED (pixel).
- Stel de helderheid van de hele strip in.
※ Notiz:
- DotStar.setBrightness() geldt voor alle pixels op de LED-strip. Om de helderheid van elke pixel apart in te stellen, kunnen we de kleurwaarde schalen.
- De bij DotStar.setBrightness() en DotStar.setPixelColor() ingestelde waarden worden pas actief bij het aanroepen van DotStar.show().
Arduino Nano Code
De onderstaande code zet de pixels één voor één rood, met een vertraging tussen elke pixel.
Snelle Stappen
- Verbind de componenten volgens het bijgevoegde bedradingsschema.
- Verbind de Arduino Nano met uw computer via een USB-kabel.
- Start de Arduino IDE op uw computer.
- Selecteer de Arduino Nano als board en het bijbehorende COM-poort.
- Open de Library Manager door te klikken op het icoon Library Manager in de linker navigatiebalk van de Arduino IDE.
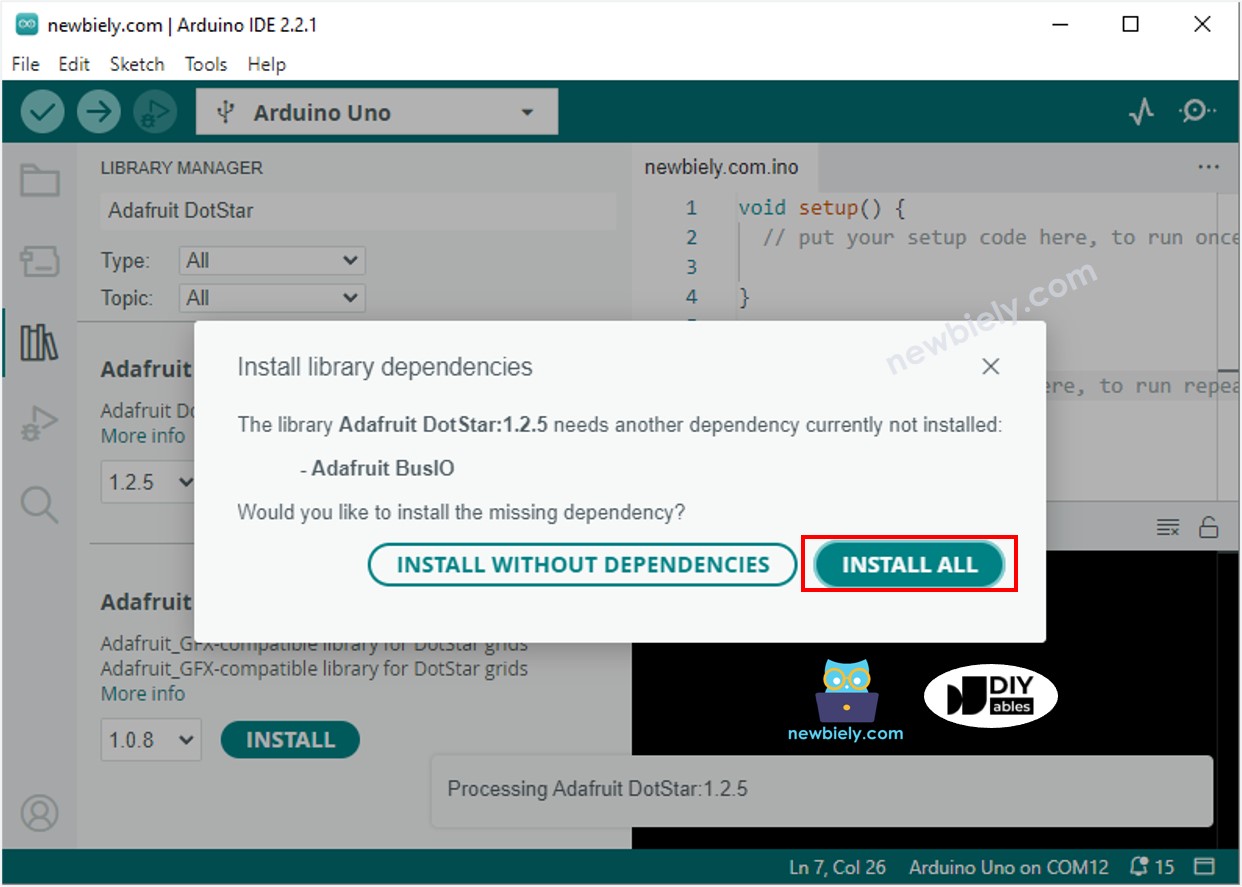
- Zoek op “Adafruit DotStar” en vind de DotStar bibliotheek van Adafruit.
- Klik op de Installeren-knop om de DotStar bibliotheek te installeren.

- U wordt gevraagd om afhankelijkheden te installeren. Klik op de Installeer alles-knop.
- Kopieer bovenstaande code en open deze in de Arduino IDE.
- Klik op de Upload-knop in de Arduino IDE om de code naar Arduino Nano te uploaden.
- Bekijk het LED-effect.
Arduino Nano Code - LED Strip Komeet Effect
De onderstaande code maakt een komeet-effect voor de DotStar LED-strip:
※ Notiz:
Voor andere LED-effecten bieden wij ook een betaalde programmeerservice aan.
Video Tutorial
We overwegen het maken van videotutorials. Als u videotutorials belangrijk vindt, abonneer u dan op ons YouTube-kanaal om ons te motiveren de video's te maken.
Bekijk onze video-tutorial voor een visuele begeleiding bij dit project! De video biedt extra inzichten en helpt u sneller te begrijpen hoe alles werkt.