Arduino Nano - OLED Klok
Deze handleiding legt uit hoe u een OLED-klok maakt met behulp van de Arduino Nano, een RTC-module en een OLED-display. De tutorial bevat instructies voor zowel het DS3231 als het DS1307 RTC-module. In detail:
- Arduino Nano haalt het uur, de minuut en seconde op van een DS3231 RTC-module en toont deze op een OLED
- Arduino Nano haalt het uur, de minuut en seconde op van een DS1307 RTC-module en toont deze op een OLED
U kunt kiezen uit twee RTC-modules: DS3231 en DS1307. Voor meer informatie verwijzen wij u naar DS3231 vs DS1307.
Hardware Benodigd
Of u kunt de volgende kits kopen:
| 1 | × | DIYables Sensorkit (30 sensoren/displays) | |
| 1 | × | DIYables Sensorkit (18 sensoren/displays) |
Over OLED, DS3231 en DS1307 RTC-module
Als u niet bekend bent met OLED, DS3231 en DS1307 (pinout, werking, programmeren, enz.), kunnen de volgende tutorials u helpen:
Installeer OLED en RTC Libraries
- Klik op het icoon Libraries in de linkerzijbalk van de Arduino IDE.
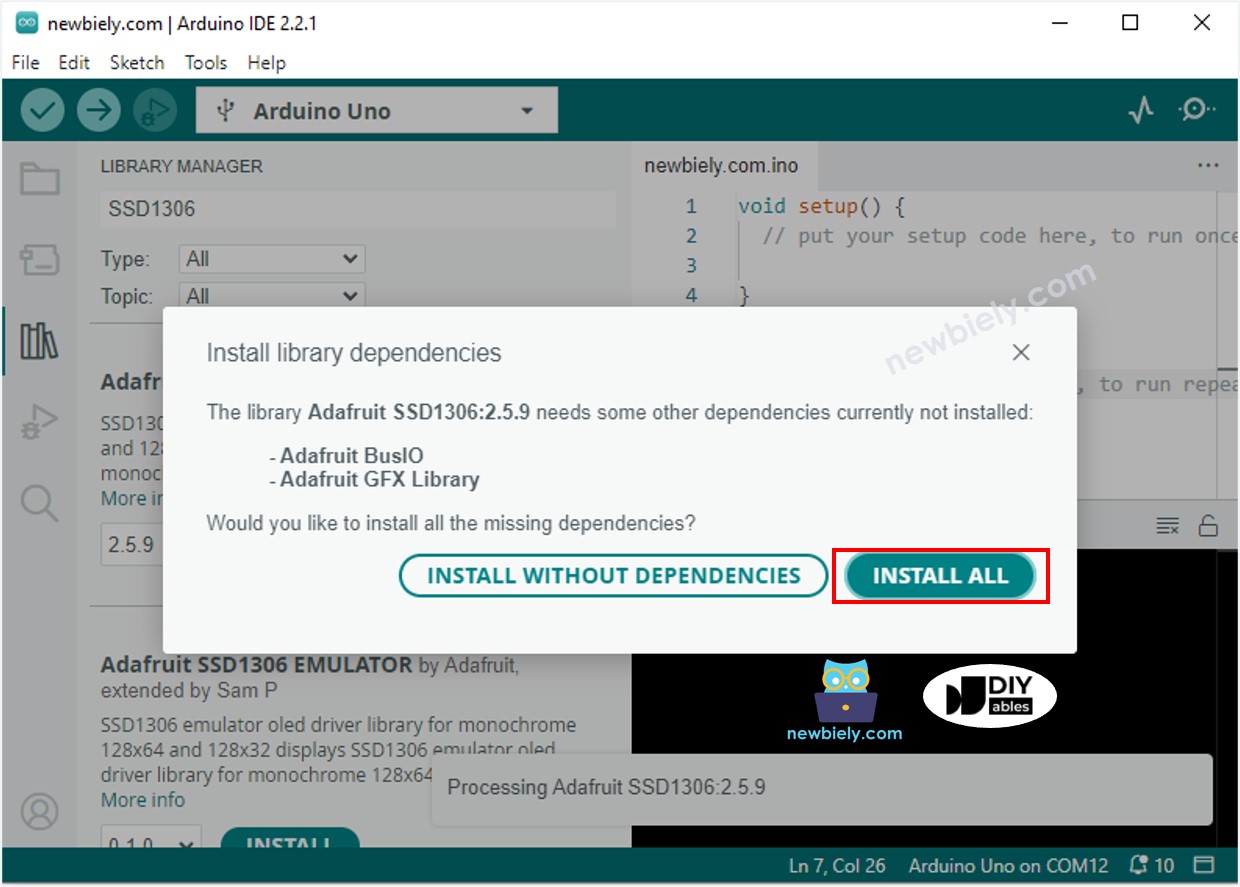
- Zoek naar “SSD1306” en vind de SSD1306 bibliotheek van Adafruit.
- Druk op de knop Installeren om de installatie te voltooien.

- U krijgt een melding om enkele andere benodigde libraries te installeren.
- Klik op de knop Alles Installeren om ze allemaal te installeren.
- Zoek naar “RTClib” en vind de RTC bibliotheek gemaakt door Adafruit. Deze bibliotheek is compatibel met zowel DS3231 als DS1307.
- Druk op de knop Installeren om de RTC bibliotheek te installeren.

Tijd uitlezen van DS3231 RTC-module en tonen op OLED
Bedradingsschema
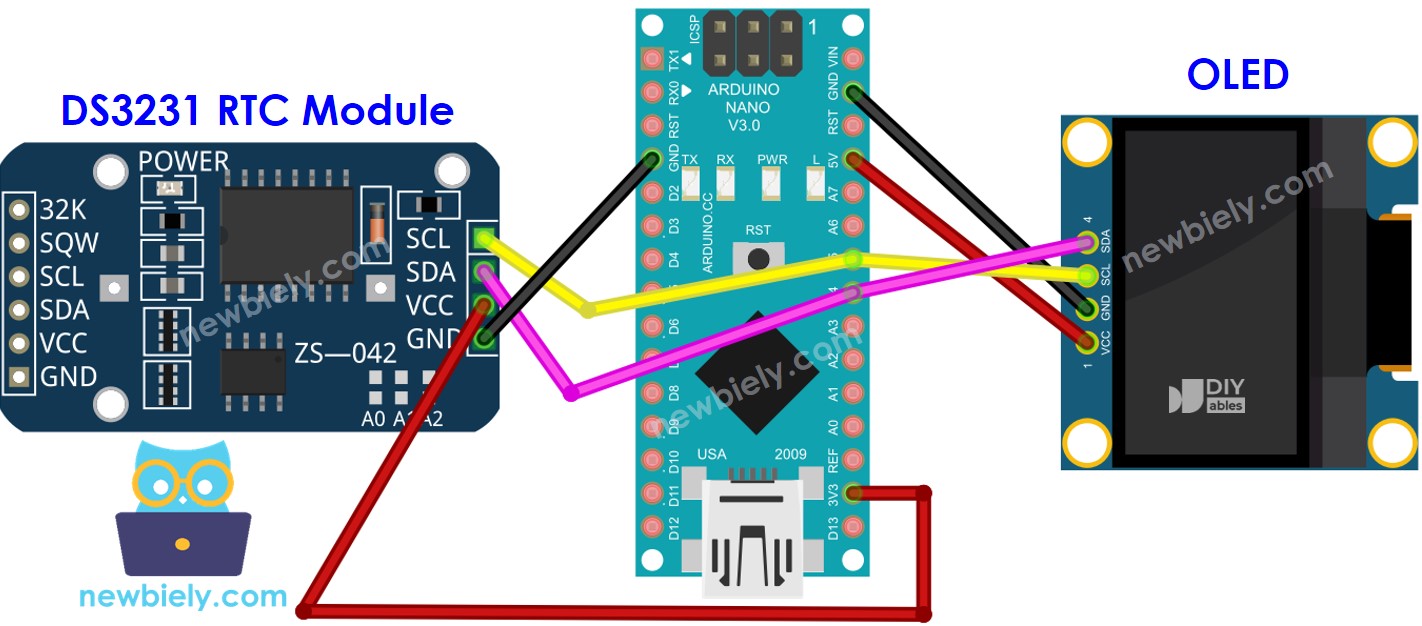
Deze afbeelding is gemaakt met Fritzing. Klik om de afbeelding te vergroten.
Arduino Nano Code - DS3231 en OLED
Snelle Stappen
- Kopieer de code en open deze in de Arduino IDE.
- Druk op de knop Uploaden in de Arduino IDE om de code naar de Arduino Nano te sturen.
- Plaats de sensor in heet en koud water of houd deze in uw hand.
- Bekijk de resultaten op het OLED-scherm.
Tijd uitlezen van DS1307 RTC-module en tonen op OLED
Bedradingsschema
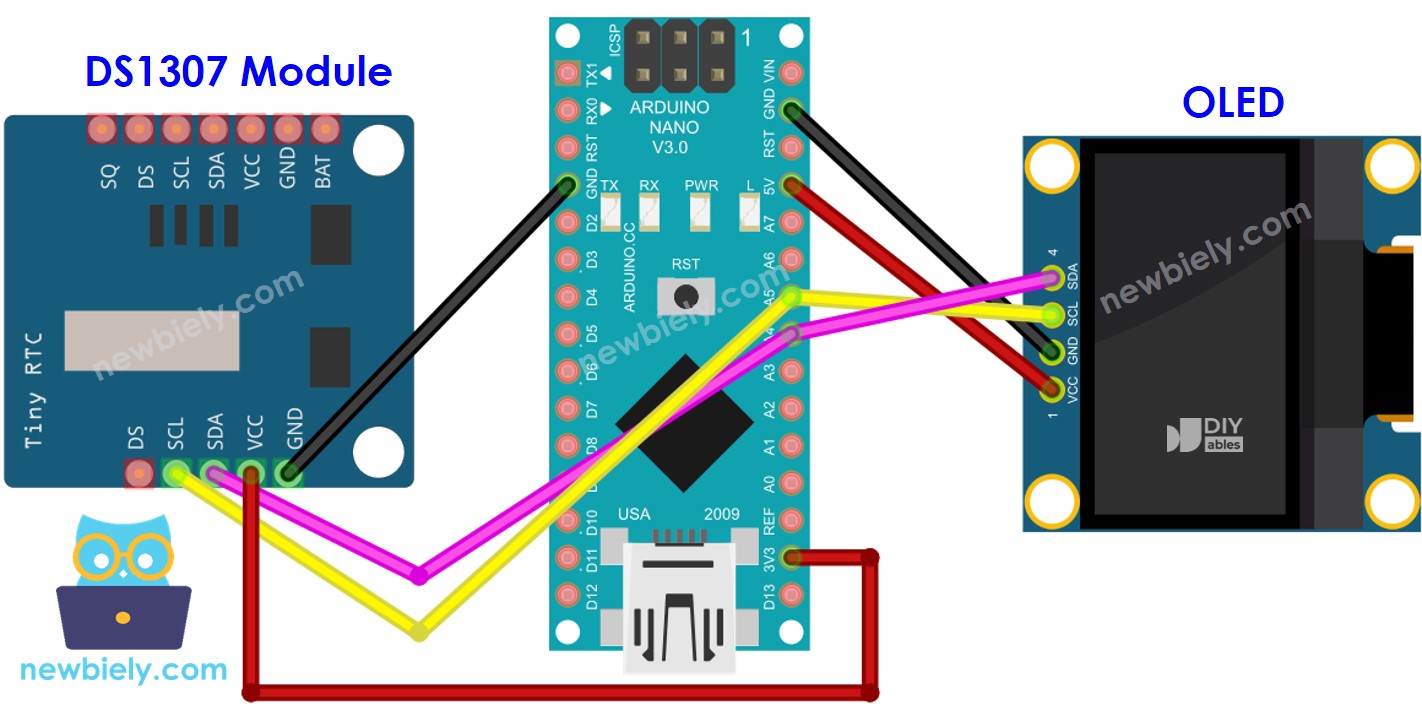
Deze afbeelding is gemaakt met Fritzing. Klik om de afbeelding te vergroten.
Arduino Nano Code - DS1307 en OLED
Snelle Stappen
- Kopieer de code en open deze in de Arduino IDE.
- Druk op de knop Uploaden in de Arduino IDE om de code naar de Arduino Nano te sturen.
- Plaats de sensor in heet en koud water, of houd deze in uw hand.
- Bekijk het resultaat op het OLED-scherm.
Video Tutorial
We overwegen het maken van videotutorials. Als u videotutorials belangrijk vindt, abonneer u dan op ons YouTube-kanaal om ons te motiveren de video's te maken.