Arduino UNO R4 - Ingebouwde LED Matrix

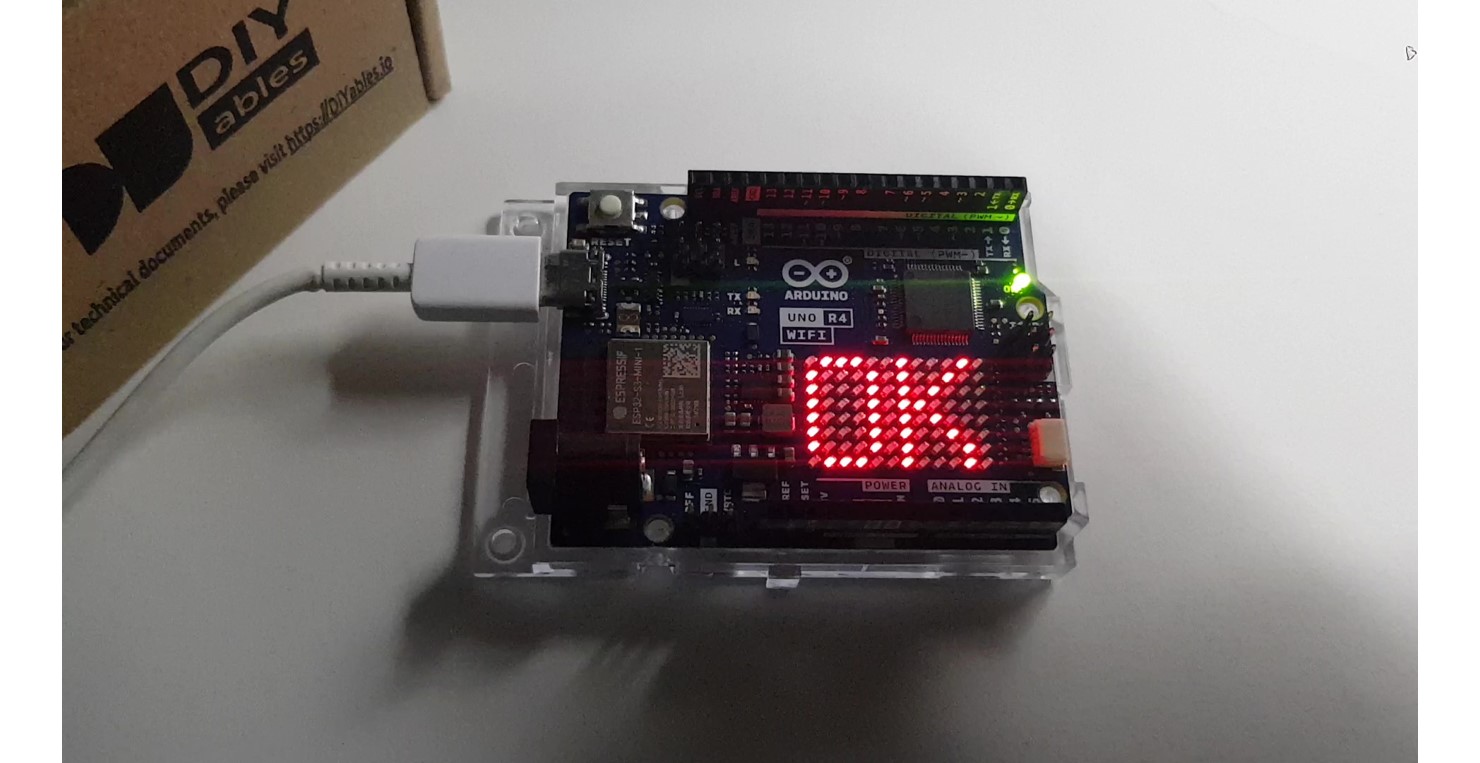
De Arduino Uno R4 WiFi wordt geleverd met een ingebouwde 12x8 LED Matrix. In deze handleiding gaan we onderzoeken hoe u de ingebouwde LED matrix kunt gebruiken om cijfers en karakters weer te geven. Specifiek behandelen we het volgende:

Arduino Uno R4 ingebouwde LED matrix

Voor informatie over het gebruik van de Arduino R4 met externe LED Matrix modules, raadpleeg de handleiding Arduino UNO R4 - LED Matrix.

Demonstratie

Arduino Code - Geeft cijfers (0-9) of karakters (A-Z) weer

De onderstaande code geeft achtereenvolgens cijfers van 0 tot 9 en karakters van A tot Z weer, één voor één, in het midden van de LED matrix.

/* * Deze Arduino UNO R4 code is ontwikkeld door newbiely.nl * Deze Arduino UNO R4 code wordt zonder enige beperking aan het publiek beschikbaar gesteld. * Voor volledige instructies en schema's, bezoek: * https://newbiely.nl/tutorials/arduino-uno-r4/arduino-uno-r4-built-in-led-matrix */ #include "Arduino_LED_Matrix.h" #include "fonts.h" ArduinoLEDMatrix matrix; uint8_t frame[8][12] = { { 0, 0, 0, 0, 0, 0, 0, 0, 0, 0, 0, 0 }, { 0, 0, 0, 0, 0, 0, 0, 0, 0, 0, 0, 0 }, { 0, 0, 0, 0, 0, 0, 0, 0, 0, 0, 0, 0 }, { 0, 0, 0, 0, 0, 0, 0, 0, 0, 0, 0, 0 }, { 0, 0, 0, 0, 0, 0, 0, 0, 0, 0, 0, 0 }, { 0, 0, 0, 0, 0, 0, 0, 0, 0, 0, 0, 0 }, { 0, 0, 0, 0, 0, 0, 0, 0, 0, 0, 0, 0 }, { 0, 0, 0, 0, 0, 0, 0, 0, 0, 0, 0, 0 } }; void setup() { // put your setup code here, to run once: Serial.begin(115200); delay(1500); matrix.begin(); } void loop() { for (char c = '0'; c <= '9'; c++) { clear_frame(); add_to_frame(c, 4); display_frame(); delay(1000); } for (char c = 'A'; c <= 'Z'; c++) { clear_frame(); add_to_frame(c, 4); display_frame(); delay(1000); } } void clear_frame() { for (int row = 0; row < 8; row++) { for (int col = 0; col < 12; col++) { frame[row][col] = 0; } } } void display_frame() { matrix.renderBitmap(frame, 8, 12); } void add_to_frame(char c, int pos) { int index = -1; if (c >= '0' && c <= '9') index = c - '0'; else if (c >= 'A' && c <= 'Z') index = c - 'A' + 10; else { Serial.println("WARNING: unsupported character"); return; } for (int row = 0; row < 8; row++) { uint32_t temp = fonts[index][row] << (7 - pos); for (int col = 0; col < 12; col++) { frame[row][col] |= (temp >> (11 - col)) & 1; } } }

Snelle Stappen

Arduino IDE 2 voegt bestand toe
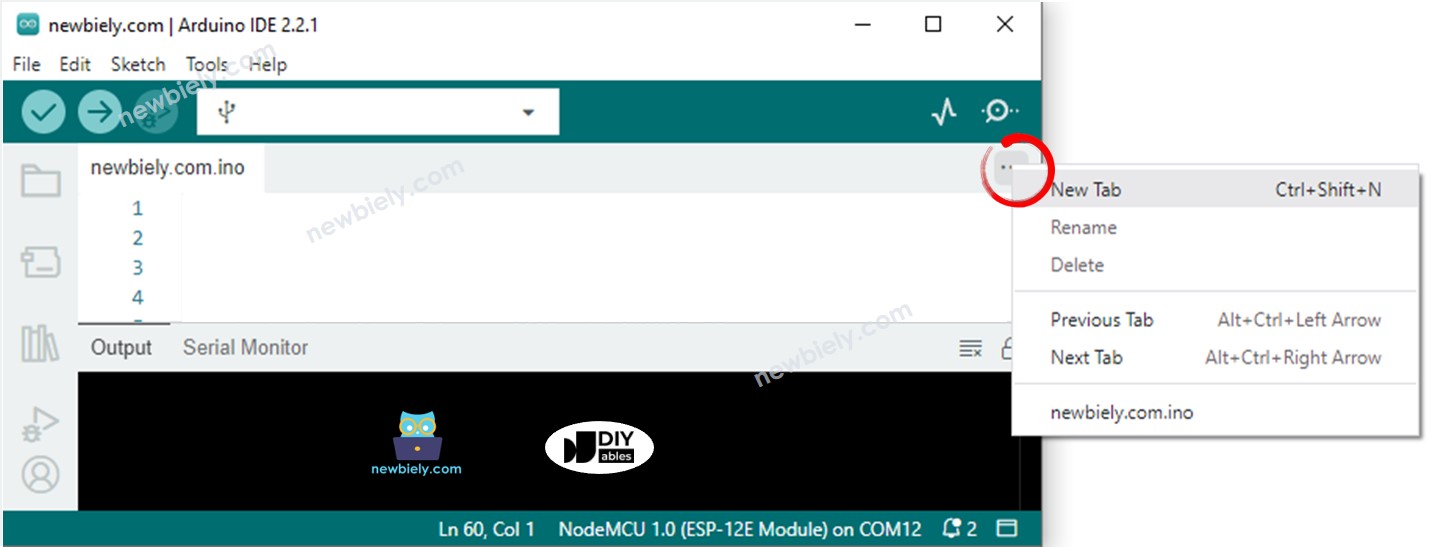
  • Klik op de knop net onder het seriële monitor icoon en kies "New Tab", of gebruik Ctrl+Shift+N.
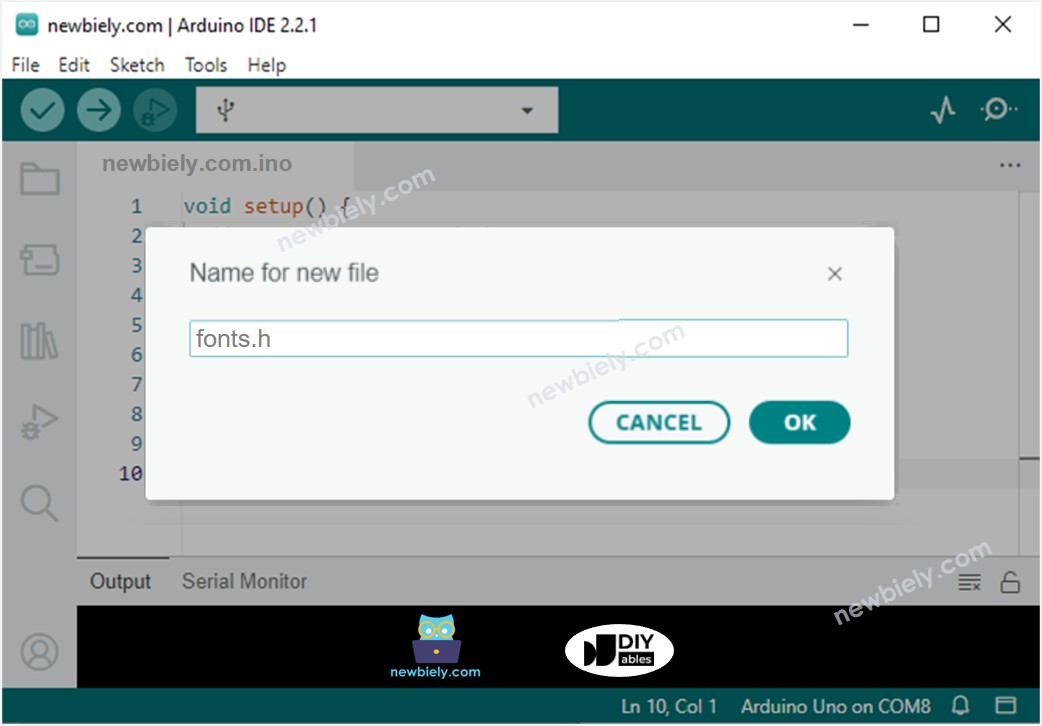
  • Geef het bestand de naam fonts.h en klik op de OK knop
Arduino IDE 2 voegt bestand fonts.h toe
  • Kopieer de onderstaande code en plak deze in dat bestand.
/* * Deze Arduino UNO R4 code is ontwikkeld door newbiely.nl * Deze Arduino UNO R4 code wordt zonder enige beperking aan het publiek beschikbaar gesteld. * Voor volledige instructies en schema's, bezoek: * https://newbiely.nl/tutorials/arduino-uno-r4/arduino-uno-r4-built-in-led-matrix */ uint8_t fonts[36][8] = { { // 0 0b01110, 0b10001, 0b10001, 0b10001, 0b10001, 0b10001, 0b10001, 0b01110, }, { // 1 0b00110, 0b01110, 0b10110, 0b00110, 0b00110, 0b00110, 0b00110, 0b11111, }, { // 2 0b11110, 0b00001, 0b00010, 0b00100, 0b01000, 0b10000, 0b10000, 0b11111, }, { // 3 0b11110, 0b00001, 0b00010, 0b00100, 0b00110, 0b00001, 0b00001, 0b11110, }, { // 4 0b00010, 0b00110, 0b01010, 0b10010, 0b11111, 0b00010, 0b00010, 0b00010, }, { // 5 0b11111, 0b10000, 0b10000, 0b11110, 0b00001, 0b00001, 0b10001, 0b01110, }, { // 6 0b01110, 0b10000, 0b10000, 0b11110, 0b10001, 0b10001, 0b10001, 0b01110, }, { // 7 0b11111, 0b00001, 0b00010, 0b00100, 0b01000, 0b01000, 0b10000, 0b10000, }, { // 8 0b01110, 0b10001, 0b10001, 0b01110, 0b10001, 0b10001, 0b10001, 0b01110, }, { // 9 0b01110, 0b10001, 0b10001, 0b10001, 0b11110, 0b00001, 0b00001, 0b11110, }, { // A 0b00100, 0b01010, 0b10001, 0b11111, 0b10001, 0b10001, 0b10001, 0b10001, }, { // B 0b11110, 0b10001, 0b10001, 0b11110, 0b10001, 0b10001, 0b10001, 0b11110, }, { // C 0b01110, 0b10001, 0b10000, 0b10000, 0b10000, 0b10000, 0b10001, 0b01110, }, { // D 0b11110, 0b10001, 0b10001, 0b10001, 0b10001, 0b10001, 0b10001, 0b11110, }, { // E 0b11111, 0b10000, 0b10000, 0b11110, 0b10000, 0b10000, 0b10000, 0b11111, }, { // F 0b11111, 0b10000, 0b10000, 0b11110, 0b10000, 0b10000, 0b10000, 0b10000, }, { // G 0b01110, 0b10001, 0b10000, 0b10000, 0b10111, 0b10001, 0b10001, 0b01110, }, { // H 0b10001, 0b10001, 0b10001, 0b11111, 0b10001, 0b10001, 0b10001, 0b10001, }, { // I 0b11111, 0b00100, 0b00100, 0b00100, 0b00100, 0b00100, 0b00100, 0b11111, }, { // J 0b11111, 0b00010, 0b00010, 0b00010, 0b00010, 0b00010, 0b10010, 0b01100, }, { // K 0b10001, 0b10010, 0b10100, 0b11000, 0b10100, 0b10010, 0b10001, 0b10001, }, { // L 0b10000, 0b10000, 0b10000, 0b10000, 0b10000, 0b10000, 0b10000, 0b11111, }, { // M 0b10001, 0b11011, 0b10101, 0b10101, 0b10001, 0b10001, 0b10001, 0b10001, }, { // N 0b10001, 0b10001, 0b11001, 0b10101, 0b10011, 0b10001, 0b10001, 0b10001, }, { // O 0b01110, 0b10001, 0b10001, 0b10001, 0b10001, 0b10001, 0b10001, 0b01110, }, { // P 0b11110, 0b10001, 0b10001, 0b11110, 0b10000, 0b10000, 0b10000, 0b10000, }, { // Q 0b01110, 0b10001, 0b10001, 0b10001, 0b10001, 0b10101, 0b10010, 0b01101, }, { // R 0b11110, 0b10001, 0b10001, 0b11110, 0b10010, 0b10001, 0b10001, 0b10001, }, { // S 0b01110, 0b10001, 0b10000, 0b01110, 0b00001, 0b00001, 0b10001, 0b01110, }, { // T 0b11111, 0b00100, 0b00100, 0b00100, 0b00100, 0b00100, 0b00100, 0b00100, }, { // U 0b10001, 0b10001, 0b10001, 0b10001, 0b10001, 0b10001, 0b10001, 0b01110, }, { // V 0b10001, 0b10001, 0b10001, 0b10001, 0b01010, 0b01010, 0b00100, 0b00100, }, { // W 0b10001, 0b10001, 0b10001, 0b10101, 0b10101, 0b11011, 0b11011, 0b10001, }, { // X 0b10001, 0b10001, 0b01010, 0b00100, 0b00100, 0b01010, 0b10001, 0b10001, }, { // Y 0b10001, 0b10001, 0b01010, 0b00100, 0b00100, 0b00100, 0b00100, 0b00100, }, { // Z 0b11111, 0b00001, 0b00010, 0b00100, 0b01000, 0b10000, 0b10000, 0b11111, } };
  • Klik op de Upload knop in Arduino IDE om de code naar Arduino te uploaden
  • Controleer de status van de LED Matrix

Code Uitleg

In de verstrekte code is het cruciaal om te focussen op de add_to_frame(char c, int pos) functie. Deze functie accepteert twee argumenten:

  • char c: Het karakter dat weergegeven moet worden. Geldige waarden variëren van 0 tot 9 en A tot Z.
  • int pos: De kolompositie waar het karakter weergegeven moet worden. Geldige waarden variëren van 0 tot 11.

Arduino Code - Geeft twee karakters tegelijkertijd weer

De volgende Arduino code geeft tegelijkertijd twee karakters weer op de LED matrix.

/* * Deze Arduino UNO R4 code is ontwikkeld door newbiely.nl * Deze Arduino UNO R4 code wordt zonder enige beperking aan het publiek beschikbaar gesteld. * Voor volledige instructies en schema's, bezoek: * https://newbiely.nl/tutorials/arduino-uno-r4/arduino-uno-r4-built-in-led-matrix */ #include "Arduino_LED_Matrix.h" #include "fonts.h" ArduinoLEDMatrix matrix; uint8_t frame[8][12] = { { 0, 0, 0, 0, 0, 0, 0, 0, 0, 0, 0, 0 }, { 0, 0, 0, 0, 0, 0, 0, 0, 0, 0, 0, 0 }, { 0, 0, 0, 0, 0, 0, 0, 0, 0, 0, 0, 0 }, { 0, 0, 0, 0, 0, 0, 0, 0, 0, 0, 0, 0 }, { 0, 0, 0, 0, 0, 0, 0, 0, 0, 0, 0, 0 }, { 0, 0, 0, 0, 0, 0, 0, 0, 0, 0, 0, 0 }, { 0, 0, 0, 0, 0, 0, 0, 0, 0, 0, 0, 0 }, { 0, 0, 0, 0, 0, 0, 0, 0, 0, 0, 0, 0 } }; void setup() { // put your setup code here, to run once: Serial.begin(115200); delay(1500); matrix.begin(); } void loop() { clear_frame(); add_to_frame('A', 0); add_to_frame('5', 6); display_frame(); delay(1000); clear_frame(); add_to_frame('7', 0); add_to_frame('F', 6); display_frame(); delay(1000); } void clear_frame() { for (int row = 0; row < 8; row++) { for (int col = 0; col < 12; col++) { frame[row][col] = 0; } } } void display_frame() { matrix.renderBitmap(frame, 8, 12); } void add_to_frame(char c, int pos) { int index = -1; if (c >= '0' && c <= '9') index = c - '0'; else if (c >= 'A' && c <= 'Z') index = c - 'A' + 10; else { Serial.println("WARNING: unsupported character"); return; } for (int row = 0; row < 8; row++) { uint32_t temp = fonts[index][row] << (7 - pos); for (int col = 0; col < 12; col++) { frame[row][col] |= (temp >> (11 - col)) & 1; } } }

Gerelateerde Tutorials

※ ONZE BERICHTEN

  • U bent welkom om de link naar deze tutorial te delen. Gebruik onze inhoud echter niet op andere websites. We hebben veel moeite en tijd gestoken in het maken van de inhoud, respecteer alstublieft ons werk!