Arduino UNO R4 - Button - Debounce
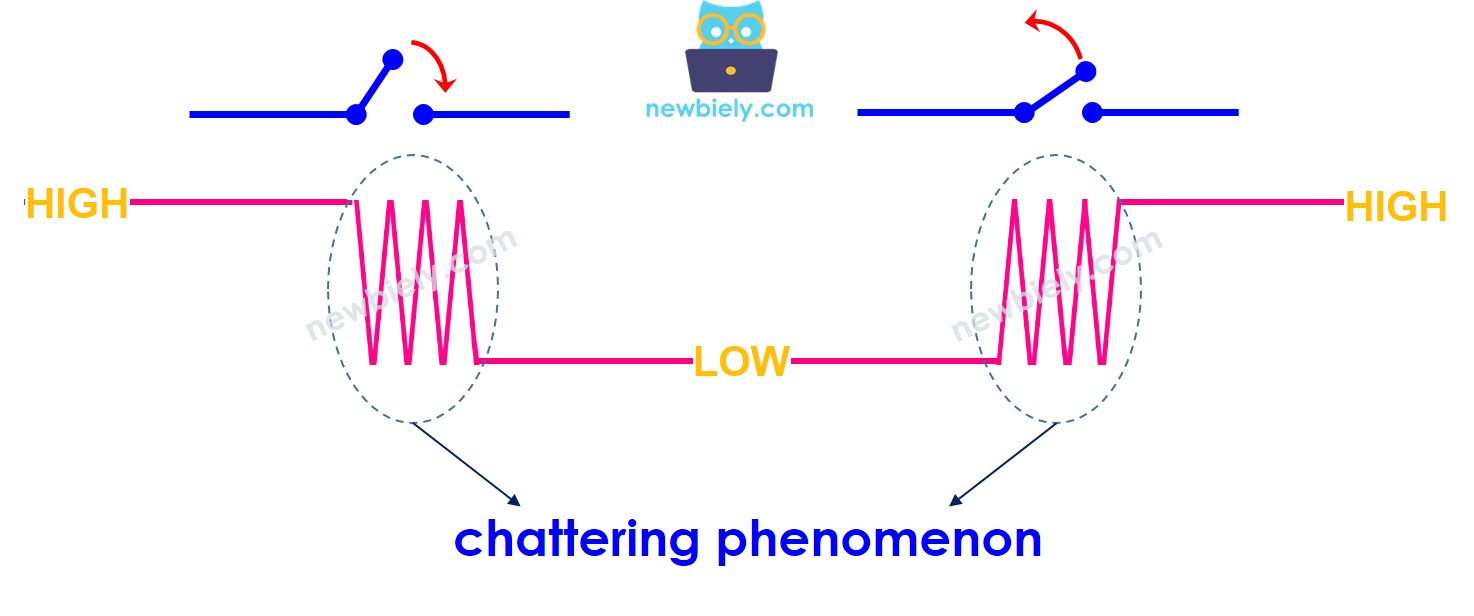
Bij het programmeren van de Arduino Uno R4 om een button press event te detecteren, kunt u merken dat een enkele druk meerdere keren wordt gedetecteerd. Dit gebeurt omdat, vanwege mechanische factoren, de button of schakelaar snel meerdere keren kan schakelen tussen LOW en HIGH. Dit wordt "chattering" genoemd. Chattering kan ertoe leiden dat één button press wordt gedetecteerd als meerdere presses, wat fouten kan veroorzaken in sommige toepassingen. Deze tutorial legt uit hoe u dit probleem kunt oplossen, een proces dat bekend staat als het debounce van de button.
Benodigde Hardware
Of u kunt de volgende kits kopen:
| 1 | × | DIYables STEM V4 IoT Starterskit (Arduino inbegrepen) | |
| 1 | × | DIYables Sensorkit (30 sensoren/displays) | |
| 1 | × | DIYables Sensorkit (18 sensoren/displays) |
Bedradingsdiagram
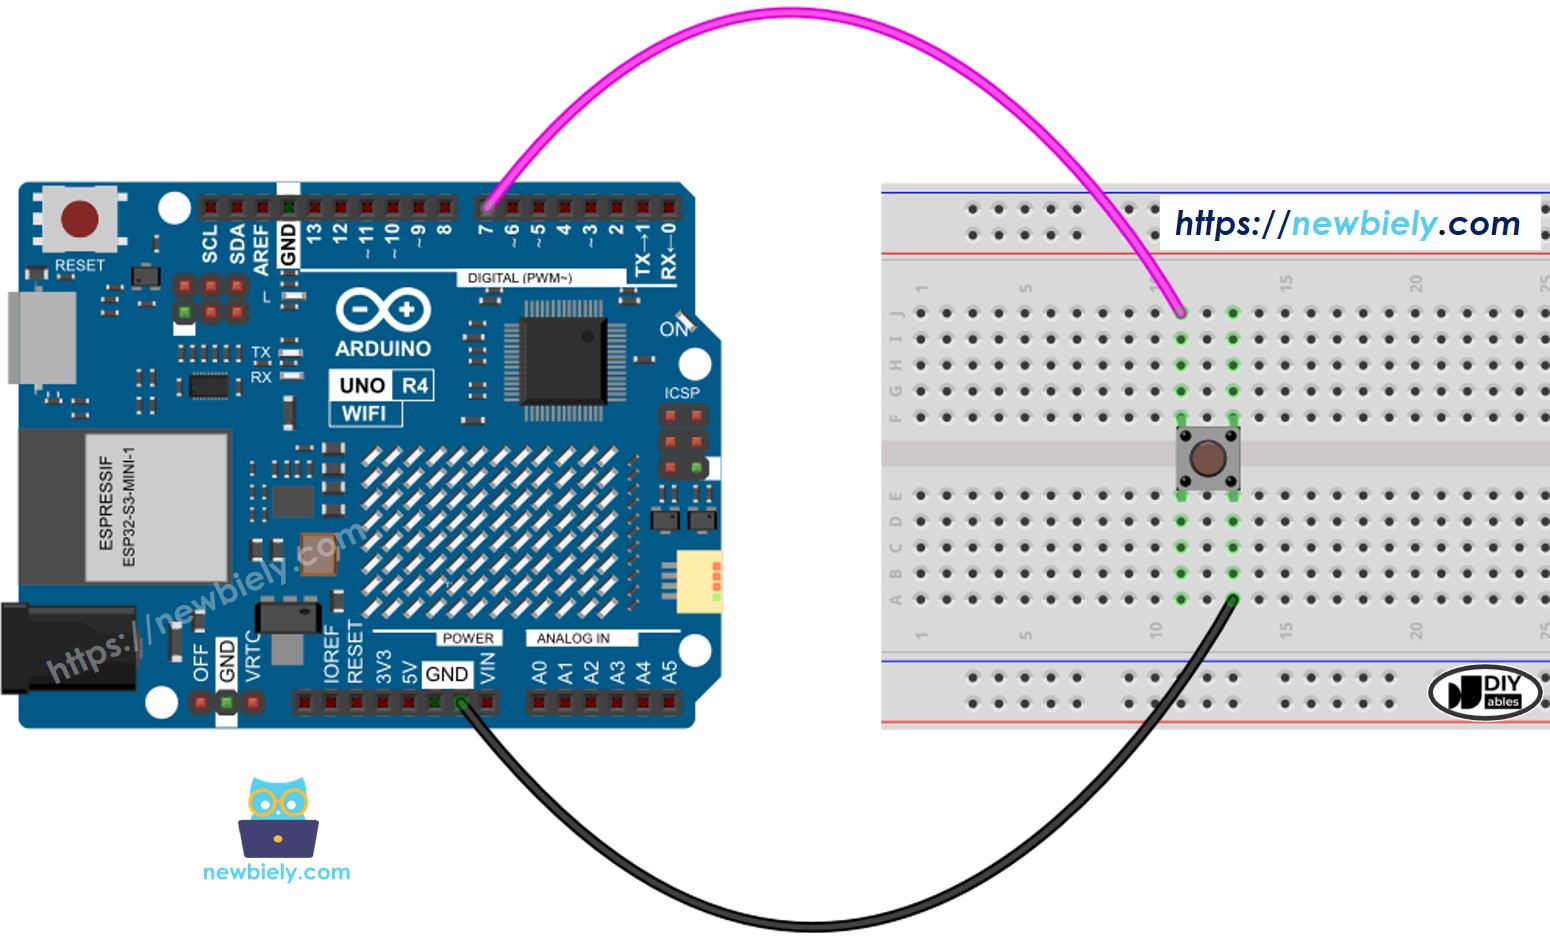
Deze afbeelding is gemaakt met Fritzing. Klik om de afbeelding te vergroten.
Laten we de Arduino UNO R4 code zonder en met debounce onderzoeken en vergelijken, en hun gedrag observeren.
Arduino Uno R4 - Button zonder Debounce
Voordat we leren over debouncing, laten we kijken naar de code zonder debounce en zien hoe deze zich gedraagt.
Snelle Stappen
Volg deze instructies stap voor stap:
- Als dit uw eerste keer is met de Arduino Uno R4 WiFi/Minima, raadpleeg dan de tutorial over het instellen van de omgeving voor Arduino Uno R4 WiFi/Minima in de Arduino IDE.
- Sluit de componenten aan volgens het meegeleverde diagram.
- Verbind het Arduino Uno R4 board met uw computer via een USB-kabel.
- Start de Arduino IDE op uw computer.
- Selecteer het juiste Arduino Uno R4 board (bijv. Arduino Uno R4 WiFi) en COM-poort.
- Kopieer de bovenstaande code en open deze in de Arduino IDE.
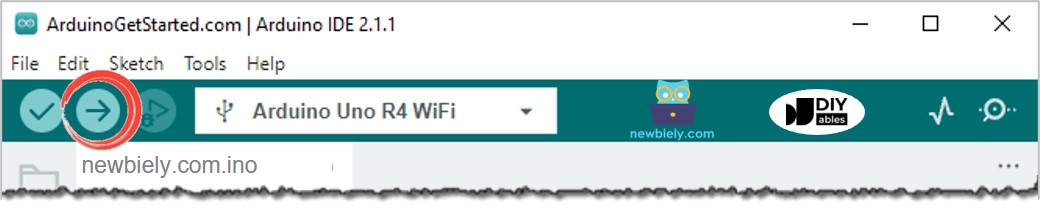
- Klik op de Upload knop in Arduino IDE om code naar Arduino UNO R4 te sturen.
- Open de Serial Monitor.
- Druk en houd de button enkele seconden ingedrukt, laat vervolgens los.
- Controleer de Serial Monitor voor het resultaat.
Zoals u kunt zien, hebt u de button slechts eenmaal ingedrukt en losgelaten. De Arduino herkent het echter als meerdere presses en releases.
※ Notiz:
De waarde van DEBOUNCE_TIME varieert per toepassing. Elke toepassing kan een unieke waarde gebruiken.
Wij Maakten Het Eenvoudig: Arduino UNO R4 Button Debounce Code met een Library
We maakten een eenvoudigere manier voor beginners die veel buttons gebruiken door een library te maken genaamd ezButton. U kunt hier meer over de ezButton library lezen.
Laten we enkele voorbeeldcodes bekijken.
Arduino UNO R4 Button Debounce Code voor Eén Button
Arduino UNO R4 Button Debounce Code voor Meerdere Buttons
Laten we debounce toepassen voor 3 buttons. Hier is het bedradingsdiagram tussen Arduino UNO R4 en drie buttons:
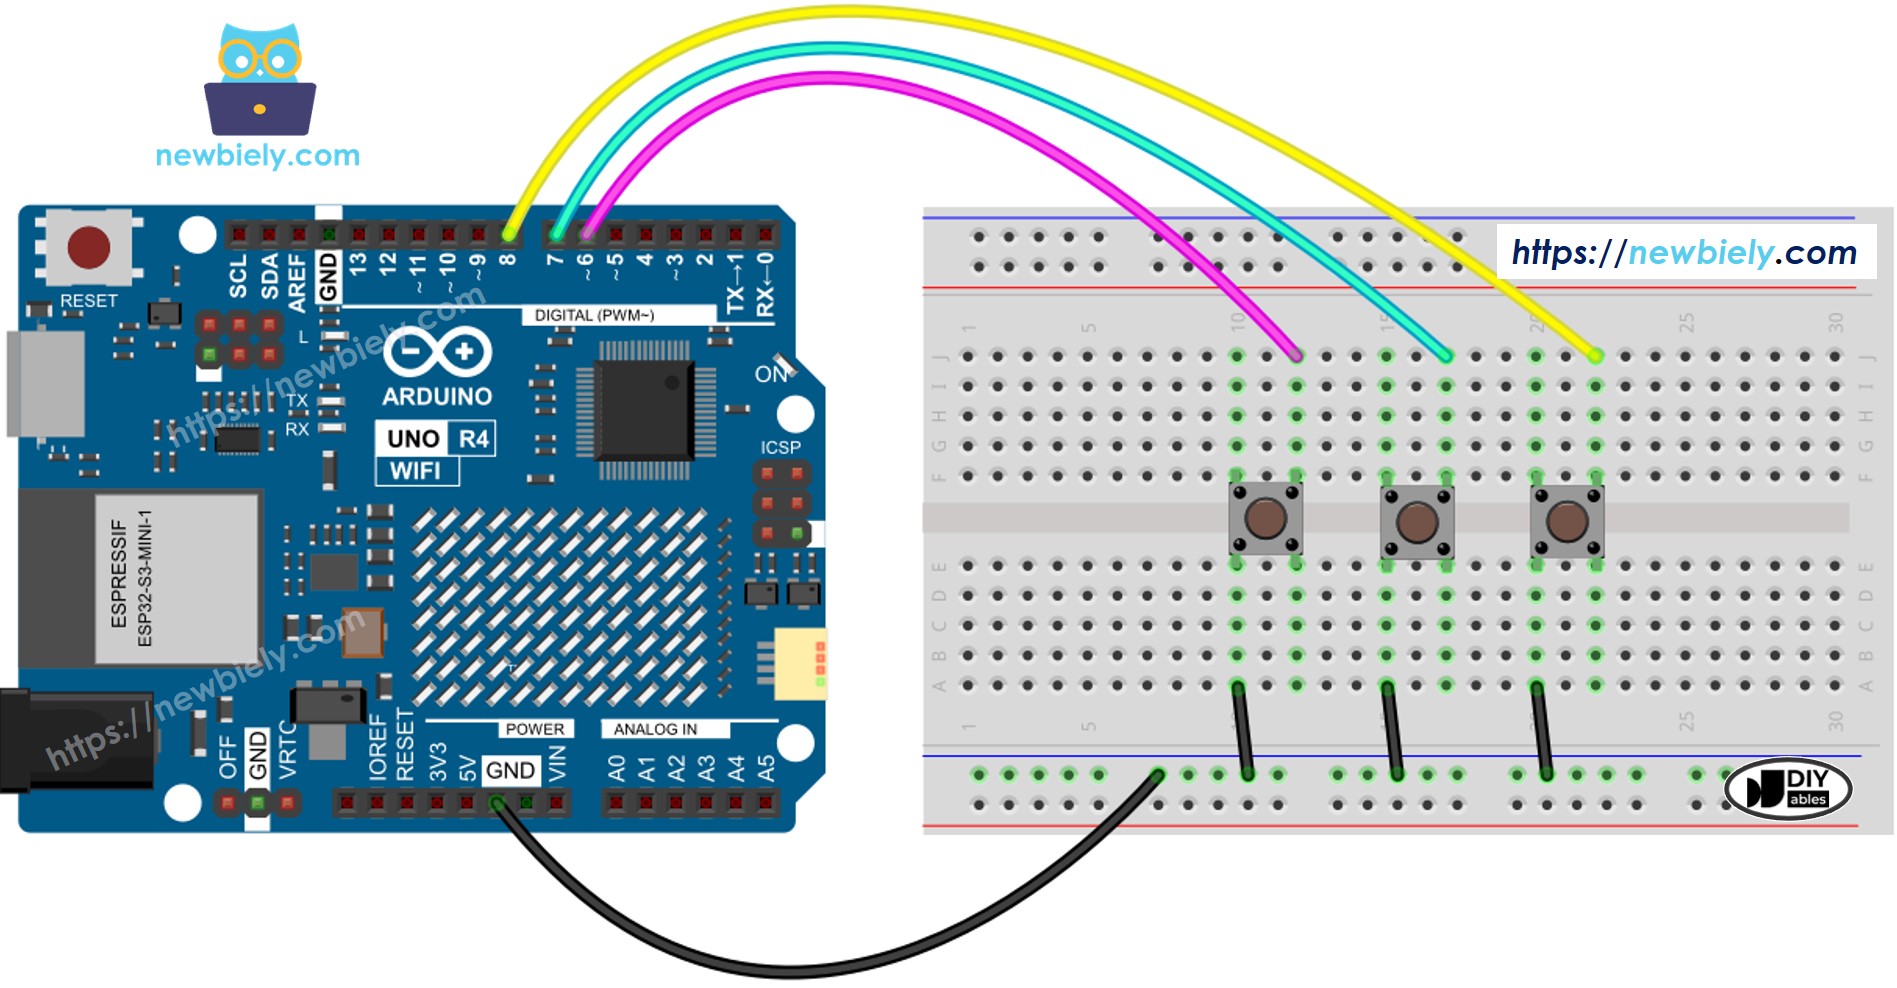
Deze afbeelding is gemaakt met Fritzing. Klik om de afbeelding te vergroten.
Zie De beste manier om Arduino Uno R4 en andere componenten van stroom te voorzien.
Video Tutorial
We overwegen het maken van videotutorials. Als u videotutorials belangrijk vindt, abonneer u dan op ons YouTube-kanaal om ons te motiveren de video's te maken.