Arduino UNO R4 - DHT22 - OLED
In deze handleiding leren we hoe u de temperatuur en vochtigheid kunt controleren en weergeven met behulp van de DHT22 module op een OLED-scherm.
Benodigde Hardware
Of u kunt de volgende kits kopen:
| 1 | × | DIYables STEM V4 IoT Starterskit (Arduino inbegrepen) | |
| 1 | × | DIYables Sensorkit (30 sensoren/displays) | |
| 1 | × | DIYables Sensorkit (18 sensoren/displays) |
Over OLED display, DHT22 Temperatuur Vochtigheid Sensor
Leer over het OLED display en DHT22 temperatuur vochtigheidssensor, inclusief hun pinouts, hoe ze functioneren en programmeermethoden, in de onderstaande tutorials.
- Arduino UNO R4 - OLED tutorial
- Arduino UNO R4 - DHT22 tutorial
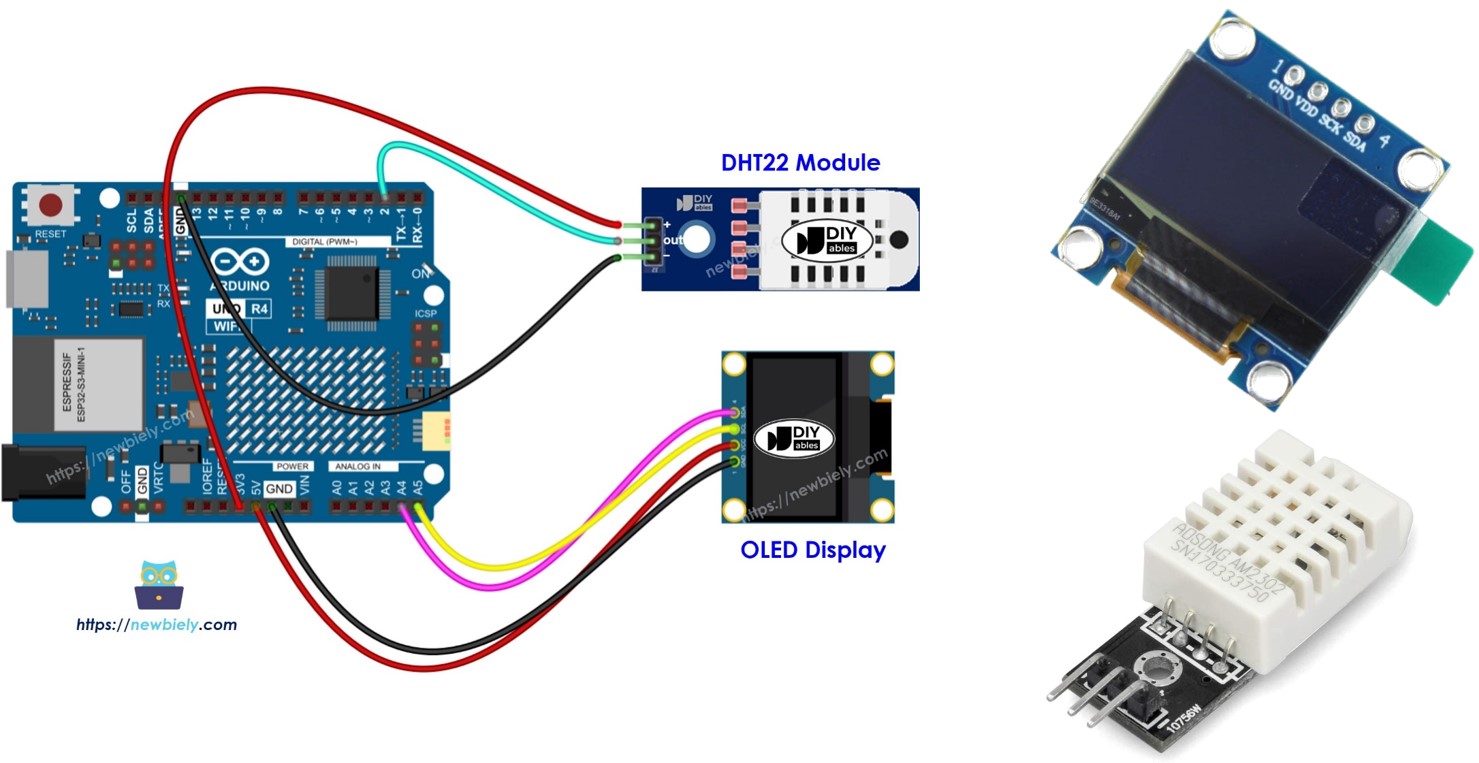
Bedradingsschema
Deze afbeelding is gemaakt met Fritzing. Klik om de afbeelding te vergroten.
Zie De beste manier om Arduino Uno R4 en andere componenten van stroom te voorzien.
Arduino UNO R4 Code - DHT22 Sensor - OLED
Snelle Stappen
Volg deze instructies stap voor stap:
- Als dit uw eerste keer is met de Arduino Uno R4 WiFi/Minima, raadpleeg dan de tutorial over het instellen van de omgeving voor Arduino Uno R4 WiFi/Minima in de Arduino IDE.
- Verbind het Arduino Uno R4 board met de DHT22 module en OLED display volgens het meegeleverde schema.
- Verbind het Arduino Uno R4 board met uw computer via een USB-kabel.
- Start de Arduino IDE op uw computer.
- Selecteer het juiste Arduino Uno R4 board (bijv. Arduino Uno R4 WiFi) en COM-poort.
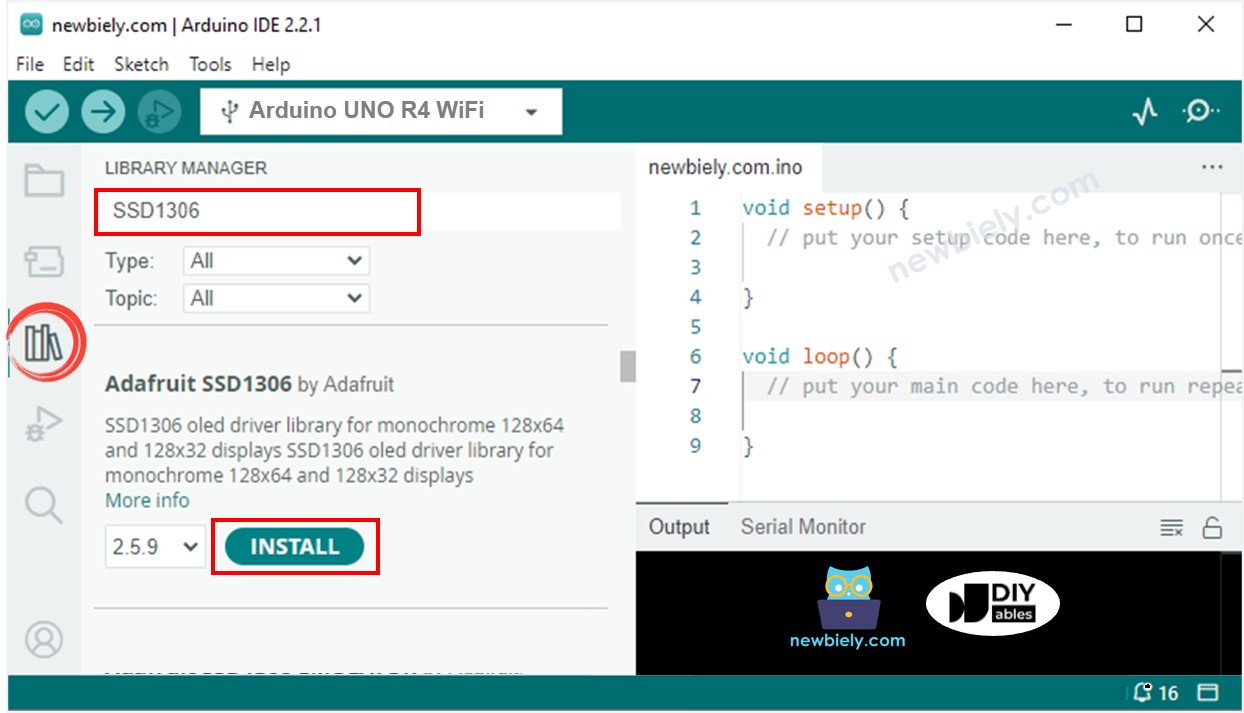
- Ga naar het Libraries pictogram aan de linkerkant van de Arduino IDE.
- Zoek naar "SSD1306" en zoek de SSD1306 bibliotheek van Adafruit.
- Druk op de Install knop om de bibliotheek te installeren.
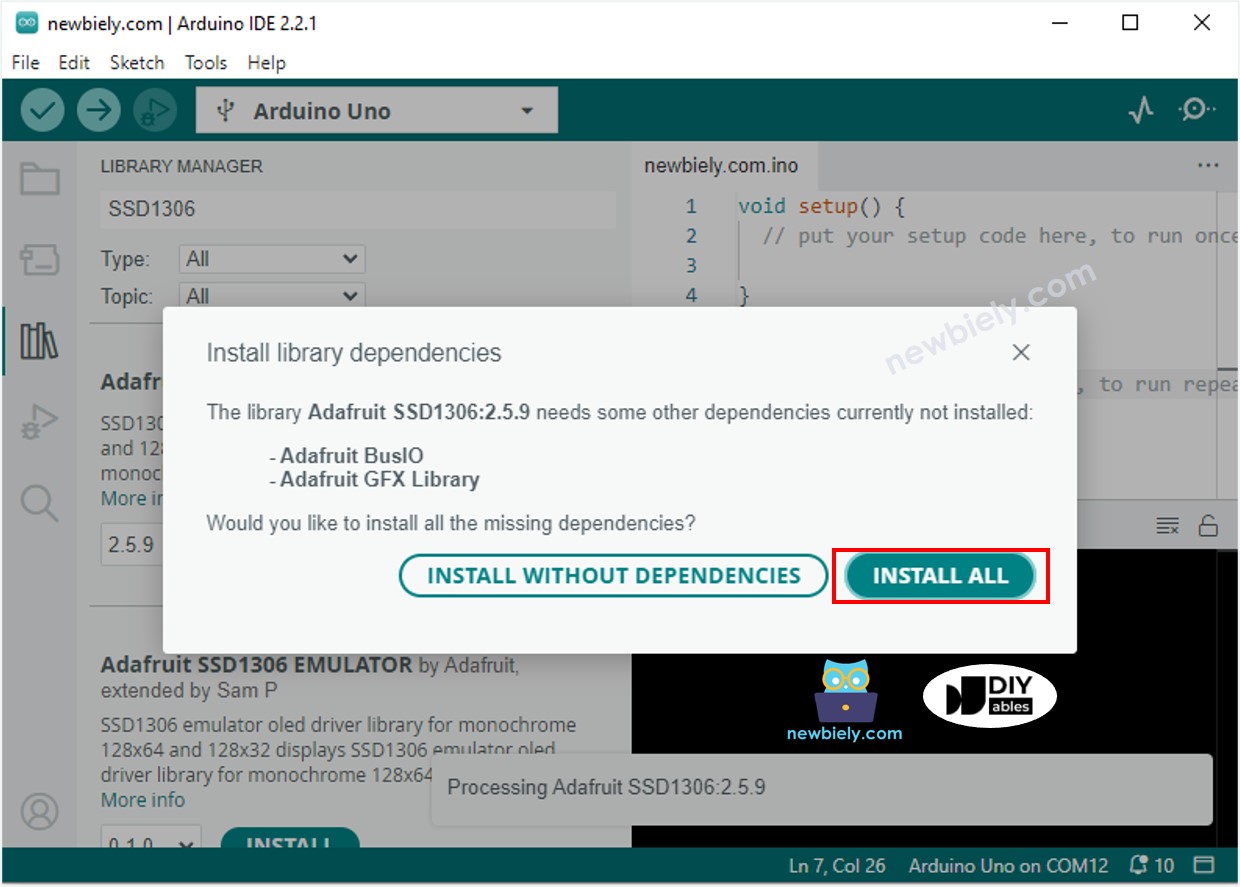
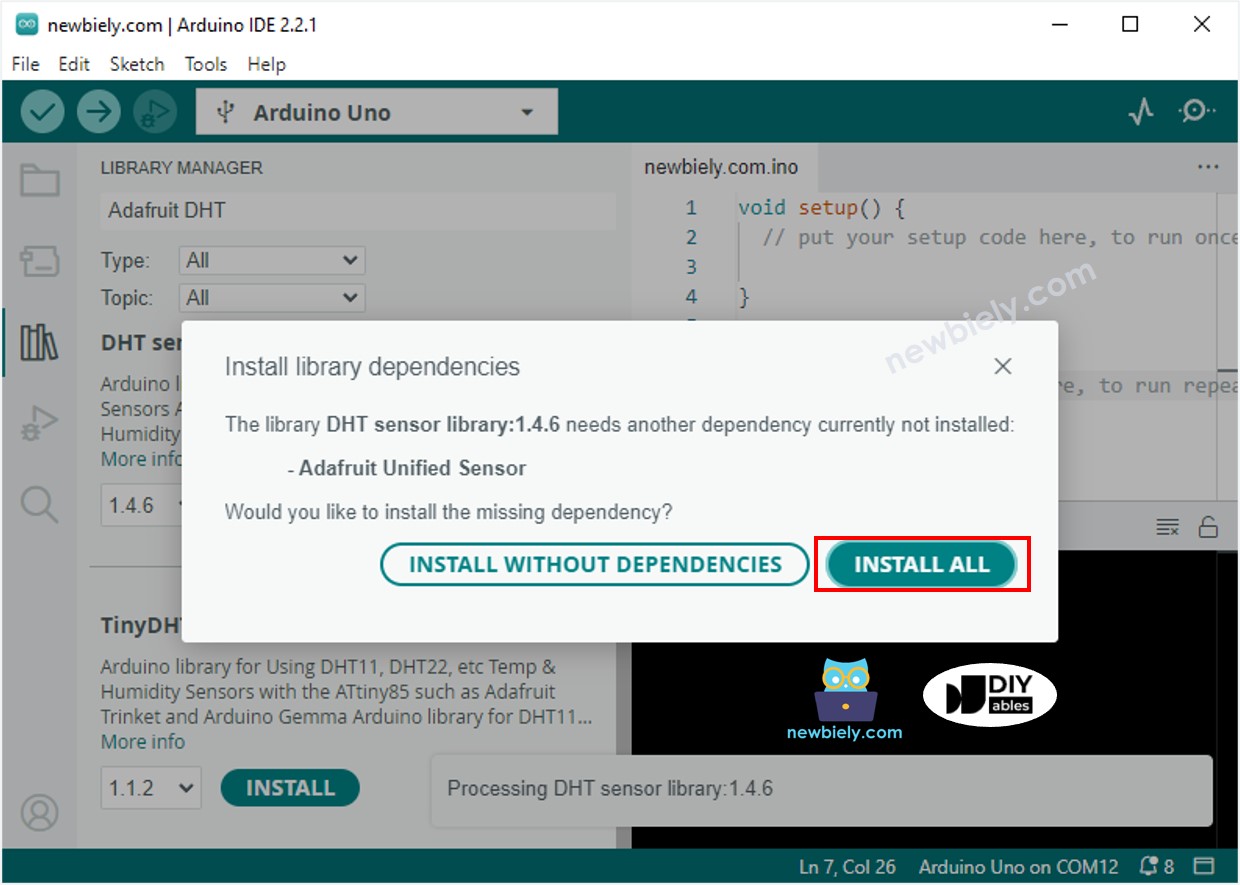
- U moet aanvullende bibliotheekafhankelijkheden installeren.
- Klik op de Install All knop om alle vereiste bibliotheken te installeren.
- Zoek naar "DHT" en zoek naar de DHT sensor bibliotheek van Adafruit.
- Klik op de Install knop om de bibliotheek te installeren.

- U moet aanvullende bibliotheekafhankelijkheden installeren.
- Klik op de Install All knop om alle bibliotheekafhankelijkheden te installeren.
- Kopieer de code en open deze in de Arduino IDE.
- Druk op de Upload knop in de Arduino IDE om de code over te brengen naar uw Arduino UNO R4.
- Plaats de sensor in warm en koud water, of houd deze in uw hand.
- Controleer de resultaten op het OLED display en de Serial Monitor.
※ Notiz:
De code centreert de tekst automatisch horizontaal en verticaal op het OLED display.
Video Tutorial
We overwegen het maken van videotutorials. Als u videotutorials belangrijk vindt, abonneer u dan op ons YouTube-kanaal om ons te motiveren de video's te maken.