ESP32 - Knop Tellen - OLED
In deze handleiding gaan we de ESP32 gebruiken om de volgende doelen te bereiken:
- Het tellen van het aantal keren dat een knop wordt ingedrukt.
- Het weergeven van het aantal drukken op een OLED-display.
- Het automatisch verticaal en horizontaal centreren van het getal op het OLED-display.
Daarnaast behandelt deze tutorial het debouncen (ontkoppelen) van de knop zonder gebruik te maken van de delay() functie. Voor een uitleg over waarom debouncen noodzakelijk is, verwijzen we u naar Waarom hebben we debouncing nodig?.
Deze uitgebreide gids helpt u om het tellen van knopdrukken, OLED-display functionaliteit en debouncen technieken naadloos te integreren in uw ESP32-project.
Hardware Benodigd
Of u kunt de volgende kits kopen:
| 1 | × | DIYables Sensorkit (30 sensoren/displays) | |
| 1 | × | DIYables Sensorkit (18 sensoren/displays) |
Over OLED en Knop
Bent u niet bekend met OLED en knop, inclusief hun pinouts, werking en programmering? Verken onderstaande uitgebreide tutorials over deze onderwerpen:
Bedradingsschema
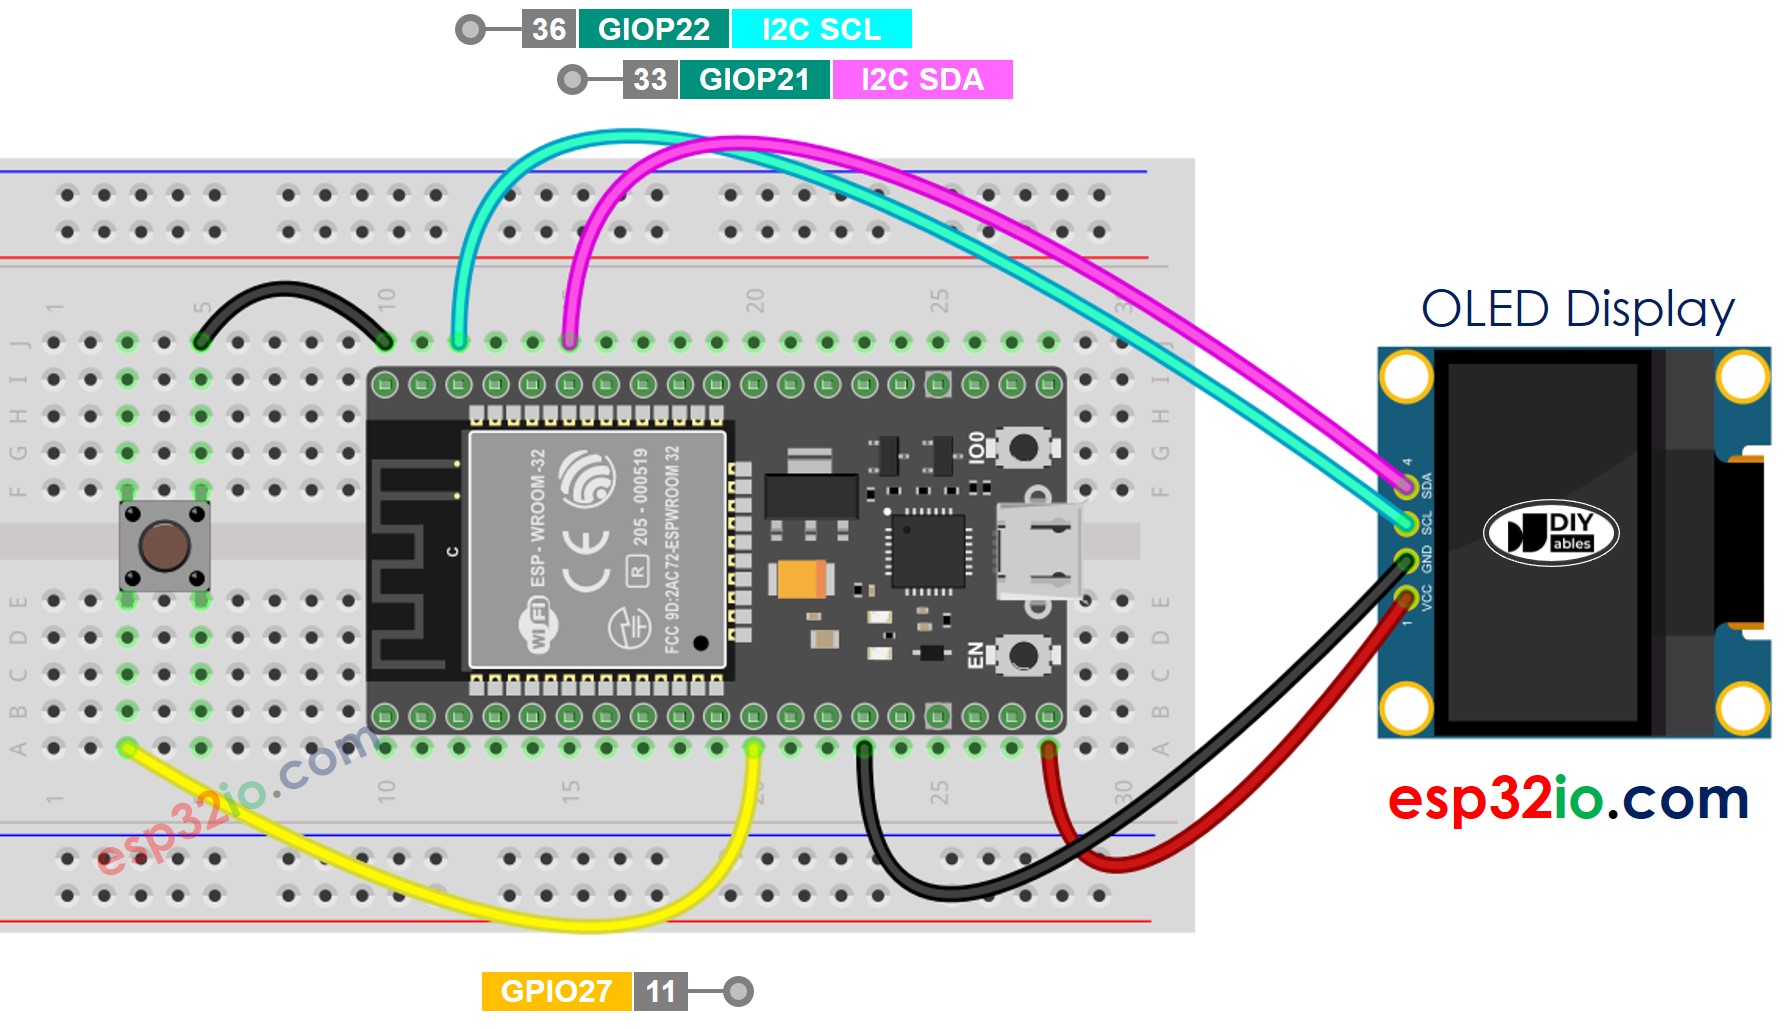
Deze afbeelding is gemaakt met Fritzing. Klik om de afbeelding te vergroten.
ESP32 Code - knopdrukken aantal weergeven op OLED
Snelle Stappen
- Als u ESP32 voor het eerst gebruikt, bekijk dan hoe u de omgeving instelt voor ESP32 in Arduino IDE.
- Voer de bedrading uit zoals te zien is op bovenstaande afbeelding.
- Verbind de ESP32 board met uw pc via een micro USB-kabel.
- Open Arduino IDE op uw pc.
- Selecteer het juiste ESP32 board (bijv. ESP32 Dev Module) en de juiste COM-poort.
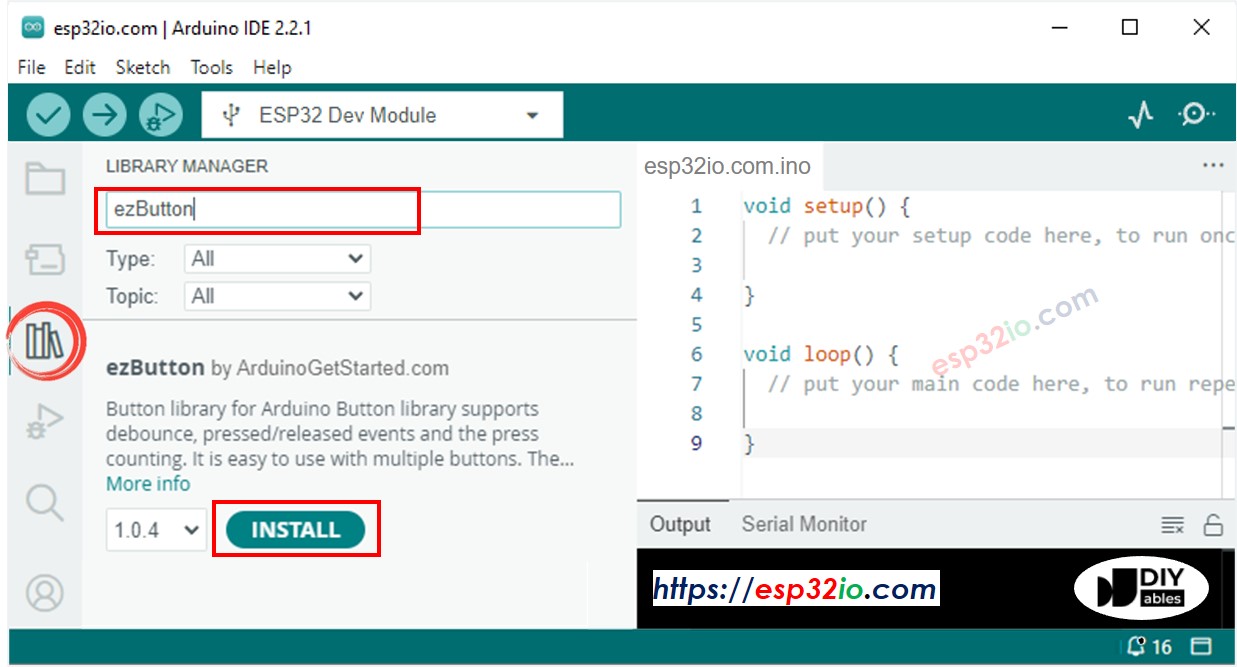
- Klik op het Libraries icoon in de linkerzijbalk van Arduino IDE.
- Zoek op “ezButton” en selecteer de button library van ArduinoGetStarted.
- Klik op de Installeren knop om de ezButton library te installeren.
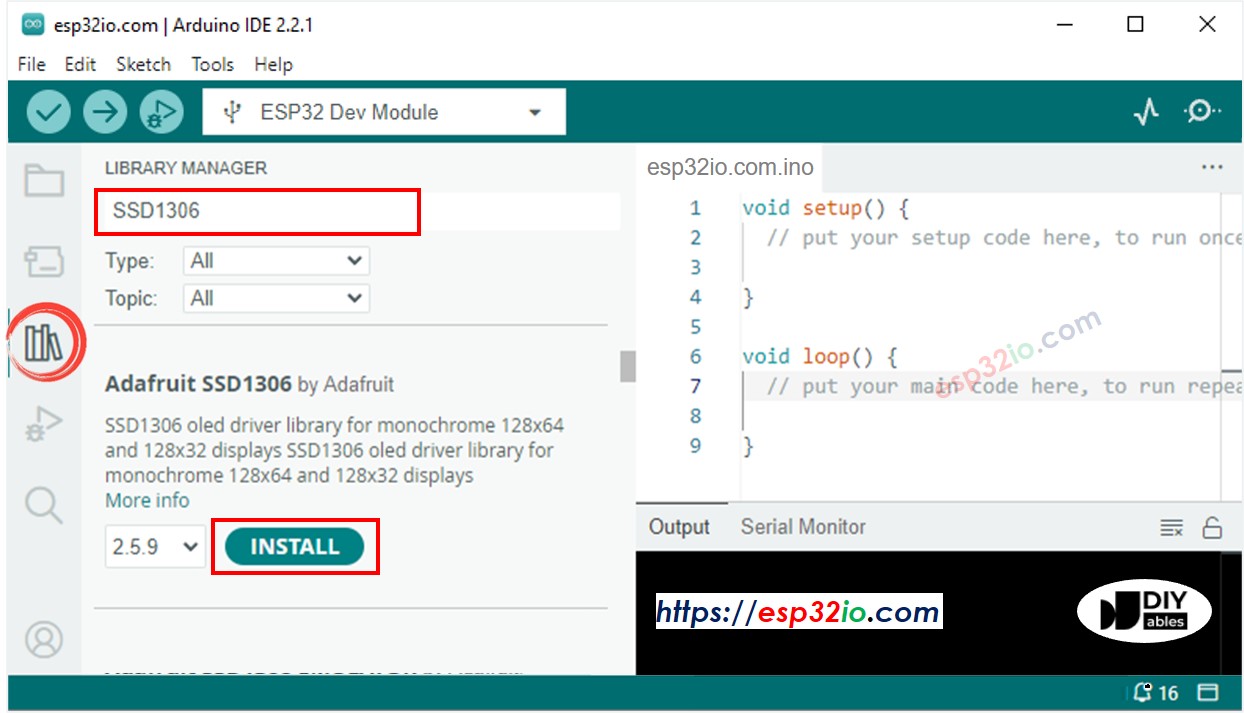
- Zoek op “SSD1306” en vind de SSD1306 library van Adafruit.
- Klik op de Installeren knop om de bibliotheek te installeren.
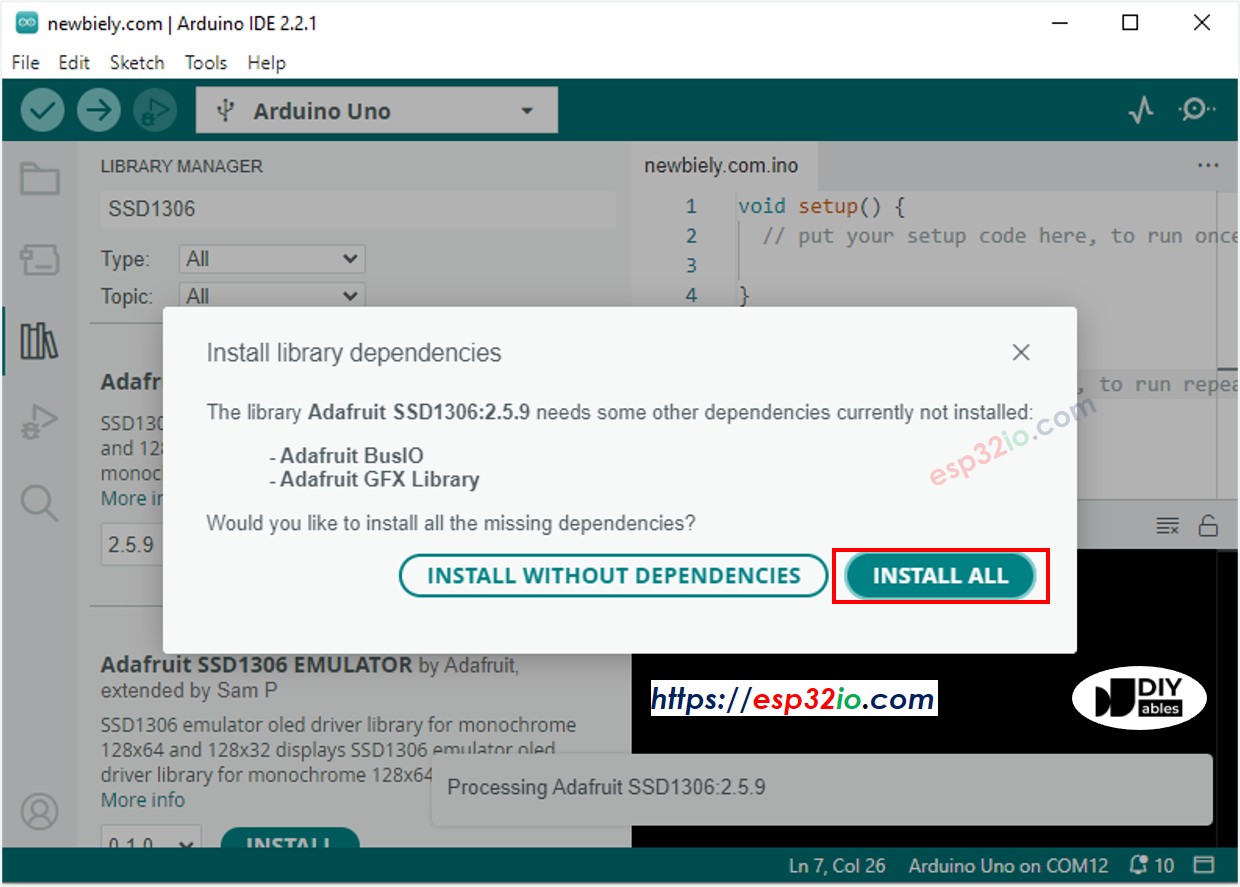
- Er zal gevraagd worden om enkele andere bibliotheekafhankelijkeheden te installeren.
- Klik op de Alles installeren knop om alle bibliotheekafhankelijkeheden te installeren.
- Kopieer bovenstaande code en open deze met Arduino IDE.
- Klik op de Uploaden knop in Arduino IDE om de code naar de ESP32 te uploaden.
- Druk een aantal keer op de knop.
- Zie het tellergetal veranderen op het OLED-display.
De bovenstaande code toont alleen het aantal knopdrukken linksboven. Laten we de code aanpassen zodat het getal gecentreerd wordt weergegeven!
ESP32 Code - Verticaal en Horizontaal Centreren op OLED
※ Notiz:
De bovenstaande code centreert automatisch de tekst horizontaal en verticaal op het OLED-display. Zie Hoe centreer ik verticaal/horizontaal op OLED voor meer details.
Video Tutorial
We overwegen het maken van videotutorials. Als u videotutorials belangrijk vindt, abonneer u dan op ons YouTube-kanaal om ons te motiveren de video's te maken.
#