ESP32 - DHT11 - OLED
Deze tutorial laat u zien hoe u de temperatuur en luchtvochtigheid leest met het DHT11 module en deze weergeeft op een OLED-scherm.
Hardware Benodigd
Of u kunt de volgende kits kopen:
| 1 | × | DIYables ESP32 Starterskit (ESP32 inbegrepen) | |
| 1 | × | DIYables Sensorkit (30 sensoren/displays) | |
| 1 | × | DIYables Sensorkit (18 sensoren/displays) |
Over OLED scherm en DHT11 Temperatuur en Luchtvochtigheid Sensor
Als u niet bekend bent met OLED schermen en de DHT11 temperatuur en luchtvochtigheid sensor (pinout, werking, programmeren ...), leer er meer over in de volgende tutorials:
- ESP32 - OLED tutorial
- ESP32 - DHT11 tutorial
Bedradingsschema
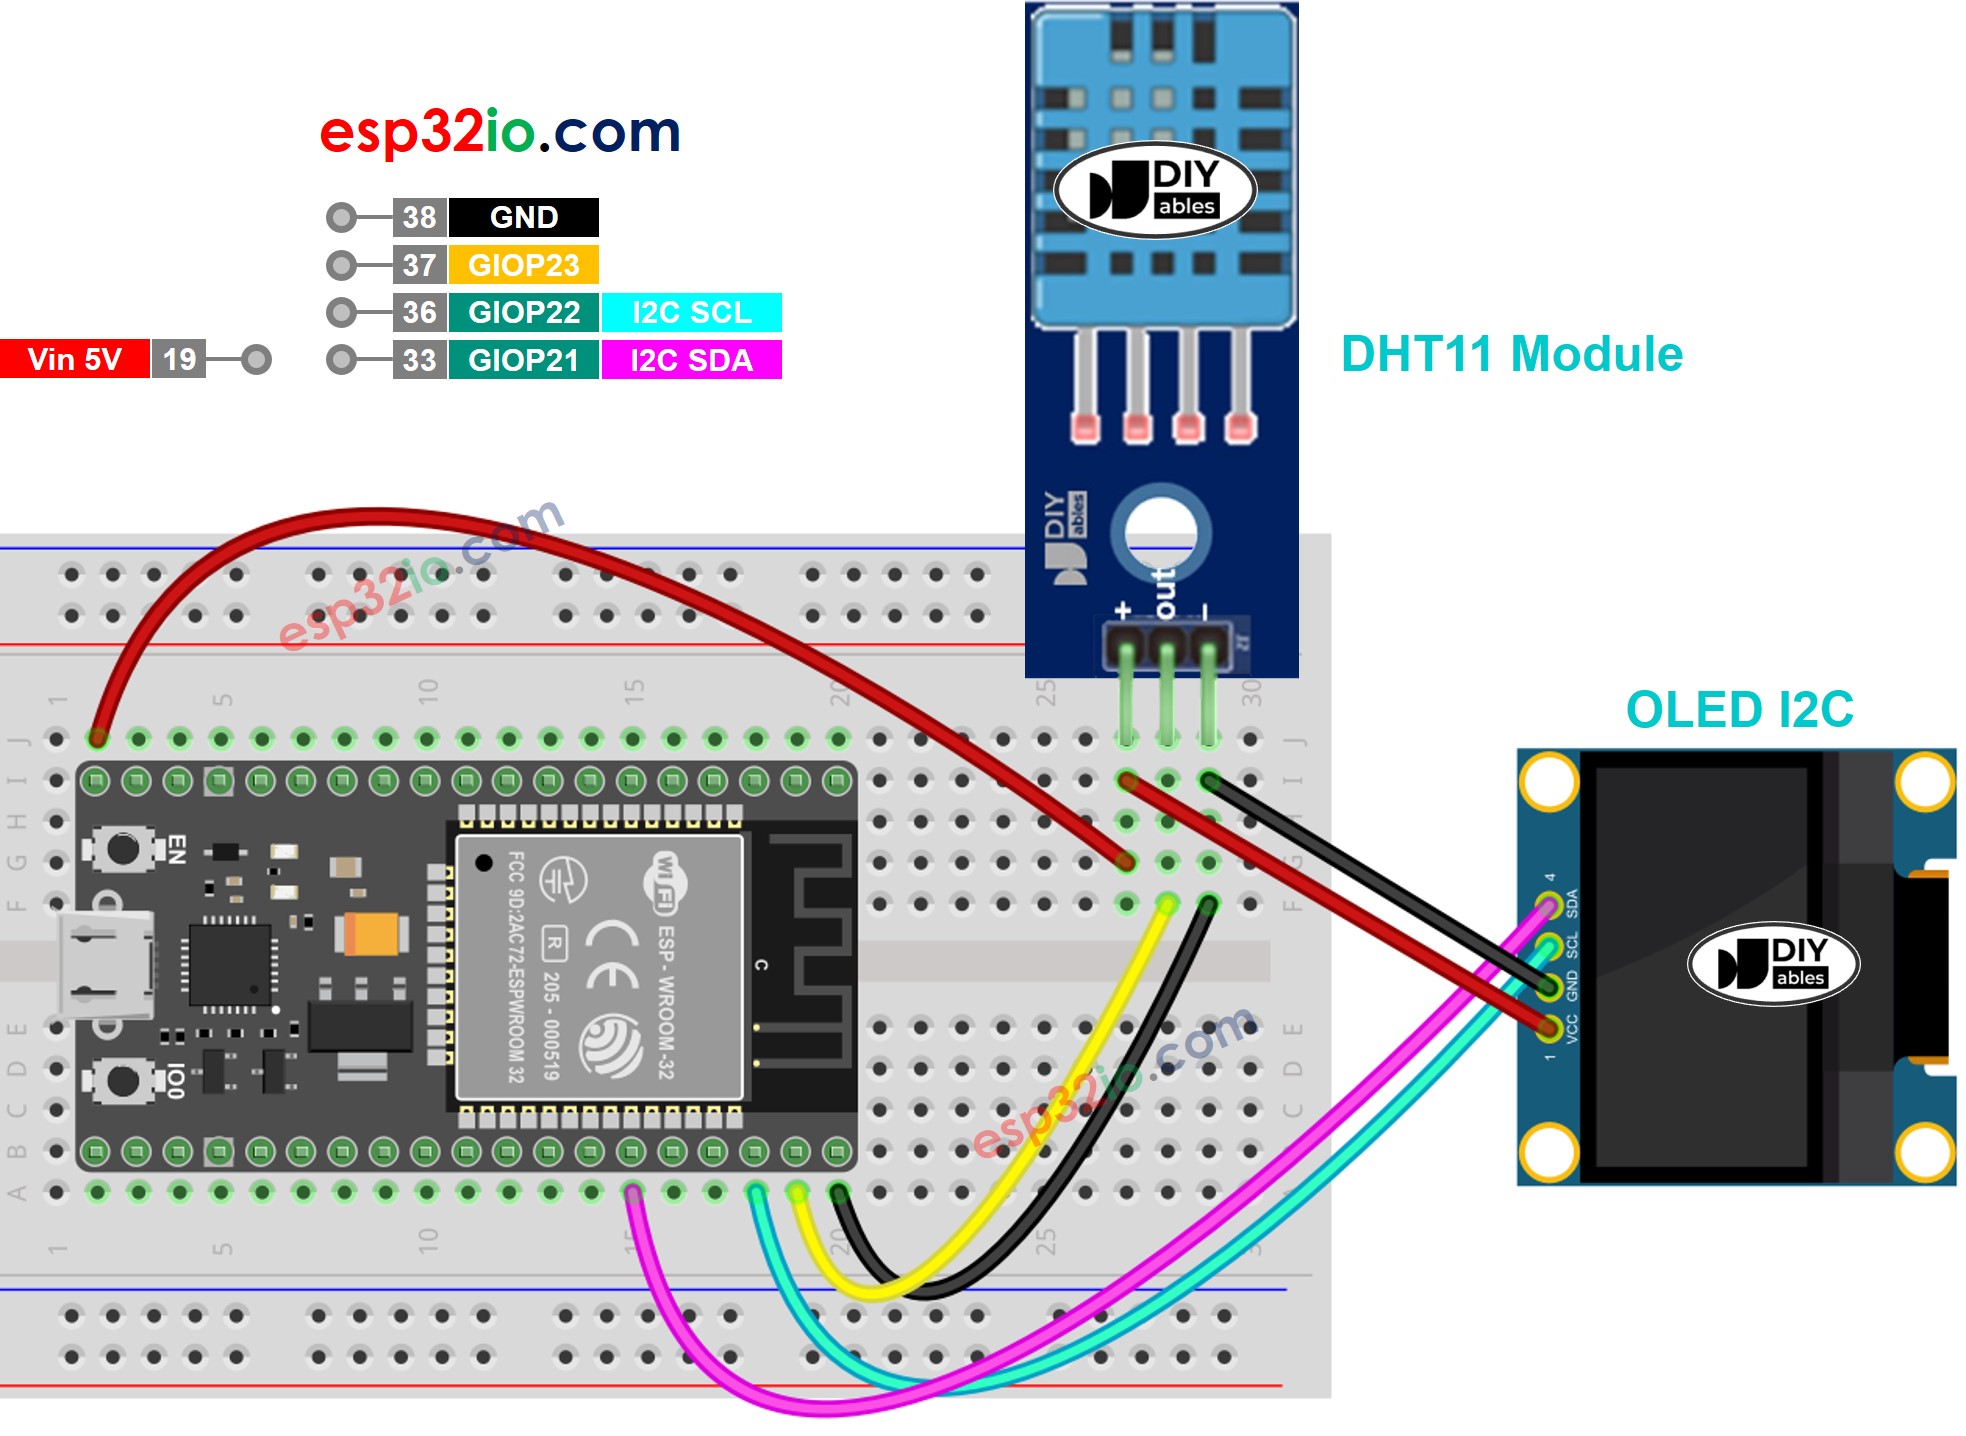
Deze afbeelding is gemaakt met Fritzing. Klik om de afbeelding te vergroten.
Als u niet weet hoe u ESP32 en andere componenten van stroom moet voorzien, vindt u instructies in de volgende tutorial: Hoe ESP32 van stroom te voorzien.
ESP32 Code - DHT11 Sensor - OLED
Snelle Stappen
- Als u voor het eerst ESP32 gebruikt, bekijk dan hoe u de omgeving voor ESP32 instelt in Arduino IDE.
- Maak de bedrading volgens de afbeelding hierboven.
- Verbind de ESP32 board met uw pc via een micro USB-kabel.
- Open Arduino IDE op uw pc.
- Selecteer het juiste ESP32 board (bijv. ESP32 Dev Module) en COM-poort.
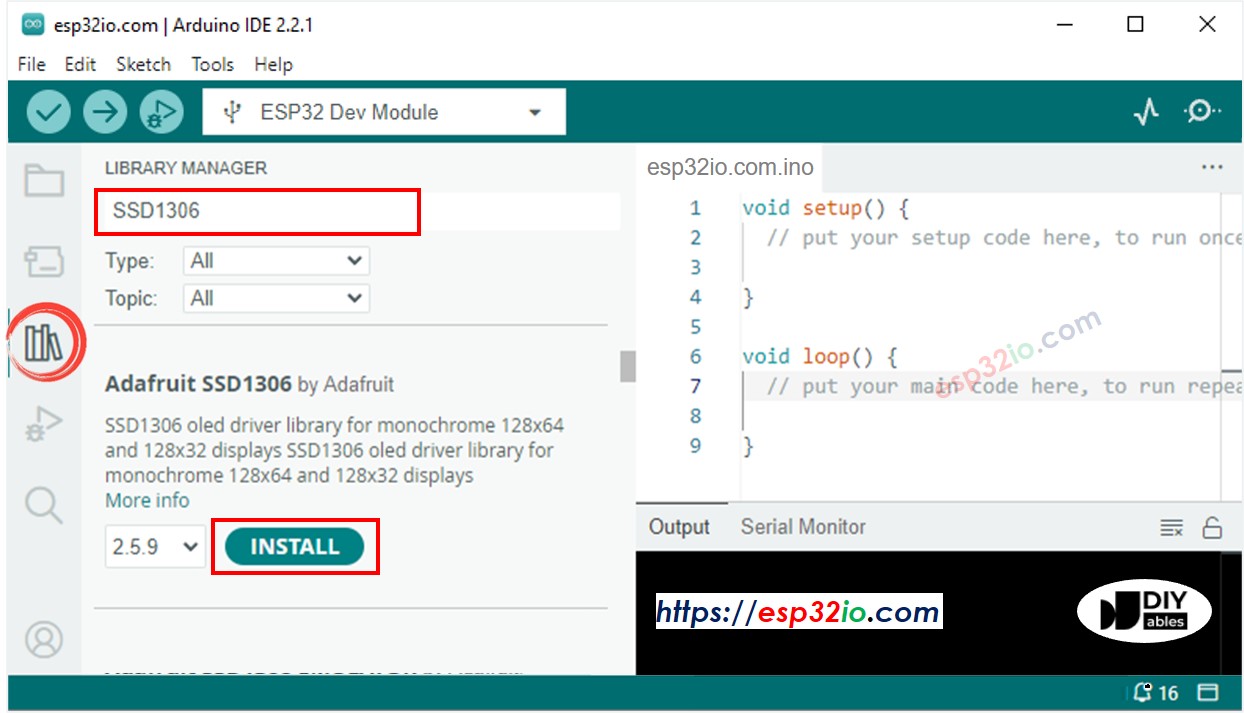
- Klik op het Libraries icoon in de linker zijbalk van Arduino IDE.
- Zoek op “SSD1306”, en vind de SSD1306 bibliotheek van Adafruit.
- Klik op de knop Install om de bibliotheek te installeren.
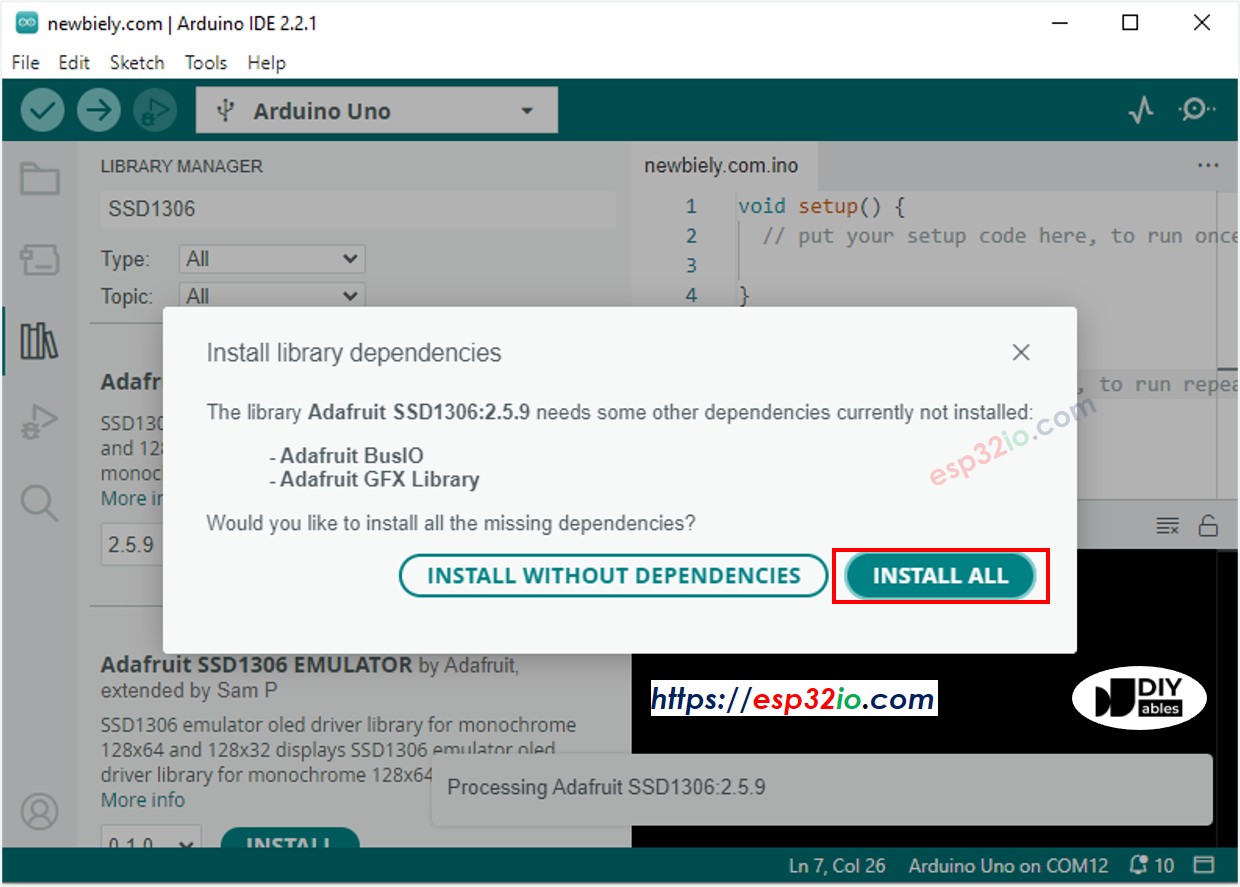
- Er wordt gevraagd om enkele aanvullende bibliotheekafhankelijkheden te installeren.
- Klik op Install All om alle afhankelijkheden te installeren.
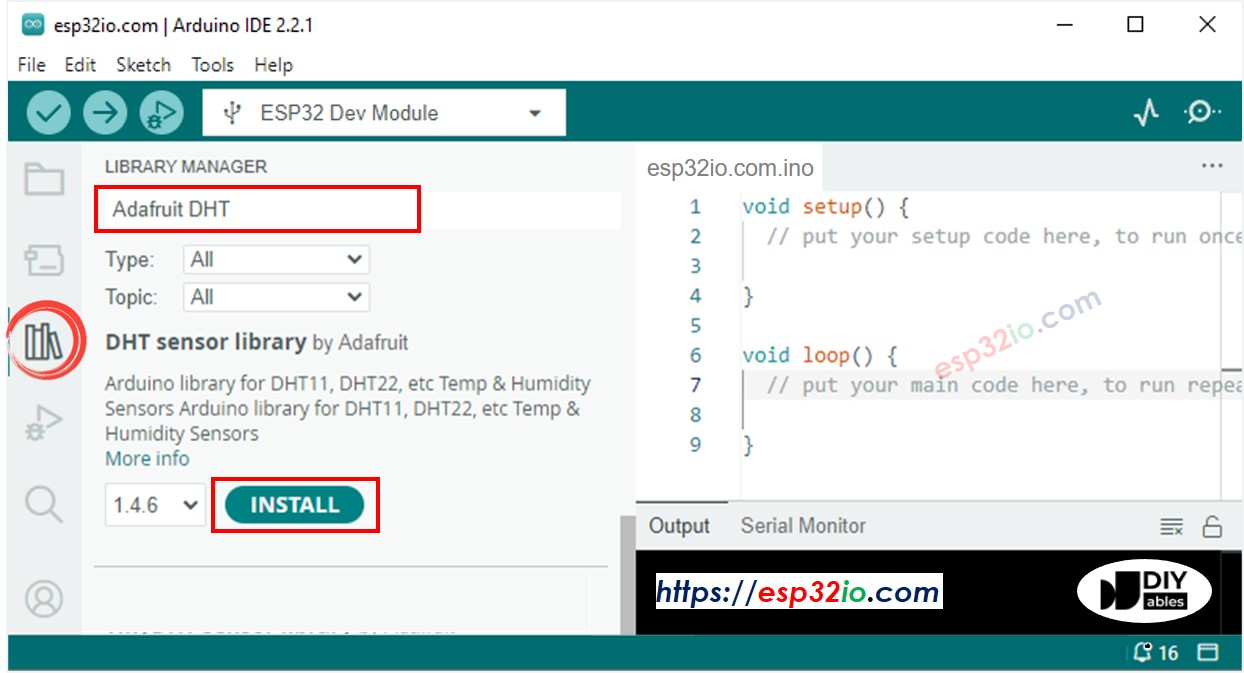
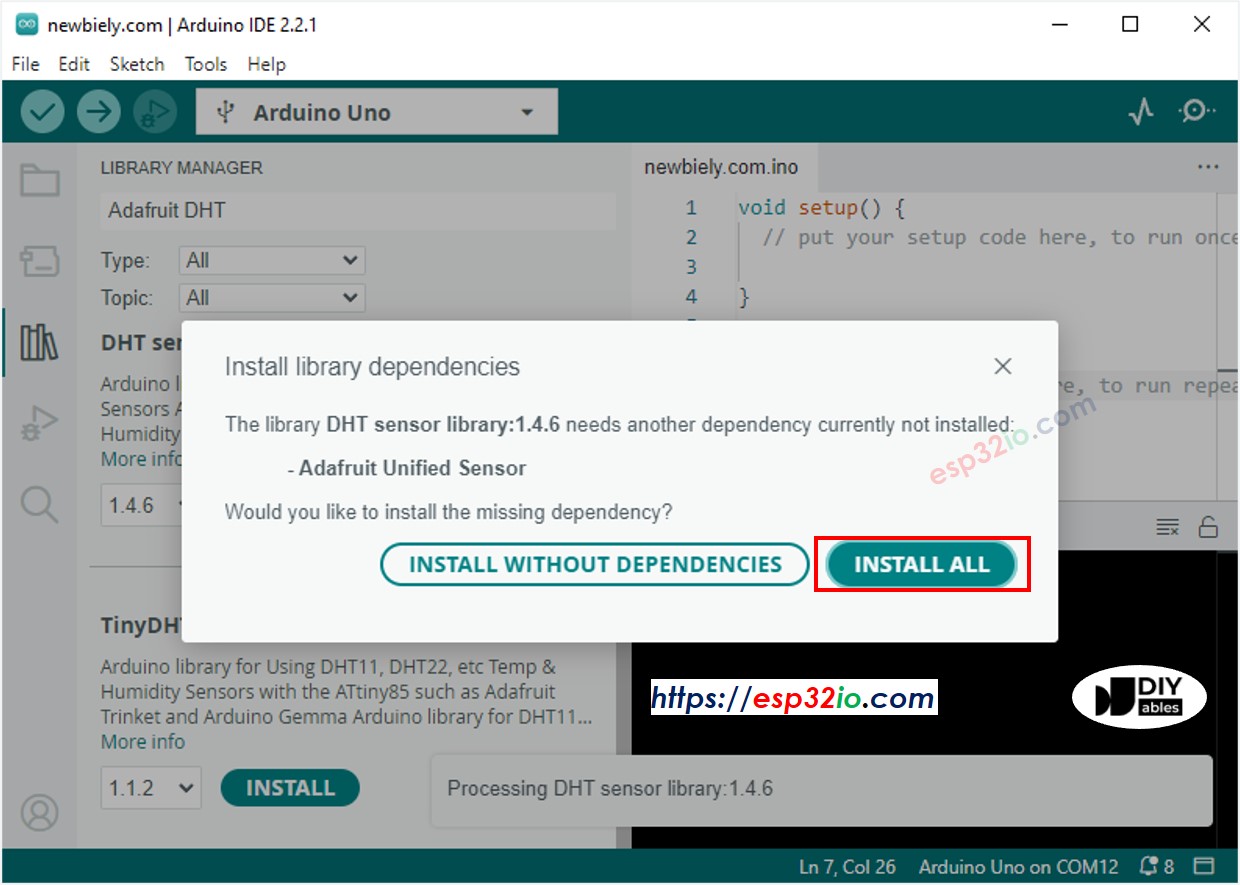
- Zoek op “DHT”, en vind de DHT sensor bibliotheek van Adafruit.
- Klik op Install om de bibliotheek te installeren.
- Er wordt gevraagd om enkele aanvullende bibliotheekafhankelijkheden te installeren.
- Klik op Install All om alle afhankelijkheden te installeren.
- Kopieer de bovenstaande code en open deze in Arduino IDE.
- Klik op de knop Upload in Arduino IDE om de code naar ESP32 te uploaden.
- Plaats de sensor in warm en koud water, of houd de sensor in uw hand.
- Bekijk het resultaat op het OLED-scherm en in de Seriële Monitor.
※ Notiz:
De bovenstaande code centreert automatisch horizontaal en verticaal de tekst op het OLED-scherm.
Video Tutorial
We overwegen het maken van videotutorials. Als u videotutorials belangrijk vindt, abonneer u dan op ons YouTube-kanaal om ons te motiveren de video's te maken.