ESP32 - LED - Knipperen zonder delay
Een van de eerste programma's die beginners uitvoeren is het laten knipperen van een LED. De eenvoudigste manier om een LED te laten knipperen is met behulp van de delay() functie. Deze functie blokkeert de ESP32 echter bij het uitvoeren van andere taken. Dit is prima als u slechts één enkele LED wilt laten knipperen. Maar als u meerdere LED's wilt knipperen of parallel andere taken wilt uitvoeren, kunt u de delay() functie niet gebruiken. We hebben een andere oplossing nodig. In deze handleiding leert u hoe u meerdere taken kunt uitvoeren zonder de delay-functie te gebruiken. Meer specifiek leert u hoe u een LED laat knipperen en tegelijkertijd de status van een knop controleert.
We doorlopen hieronder drie voorbeelden en vergelijken de verschillen:
- ESP32 laat een LED knipperen met de delay() functie
- ESP32 laat een LED knipperen met de millis() functie
- ESP32 laat een LED knipperen met de ezLED bibliotheek
Deze methode kan worden toegepast om de ESP32 meerdere taken tegelijk te laten uitvoeren. Het knipperen van een LED is slechts een voorbeeld.
Benodigdheden Hardware
Of u kunt de volgende kits kopen:
| 1 | × | DIYables ESP32 Starterskit (ESP32 inbegrepen) | |
| 1 | × | DIYables Sensorkit (30 sensoren/displays) | |
| 1 | × | DIYables Sensorkit (18 sensoren/displays) |
Aankoopadvies: Om het bedradingsproces te vereenvoudigen, raden we aan de LED Module te gebruiken, die wordt geleverd met een ingebouwde weerstand.
Over LED en Knop
We hebben specifieke handleidingen over LED en knop. Elke handleiding bevat uitgebreide informatie en stapsgewijze instructies over hardware pinout, werking, bekabeling naar ESP32, ESP32-code... Leer er meer over via onderstaande links:
Bedradingsschema
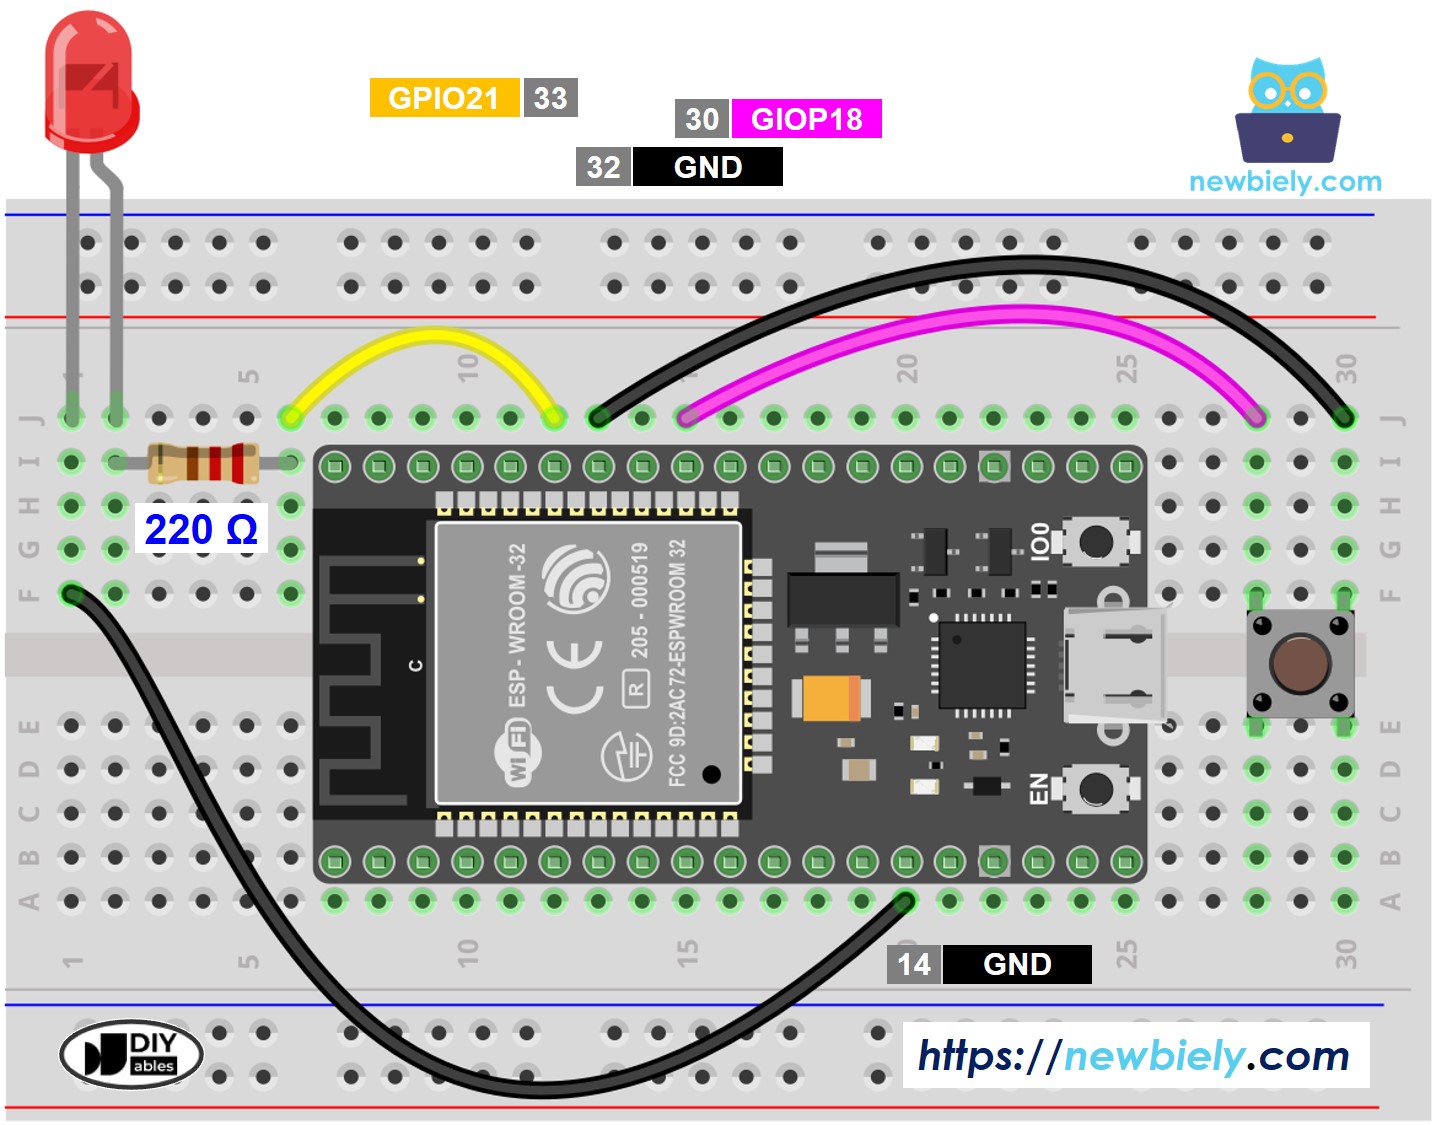
Deze afbeelding is gemaakt met Fritzing. Klik om de afbeelding te vergroten.
Als u niet weet hoe u ESP32 en andere componenten van stroom moet voorzien, vindt u instructies in de volgende tutorial: Hoe ESP32 van stroom te voorzien.
Laten we de ESP32-code vergelijken die een LED laat knipperen met en zonder gebruik van de delay() functie
ESP32 Code - Met Delay
Snelle Stappen
- Als u voor het eerst ESP32 gebruikt, zie dan hoe u de omgeving instelt voor ESP32 op Arduino IDE.
- Maak de bedrading zoals op bovenstaande afbeelding.
- Verbind de ESP32 module met uw computer via een micro USB-kabel.
- Open Arduino IDE op uw computer.
- Selecteer de juiste ESP32 board (bijv. ESP32 Dev Module) en COM-poort.
- Kopieer de bovenstaande code en plak deze in Arduino IDE.
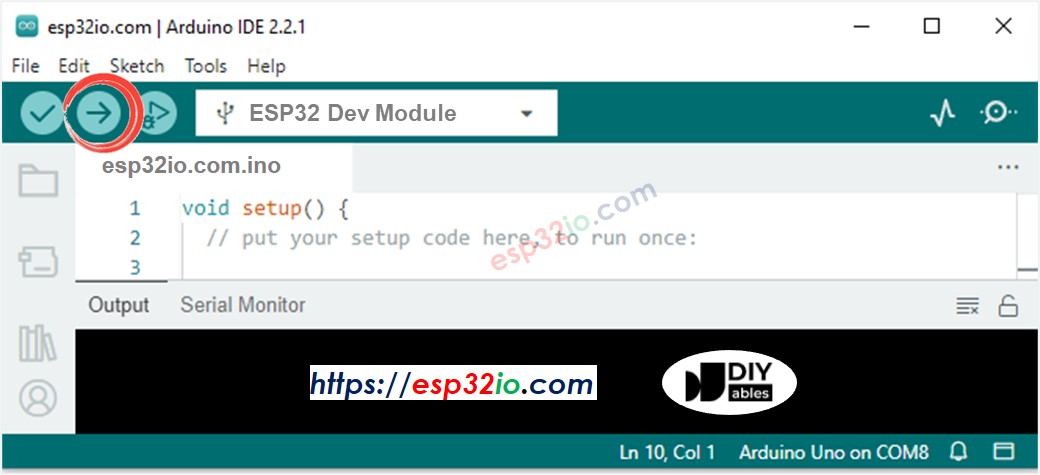
- Compileer en upload de code naar het ESP32 board door te klikken op de Upload knop in Arduino IDE
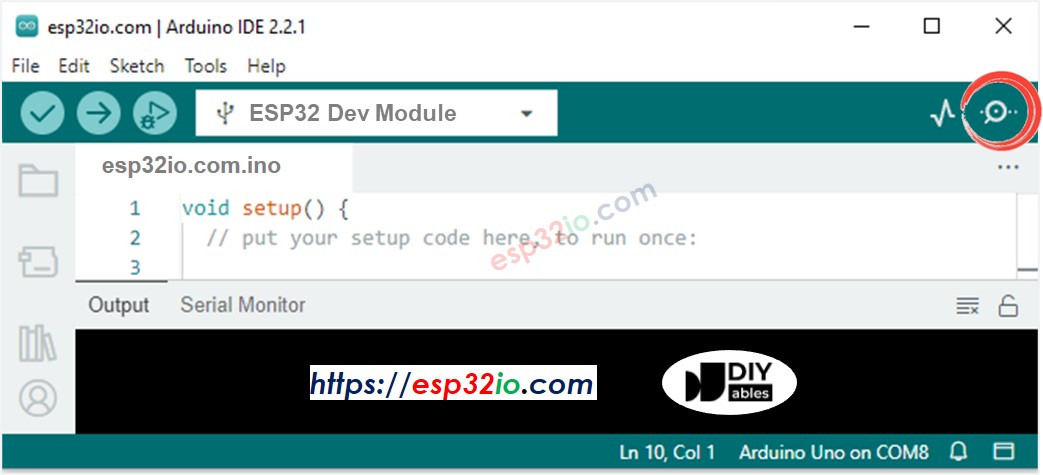
- Open de Serial Monitor in Arduino IDE
- Druk 4 keer op de knop
- Kijk naar de LED: de LED schakelt elke seconde periodiek tussen AAN en UIT
- Bekijk de output in Serial Monitor
- In Serial Monitor zult u niet vier keer zien dat de status naar 0 verandert (4 drukken). Dat komt omdat tijdens de delay-tijd de ESP32 GEEN veranderingen kan detecteren.
ESP32 Code - Zonder Delay
Snelle Stappen
- Als u voor het eerst ESP32 gebruikt, zie dan hoe u de omgeving instelt voor ESP32 op Arduino IDE.
- Voer bovenstaande code uit en druk 4 keer op de knop
- Kijk naar de LED: de LED schakelt elke seconde periodiek tussen AAN en UIT
- Bekijk de output in Serial Monitor
- Alle knopdruk gebeurtenissen werden gedetecteerd.
Regel-voor-regel Code Uitleg
De bovenstaande ESP32 code bevat een uitleg regel-voor-regel. Lees de opmerkingen in de code alstublieft!
Meer Taken Toevoegen
De onderstaande code laat twee LED's knipperen met verschillende intervallen en controleert de status van de knop.
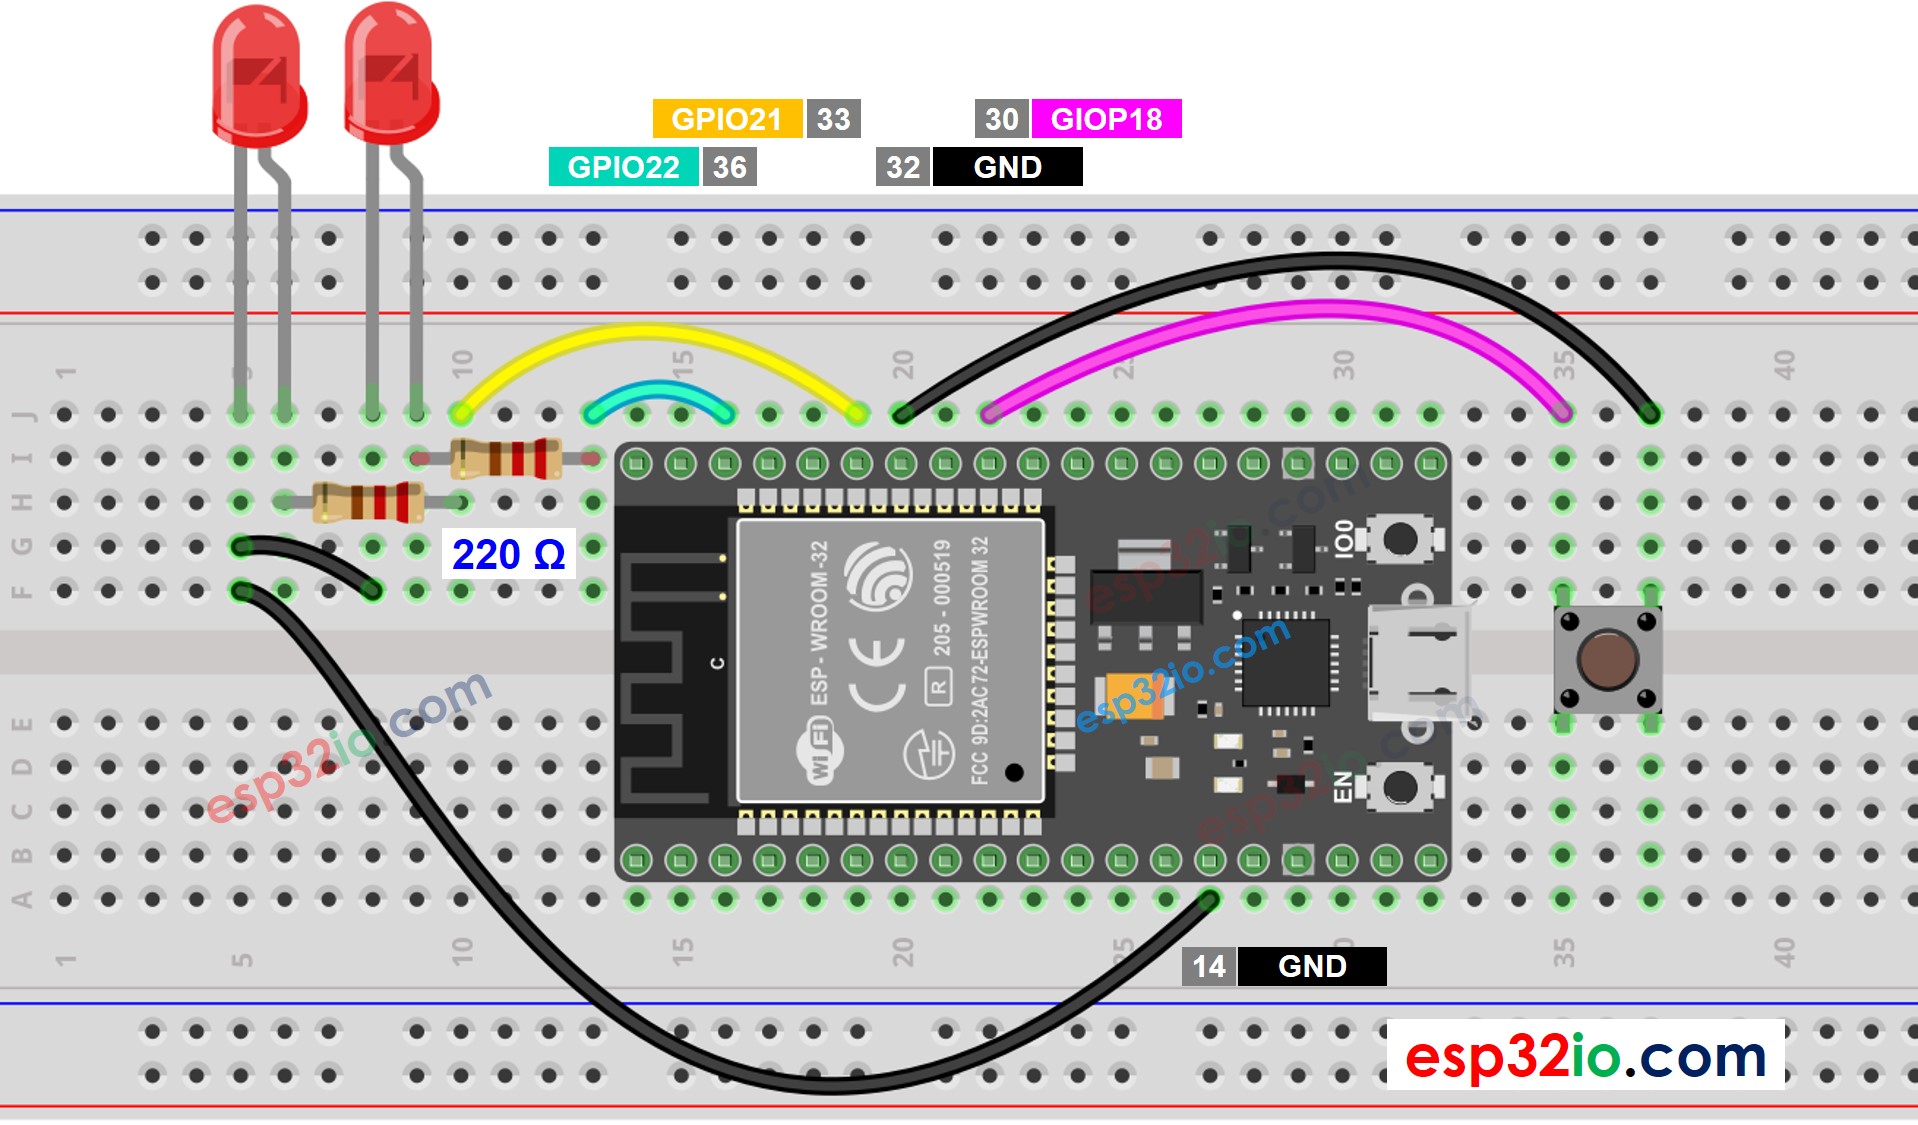
Deze afbeelding is gemaakt met Fritzing. Klik om de afbeelding te vergroten.
Video Tutorial
We overwegen het maken van videotutorials. Als u videotutorials belangrijk vindt, abonneer u dan op ons YouTube-kanaal om ons te motiveren de video's te maken.