ESP32 - OLED Klok
In deze tutorial begeleiden we u stap voor stap bij het maken van een OLED-klok met een ESP32 door de volgende stappen te behandelen:
- Het uitlezen van de huidige tijd (uur, minuut, seconde) van een DS3231 RTC-module en het weergeven ervan op een OLED.
- Het uitlezen van de huidige tijd (uur, minuut, seconde) van een DS1307 RTC-module en het weergeven ervan op een OLED.
U heeft de vrijheid om te kiezen tussen twee RTC-modules: DS3231 en DS1307. Om een weloverwogen keuze te maken kunt u de vergelijking bekijken in DS3231 vs DS1307.
Deze tutorial biedt een volledige handleiding voor het implementeren van een OLED-klok en laat zien hoe u de ESP32 integreert met de DS3231 of DS1307 RTC-module om nauwkeurige tijdinformatie op een OLED-scherm weer te geven.
Hardware benodigd
Of u kunt de volgende kits kopen:
| 1 | × | DIYables ESP32 Starterskit (ESP32 inbegrepen) | |
| 1 | × | DIYables Sensorkit (30 sensoren/displays) | |
| 1 | × | DIYables Sensorkit (18 sensoren/displays) |
Over OLED, DS3231 en DS1307 RTC-module
Bent u nog niet bekend met OLED, DS3231 en DS1307, inclusief hun pinout, functionaliteit en programmering? Verken uitgebreide tutorials over deze onderwerpen hieronder:
Installeren van OLED- en RTC-bibliotheken
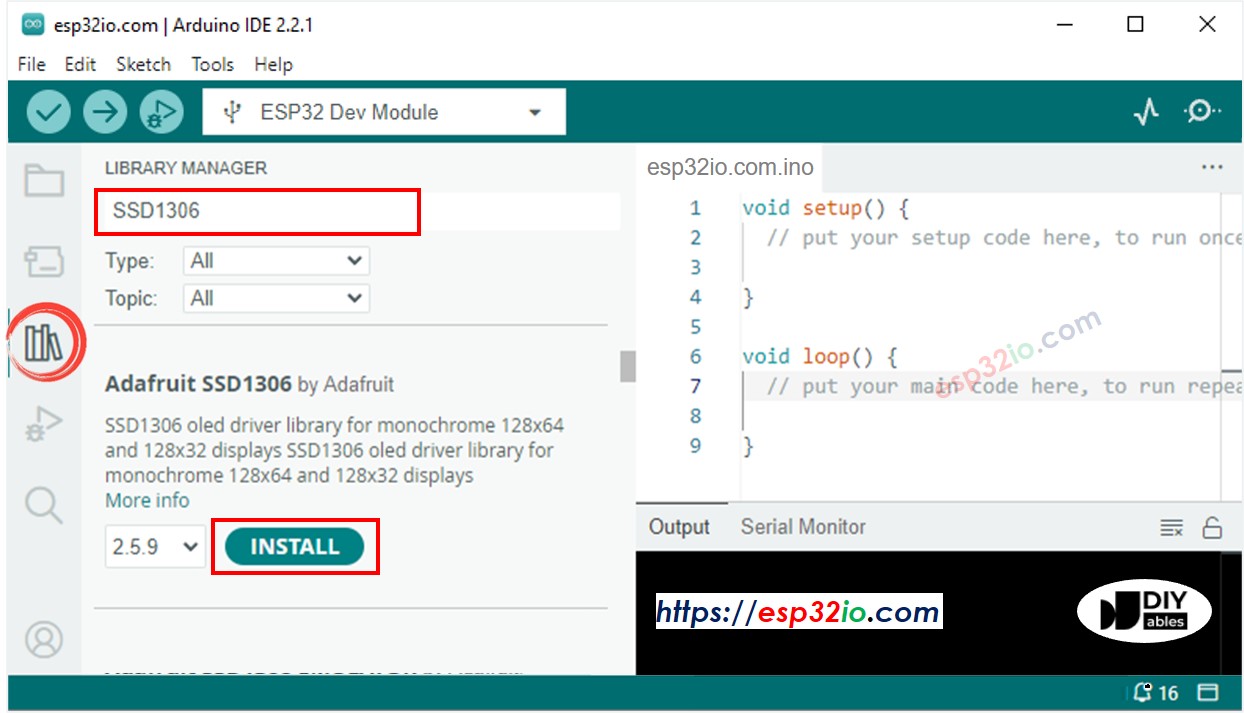
- Klik op het Bibliotheken icoon in de linkerbalk van de Arduino IDE.
- Zoek op “SSD1306” en vind de SSD1306 bibliotheek van Adafruit.
- Klik op de knop Installeren om de bibliotheek te installeren.
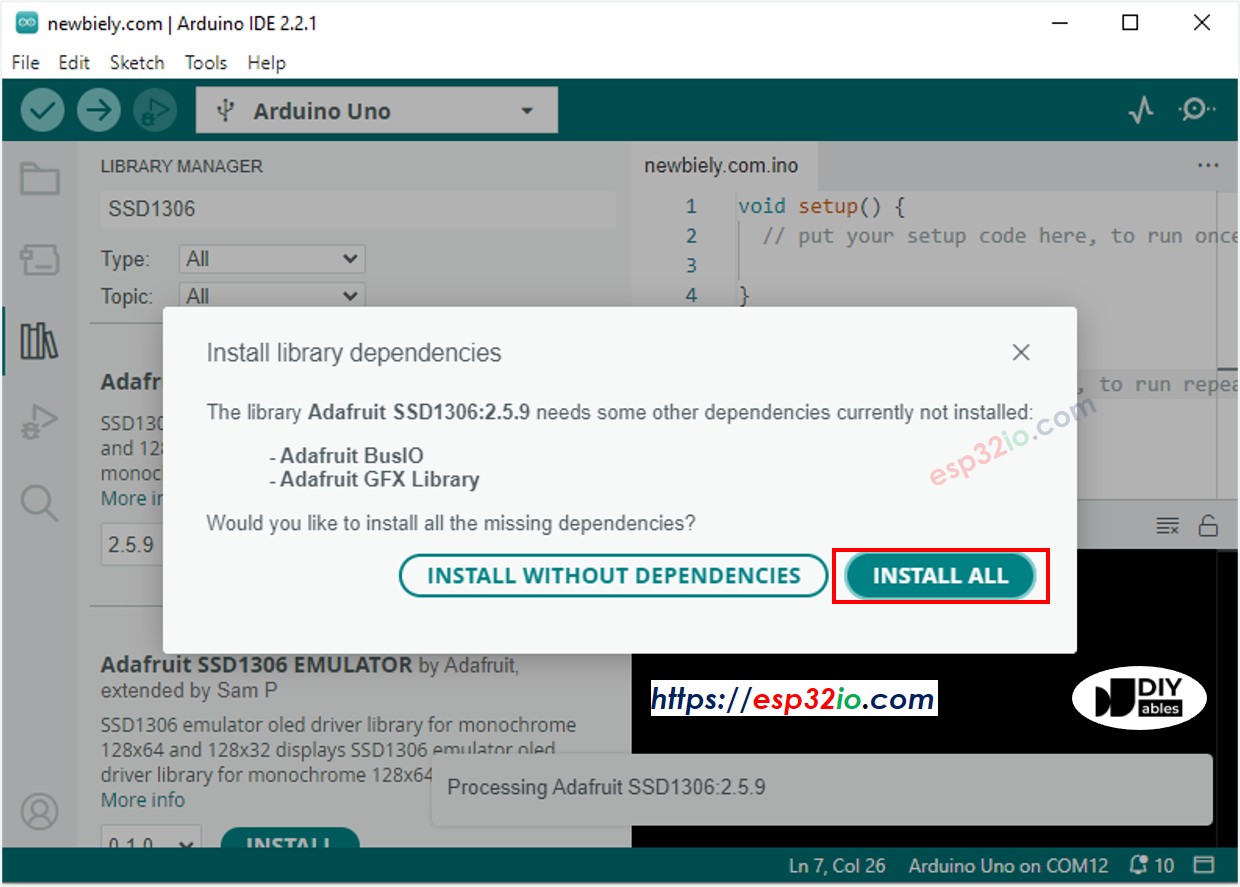
- Er wordt gevraagd om extra bibliotheekafhankelijkheden te installeren.
- Klik op de knop Installeer alles om alle afhankelijkheden te installeren.
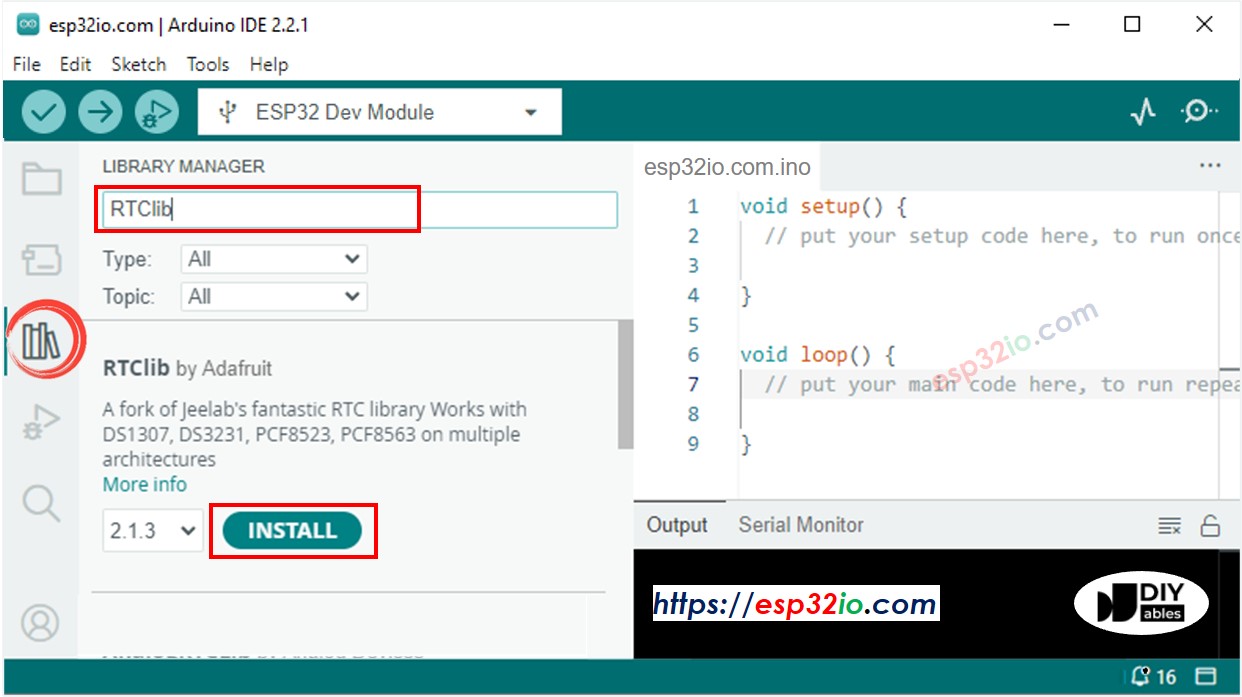
- Zoek op “RTClib” en vind de RTC bibliotheek van Adafruit.
- Klik op de knop Installeren om de RTC-bibliotheek te installeren.
- Mogelijk wordt gevraagd de afhankelijkheden voor deze bibliotheek te installeren.
- Installeer alle afhankelijkheden door op Installeer alles te klikken.

Tijd uitlezen van DS3231 RTC module en weergeven op OLED
Bedradingsschema
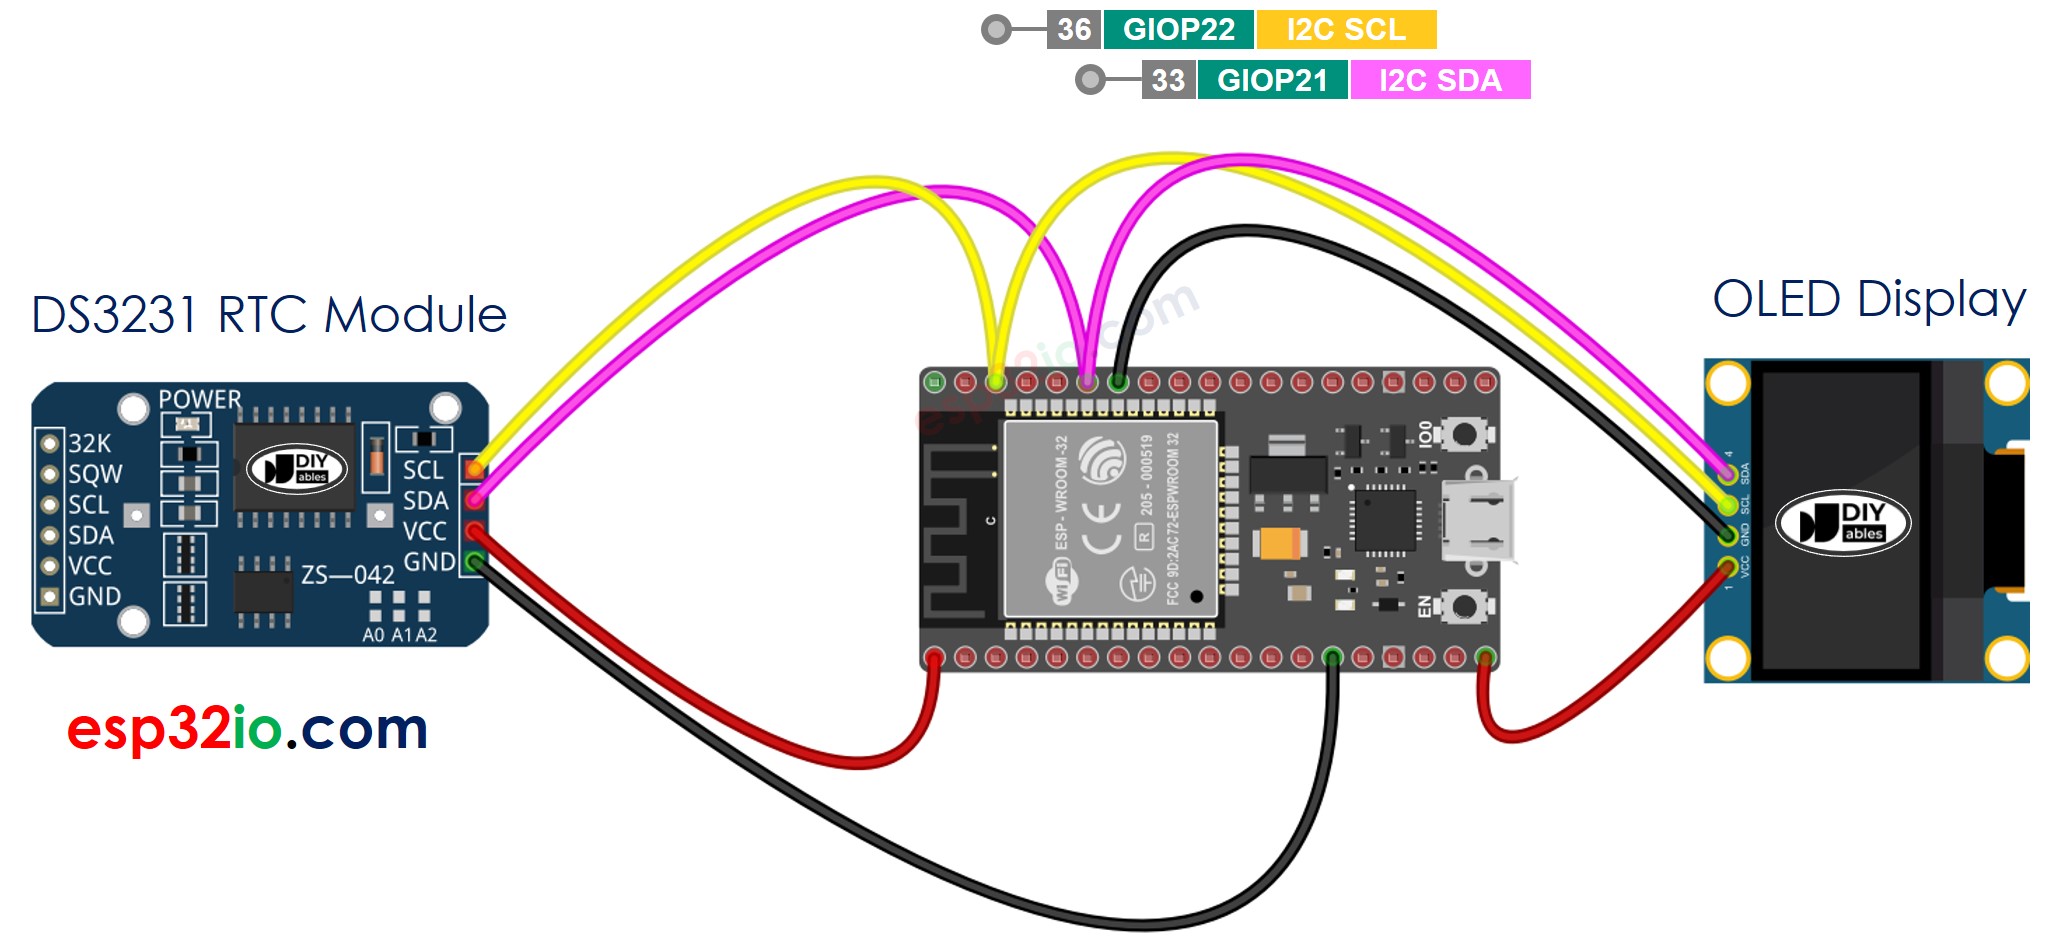
Deze afbeelding is gemaakt met Fritzing. Klik om de afbeelding te vergroten.
Als u niet weet hoe u ESP32 en andere componenten van stroom moet voorzien, vindt u instructies in de volgende tutorial: Hoe ESP32 van stroom te voorzien.
ESP32 Code - DS3231 en OLED
Snel aan de slag
- Als u ESP32 voor het eerst gebruikt, bekijk dan hoe u de omgeving instelt voor ESP32 in Arduino IDE.
- Voer de bedrading uit zoals in bovenstaande afbeelding.
- Verbind de ESP32 met uw PC via een micro USB-kabel.
- Open Arduino IDE op uw PC.
- Selecteer het juiste ESP32-bord (bijv. ESP32 Dev Module) en de juiste COM-poort.
- Kopieer de bovenstaande code en open deze in Arduino IDE.
- Klik op de knop Uploaden in Arduino IDE om de code naar de ESP32 te uploaden.
- Bekijk het resultaat op het OLED-scherm.
Tijd uitlezen van DS1307 RTC module en weergeven op OLED
Bedradingsschema
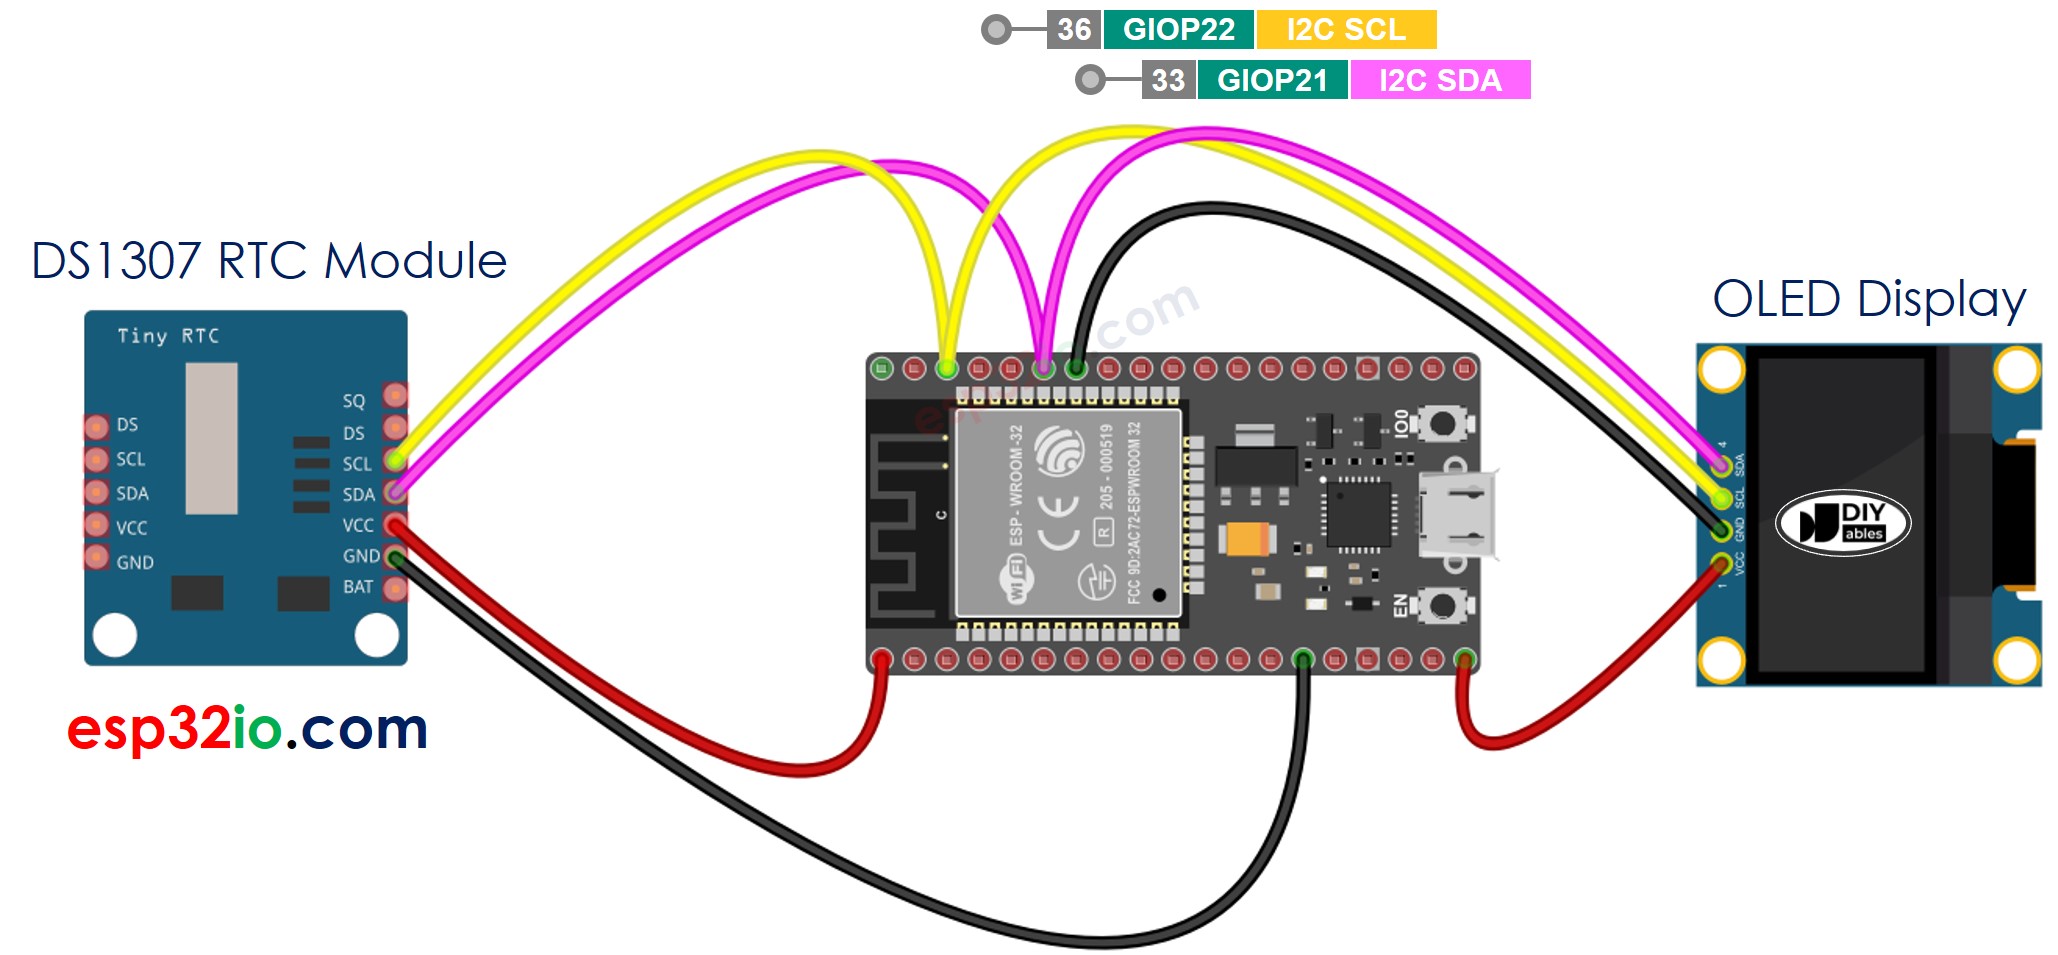
Deze afbeelding is gemaakt met Fritzing. Klik om de afbeelding te vergroten.
ESP32 Code - DS1307 en OLED
Snel aan de slag
- Als u ESP32 voor het eerst gebruikt, bekijk dan hoe u de omgeving instelt voor ESP32 in Arduino IDE.
- Voer de bedrading uit zoals in bovenstaande afbeelding.
- Verbind de ESP32 met uw PC via een micro USB-kabel.
- Open Arduino IDE op uw PC.
- Selecteer het juiste ESP32-bord (bijv. ESP32 Dev Module) en de juiste COM-poort.
- Kopieer de bovenstaande code en open deze in Arduino IDE.
- Klik op de knop Uploaden in Arduino IDE om de code naar de ESP32 te uploaden.
- Bekijk het resultaat op het OLED-scherm.
Video Tutorial
We overwegen het maken van videotutorials. Als u videotutorials belangrijk vindt, abonneer u dan op ons YouTube-kanaal om ons te motiveren de video's te maken.