ESP32 - Keypad - LCD

Deze handleiding legt uit hoe u de ESP32 gebruikt met een keypad en LCD-display. We leren in detail hoe u de ingedrukte toets op het LCD-scherm kunt weergeven.

Hardware Benodigd

1×ESP32 ESP-WROOM-32 Ontwikkelingsmodule
1×USB-kabel Type-C
1×LCD I2C
1×Toetsenbord 3x4 en 4x4 Kit
1×(Alternatief) Keypad 3x4
1×(Alternatief) Keypad 4x4
1×Breadboard (experimenteerprint)
1×Jumper wires (doorverbinding draden)
1×(Optioneel) DC Power Jack
1×(Aanbevolen) Schroefklem Uitbreidingsboard voor ESP32
1×(Aanbevolen) Breakout Expansion Board for ESP32
1×(Aanbevolen) Stromsplitter voor ESP32

Of u kunt de volgende kits kopen:

1×DIYables Sensorkit (30 sensoren/displays)
1×DIYables Sensorkit (18 sensoren/displays)
Openbaarmaking: Sommige van de links in deze sectie zijn Amazon-affiliate links. We kunnen een commissie ontvangen voor aankopen die via deze links worden gedaan, zonder extra kosten voor u. We waarderen uw steun.

Over het Keypad en LCD

We hebben specifieke tutorials over keypad en LCD. Elke tutorial bevat gedetailleerde informatie en stapsgewijze instructies over hardware pinout, werkingsprincipe, bekabeling naar ESP32, ESP32 code... Leer er meer over via de volgende links:

Aansluitschema

  • Aansluitschema tussen ESP32 en Keypad 3x4
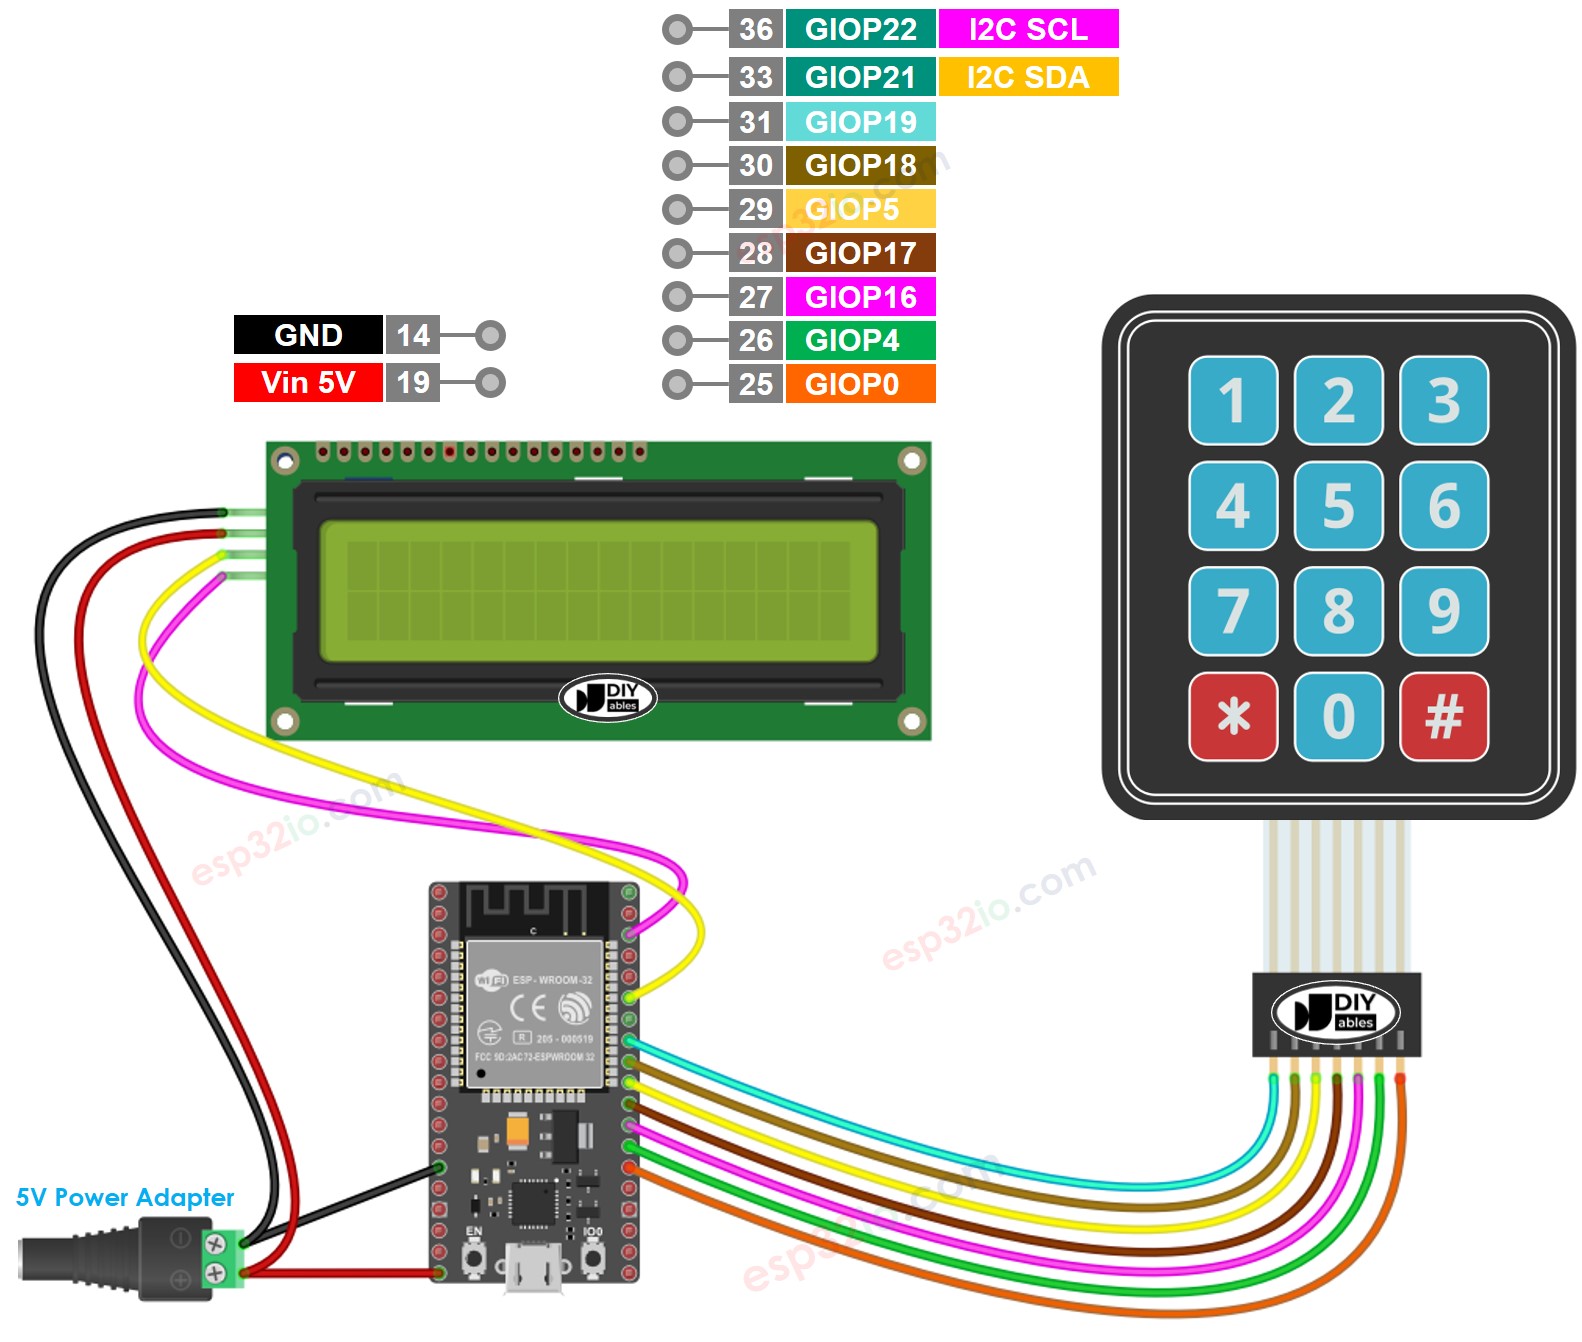
ESP32 Keypad 3x4 LCD Aansluitschema

This image is created using Fritzing. Click to enlarge image

  • Aansluitschema tussen ESP32 en Keypad 4x4
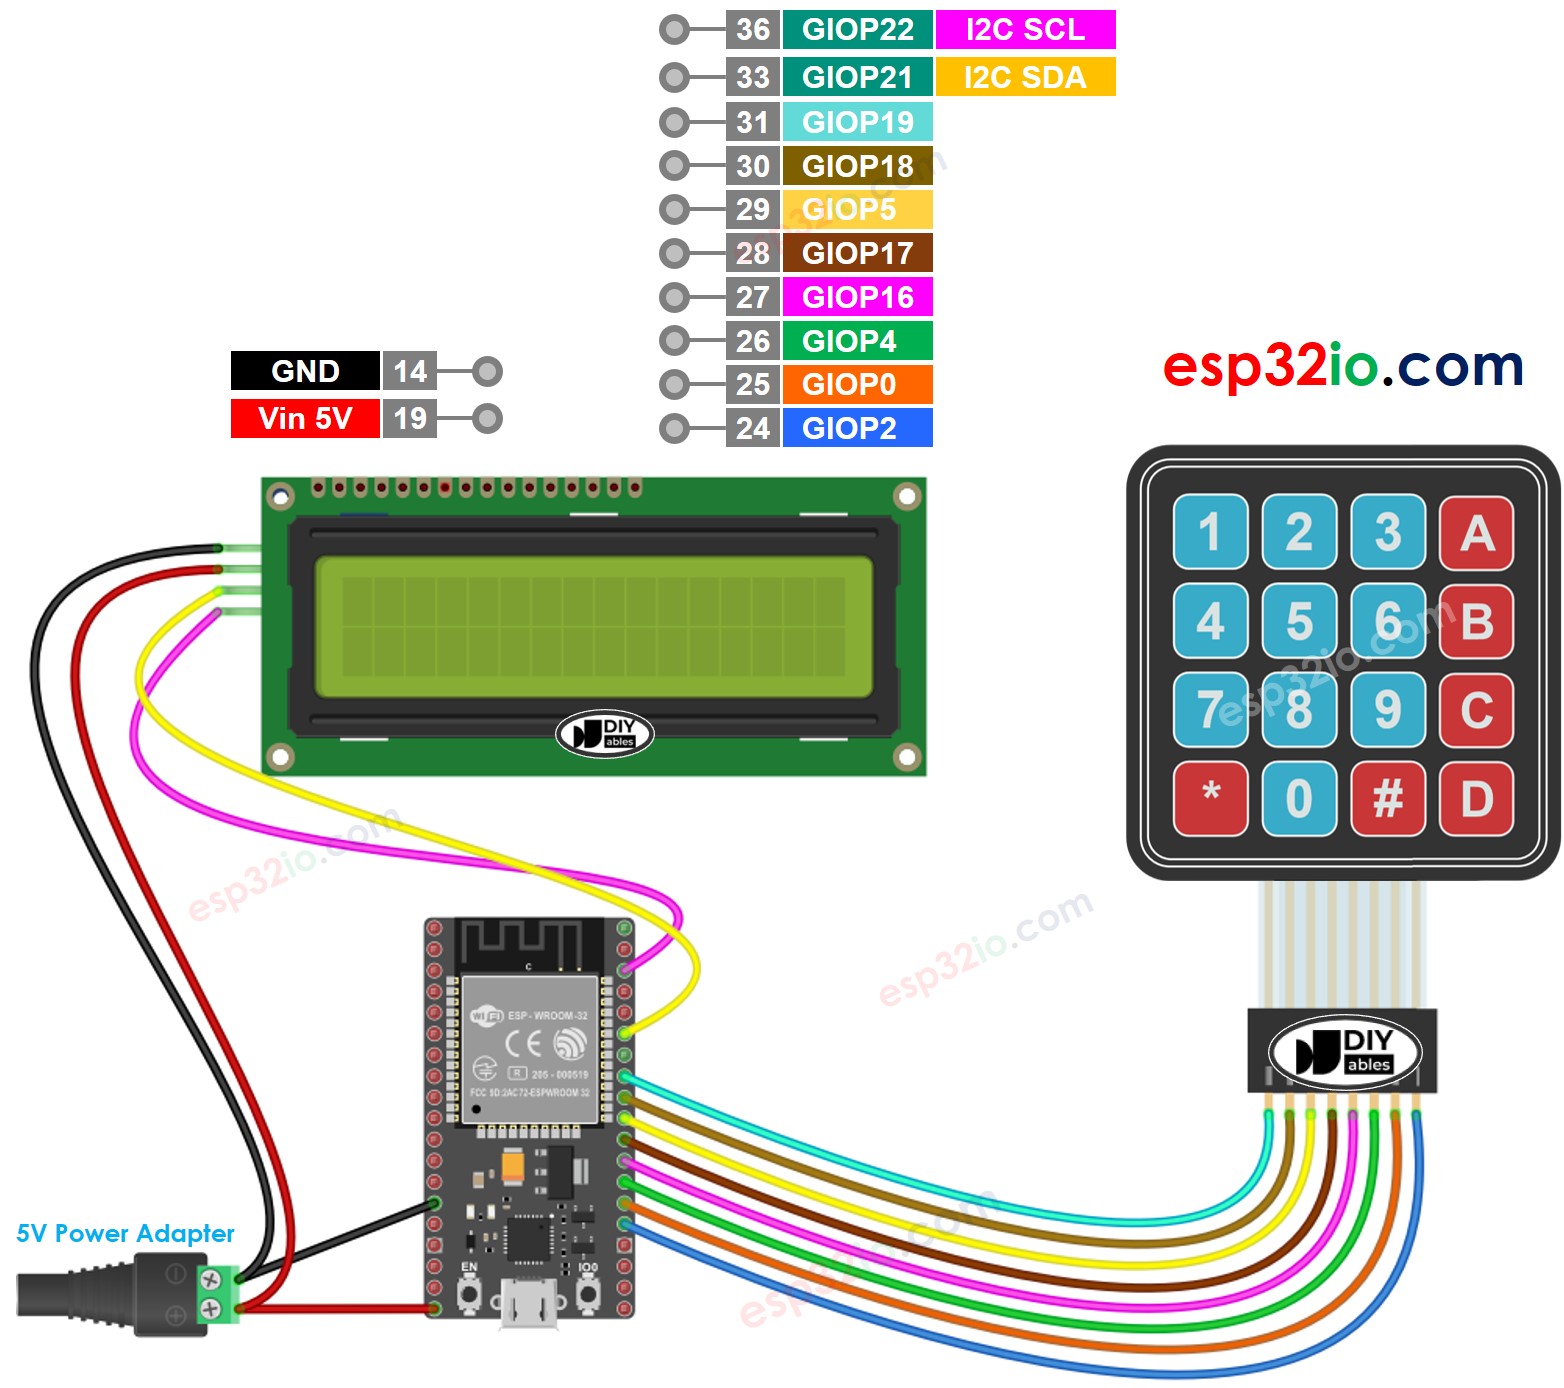
ESP32 Keypad LCD Aansluitschema

This image is created using Fritzing. Click to enlarge image

ESP32 Code - Keypad 3x4 - LCD I2C

/* * Deze ESP32 code is ontwikkeld door newbiely.nl * Deze ESP32 code wordt zonder enige beperking aan het publiek beschikbaar gesteld. * Voor volledige instructies en schema's, bezoek: * https://newbiely.nl/tutorials/esp32/esp32-keypad-lcd */ #include <Keypad.h> #include <LiquidCrystal_I2C.h> #define ROW_NUM 4 // four rows #define COLUMN_NUM 3 // three columns char keys[ROW_NUM][COLUMN_NUM] = { {'1', '2', '3'}, {'4', '5', '6'}, {'7', '8', '9'}, {'*', '0', '#'} }; byte pin_rows[ROW_NUM] = {19, 18, 5, 17}; // GPIO19, GPIO18, GPIO5, GPIO17 connect to the row pins byte pin_column[COLUMN_NUM] = {16, 4, 0}; // GPIO16, GPIO4, GPIO0 connect to the column pins Keypad keypad = Keypad(makeKeymap(keys), pin_rows, pin_column, ROW_NUM, COLUMN_NUM ); LiquidCrystal_I2C lcd(0x27, 16, 2); // I2C address 0x27 (from DIYables LCD), 16 column and 2 rows int cursorColumn = 0; void setup(){ lcd.init(); // initialize the lcd lcd.backlight(); } void loop(){ char key = keypad.getKey(); if (key) { lcd.setCursor(cursorColumn, 0); // move cursor to (cursorColumn, 0) lcd.print(key); // print key at (cursorColumn, 0) cursorColumn++; // move cursor to next position if(cursorColumn == 16) { // if reaching limit, clear LCD lcd.clear(); cursorColumn = 0; } } }

※ Notiz:

Het LCD I2C-adres kan verschillen per fabrikant. In deze code gebruiken we het adres 0x27 dat is opgegeven door de fabrikant DIYables

Snelle Stappen

  • Als u voor het eerst met ESP32 werkt, bekijk dan hoe u de omgeving voor ESP32 instelt in Arduino IDE.
  • Maak de bekabeling zoals op de bovenstaande afbeelding.
  • Verbind de ESP32 board met uw pc via een micro USB-kabel.
  • Open Arduino IDE op uw pc.
  • Selecteer het juiste ESP32 board (bijvoorbeeld ESP32 Dev Module) en de juiste COM-poort.
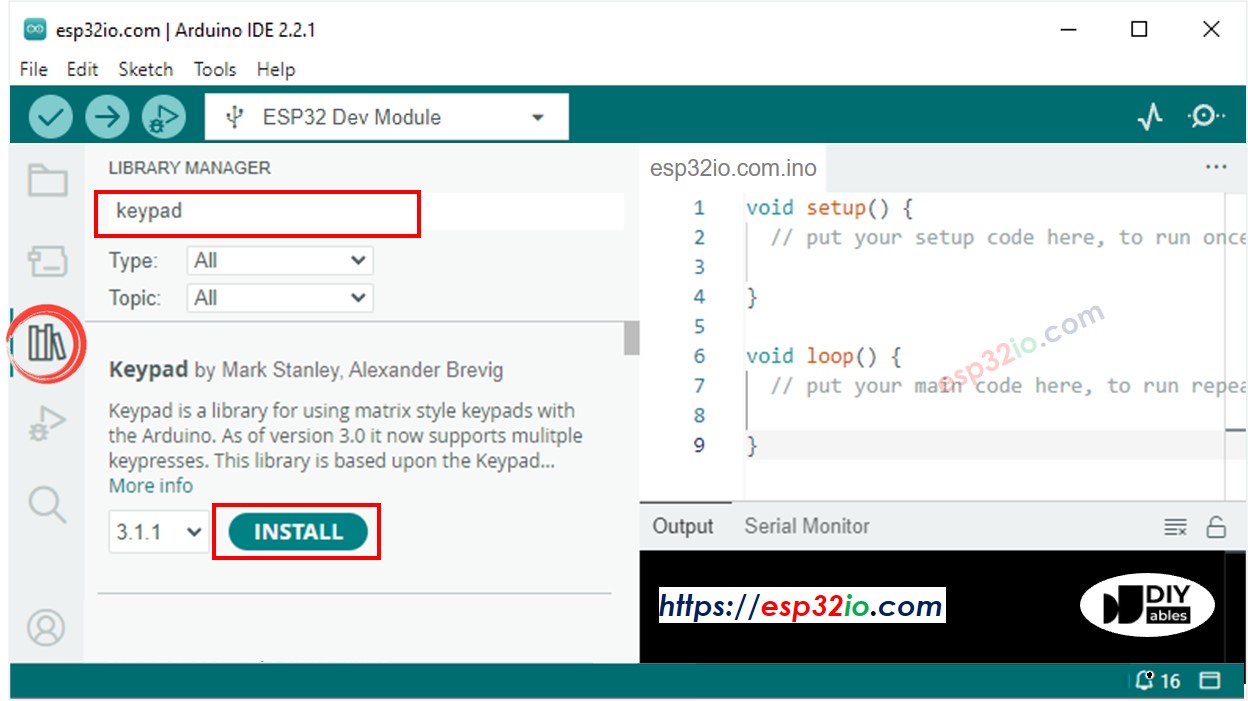
  • Klik op het Libraries-icoon in de linkerzijbalk van Arduino IDE.
  • Typ “keypad” in het zoekvak, zoek de keypad-library van Mark Stanley, Alexander Brevig.
  • Klik op de Installeren-knop om de keypad-library te installeren.
ESP32 keypad library
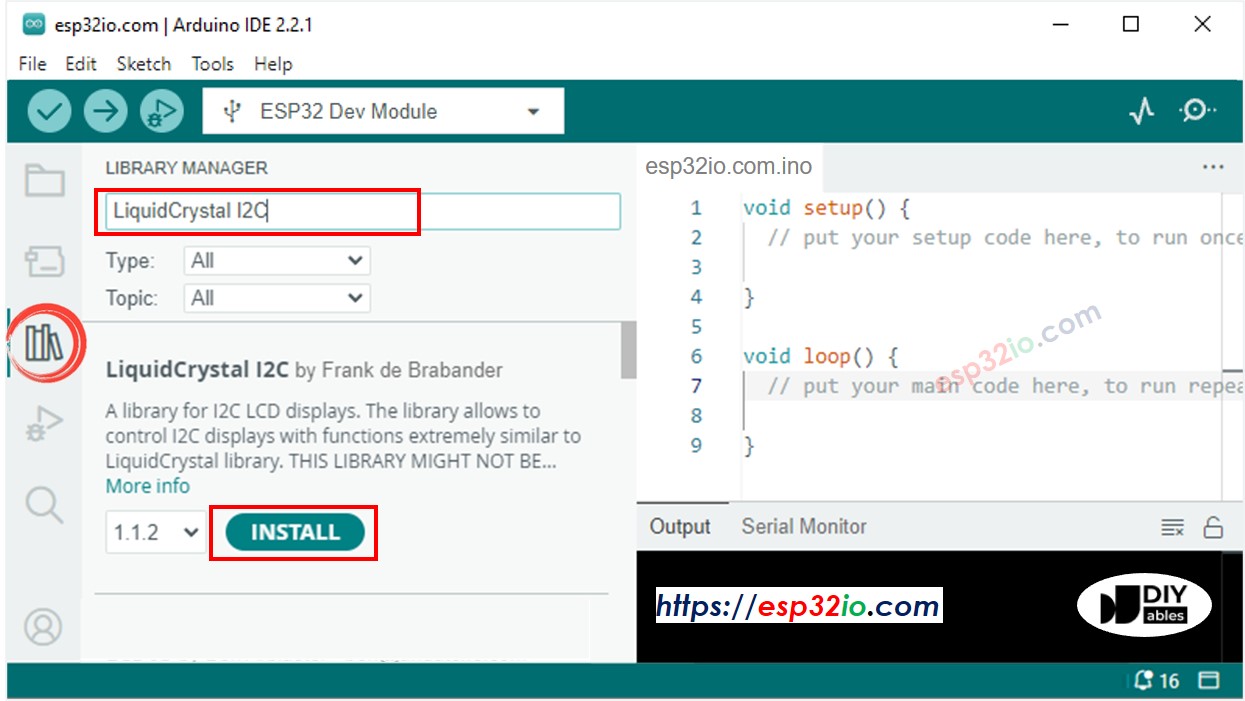
  • Typ “LiquidCrystal I2C” in het zoekvak, zoek de LiquidCrystal_I2C library van Frank de Brabander.
  • Klik op de Installeren-knop om de LiquidCrystal_I2C library te installeren.
ESP32 LiquidCrystal I2C library
  • Kopieer bovenstaande code en plak deze in Arduino IDE.
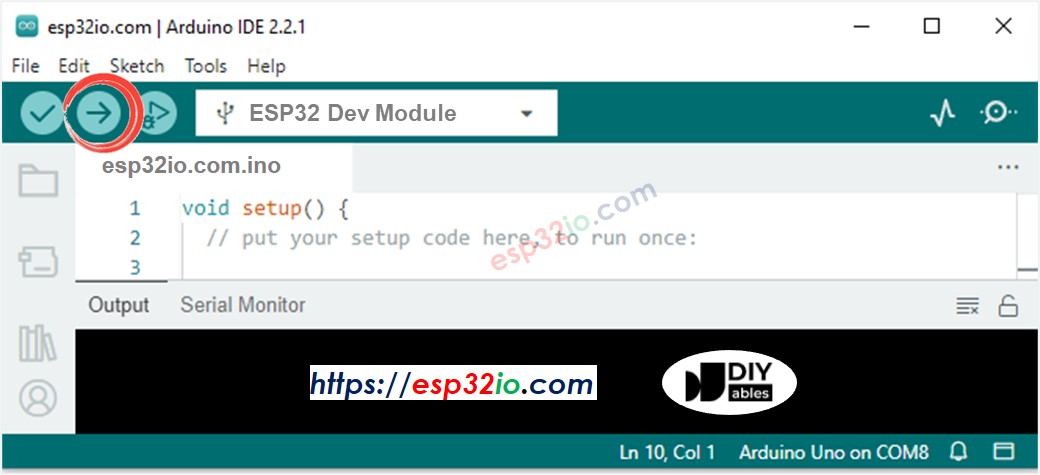
  • Compileer en upload de code naar het ESP32 board door op de Uploaden-knop in Arduino IDE te klikken.
Arduino IDE Upload Code
  • Druk op enkele toetsen op het keypad.
  • Bekijk het resultaat op het LCD-scherm.

Als het LCD niets weergeeft, zie dan Probleemoplossing bij LCD I2C.

Regel-voor-regel Code Uitleg

De bovenstaande ESP32-code bevat regel-voor-regel uitleg. Lees de commentaren in de code!

ESP32 Code - Keypad 4x4 - LCD I2C

/* * Deze ESP32 code is ontwikkeld door newbiely.nl * Deze ESP32 code wordt zonder enige beperking aan het publiek beschikbaar gesteld. * Voor volledige instructies en schema's, bezoek: * https://newbiely.nl/tutorials/esp32/esp32-keypad-lcd */ #include <Keypad.h> #include <LiquidCrystal_I2C.h> #define ROW_NUM 4 // four rows #define COLUMN_NUM 4 // four columns char keys[ROW_NUM][COLUMN_NUM] = { {'1','2','3', 'A'}, {'4','5','6', 'B'}, {'7','8','9', 'C'}, {'*','0','#', 'D'} }; byte pin_rows[ROW_NUM] = {19, 18, 5, 17}; // GPIO19, GPIO18, GPIO5, GPIO17 connect to the row pins byte pin_column[COLUMN_NUM] = {16, 4, 0, 2}; // GPIO16, GPIO4, GPIO0, GPIO2 connect to the column pins Keypad keypad = Keypad(makeKeymap(keys), pin_rows, pin_column, ROW_NUM, COLUMN_NUM ); LiquidCrystal_I2C lcd(0x27, 16, 2); // I2C address 0x27 (from DIYables LCD), 16 column and 2 rows int cursorColumn = 0; void setup(){ lcd.init(); // initialize the lcd lcd.backlight(); } void loop(){ char key = keypad.getKey(); if (key) { lcd.setCursor(cursorColumn, 0); // move cursor to (cursorColumn, 0) lcd.print(key); // print key at (cursorColumn, 0) cursorColumn++; // move cursor to next position if(cursorColumn == 16) { // if reaching limit, clear LCD lcd.clear(); cursorColumn = 0; } } }

Video Tutorial

We overwegen het maken van videotutorials. Als u videotutorials belangrijk vindt, abonneer u dan op ons YouTube-kanaal om ons te motiveren de video's te maken.

Bekijk onze video-tutorial voor een visuele begeleiding bij dit project! De video biedt extra inzichten om de combinatie van ESP32, keypad en LCD goed te begrijpen.

Reacties

※ ONZE BERICHTEN

  • U bent welkom om de link naar deze tutorial te delen. Gebruik onze inhoud echter niet op andere websites. We hebben veel moeite en tijd gestoken in het maken van de inhoud, respecteer alstublieft ons werk!