Arduino - Knop - Debounce
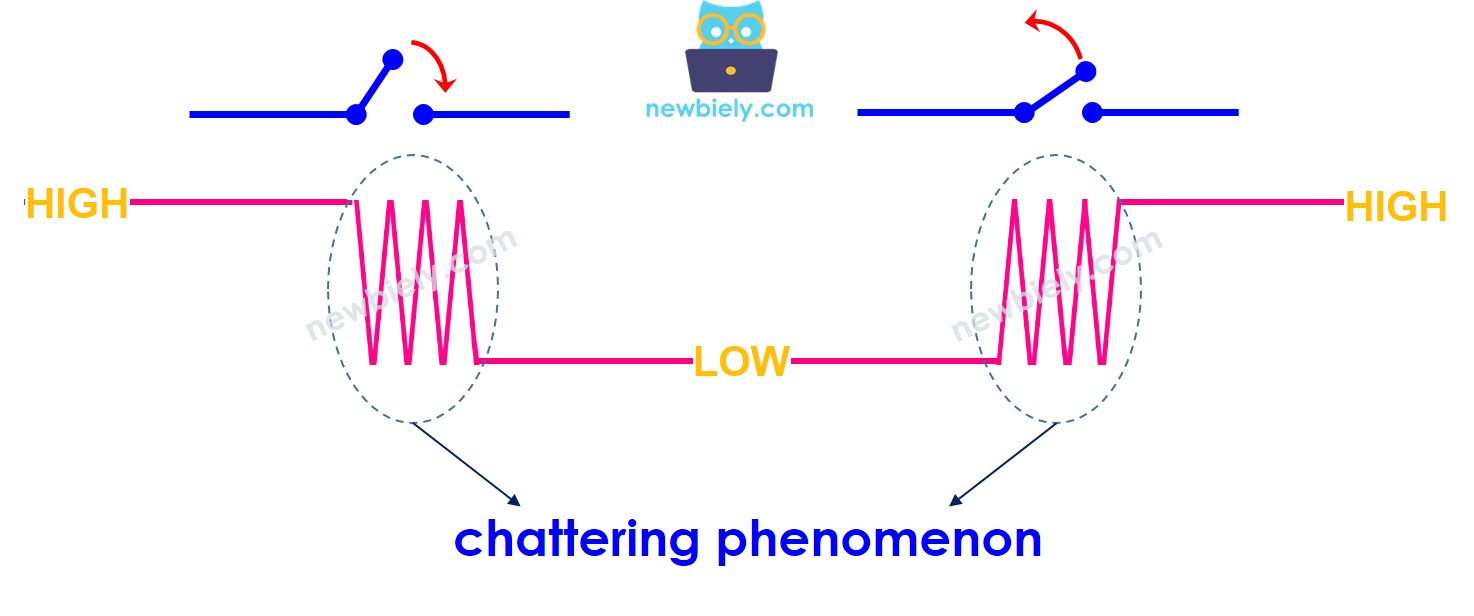
Wanneer een knop wordt ingedrukt/losgelaten of wanneer een schakelaar wordt omgezet, denken beginners vaak simpelweg dat de staat verandert van LOW naar HIGH of van HIGH naar LOW. In de praktijk is het echter niet precies zo. Door de mechanische en fysieke eigenschappen kan de staat van de knop (of schakelaar) meerdere keren snel wisselen tussen LOW en HIGH. Dit fenomeen wordt chattering genoemd. Het chattering-fenomeen zorgt ervoor dat een enkele druk vaak als meerdere drukken wordt gelezen, wat kan leiden tot storingen in bepaalde toepassingen. Deze handleiding laat zien hoe u dit fenomeen elimineert (ook wel debouncen van de input genoemd).
Benodigde hardware
Of u kunt de volgende kits kopen:
| 1 | × | DIYables STEM V3 Starterskit (Arduino inbegrepen) | |
| 1 | × | DIYables Sensorkit (30 sensoren/displays) | |
| 1 | × | DIYables Sensorkit (18 sensoren/displays) |
Over de knop
Als u niet bekend bent met knoppen (pinout, hoe ze werken, hoe te programmeren ...), leer er dan meer over in de volgende tutorials:
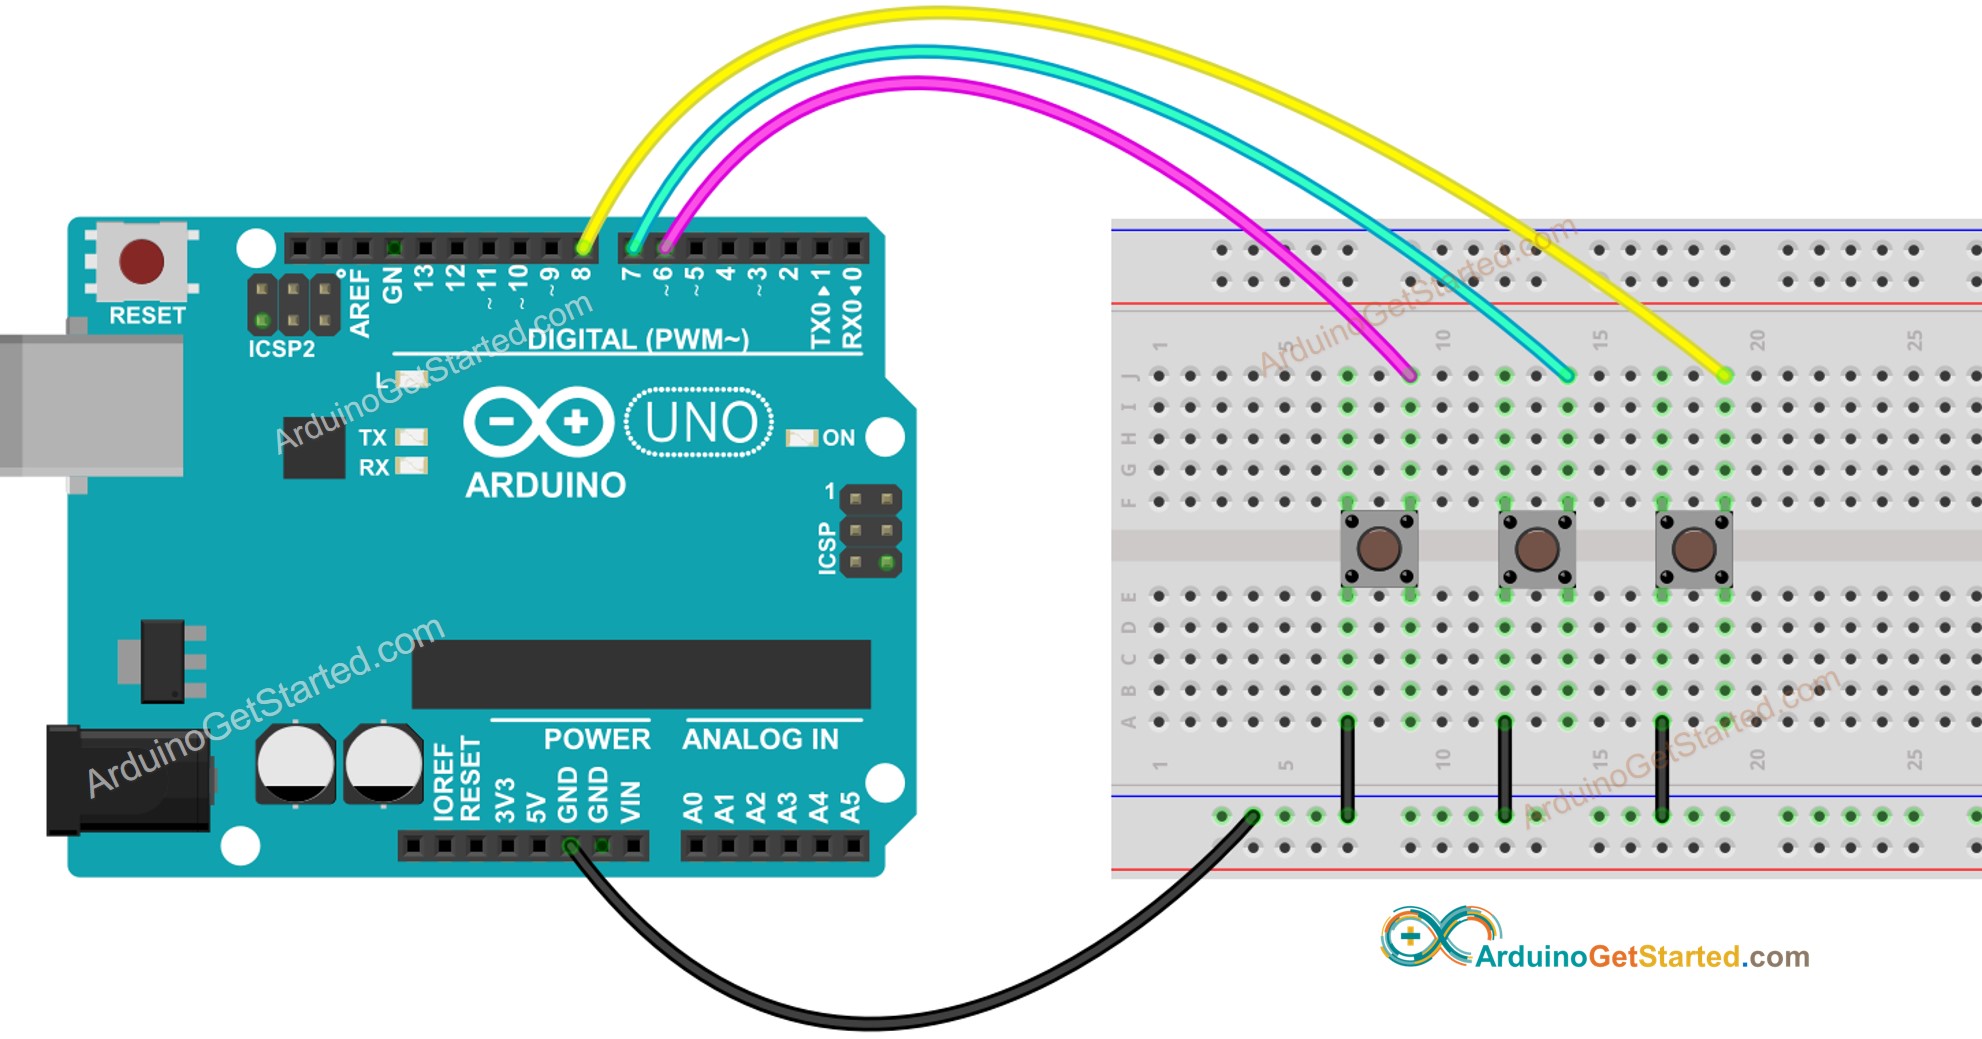
Bedradingsschema

Deze afbeelding is gemaakt met Fritzing. Klik om de afbeelding te vergroten.
Laten we de Arduino-code vergelijken tussen ZONDER en MET debounce en het gedrag daarvan bekijken.
Knop uitlezen zonder Debounce
Voordat u over debounce leert, bekijkt u eerst de code zonder debounce en het gedrag ervan.
Snelle stappen
- Verbind de Arduino met de pc via een USB-kabel
- Open de Arduino IDE, selecteer het juiste board en de goede poort
- Kopieer onderstaande code en open deze in de Arduino IDE
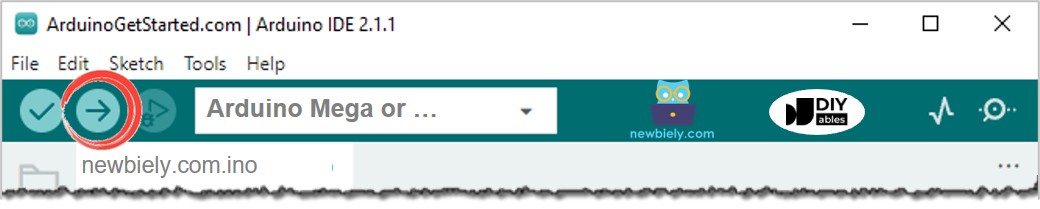
- Klik op de knop Upload in de Arduino IDE om de code naar de Arduino te uploaden
- Open de Seriële Monitor
- Houd de knop enkele seconden ingedrukt en laat deze dan los
- Bekijk het resultaat in de Seriële Monitor
⇒ Zoals u kunt zien, drukte en liet u de knop slechts één keer los. Arduino herkent dit echter als meerdere drukken en loslatingen.
Knop uitlezen met Debounce
Snelle stappen
- Kopieer onderstaande code en open deze in de Arduino IDE
- Klik op de knop Upload in de Arduino IDE om de code naar de Arduino te uploaden
- Open de Seriële Monitor
- Houd de knop enkele seconden ingedrukt en laat deze dan los
- Bekijk het resultaat in de Seriële Monitor
⇒ Zoals u ziet, drukte en liet u de knop slechts één keer los. Arduino herkent dit als één enkele druk en loslating. De chatter is geëlimineerd.
We maken het makkelijk - Arduino Knop Debounce Code met Bibliotheek
Om het nog eenvoudiger te maken voor beginners, vooral bij het gebruik van meerdere knoppen, hebben we een bibliotheek gemaakt, genaamd ezButton. U kunt hier meer leren over de ezButton bibliotheek.
Arduino Knop Debounce Code voor Eén Knop
Arduino Knop Debounce Code voor Meerdere Knoppen
Het bedradingsschema voor bovenstaande code:
Deze afbeelding is gemaakt met Fritzing. Klik om de afbeelding te vergroten.
Video Tutorial
We overwegen het maken van videotutorials. Als u videotutorials belangrijk vindt, abonneer u dan op ons YouTube-kanaal om ons te motiveren de video's te maken.
Extra kennis
- De waarde van DEBOUNCE_DELAY hangt af van de toepassing. Verschillende toepassingen kunnen verschillende waarden gebruiken.
Uitbreidbaarheid
De debounce-methode kan worden toegepast op schakelaars, touch sensors ...