Arduino - Rotary Encoder - Servo Motor
In deze tutorial leren we hoe u Arduino programmeert om een servo motor te laten draaien op basis van de outputwaarde van een rotary encoder.
Hardware Vereist
Of u kunt de volgende kits kopen:
| 1 | × | DIYables Sensorkit (30 sensoren/displays) | |
| 1 | × | DIYables Sensorkit (18 sensoren/displays) |
Aankoopadvies: Als u meerdere servomotoren gebruikt, raden we aan de PCA9685 16 Channel PWM Servo Driver Module te gebruiken om MCU-pinnen te besparen en de bedrading te vereenvoudigen.
Over Servo Motor en Rotary Encoder
Als u nog niet bekend bent met servo motor en rotary encoder (pinout, werking, programmeren, ...), leer er dan meer over in de volgende tutorials:
Bedradingsschema
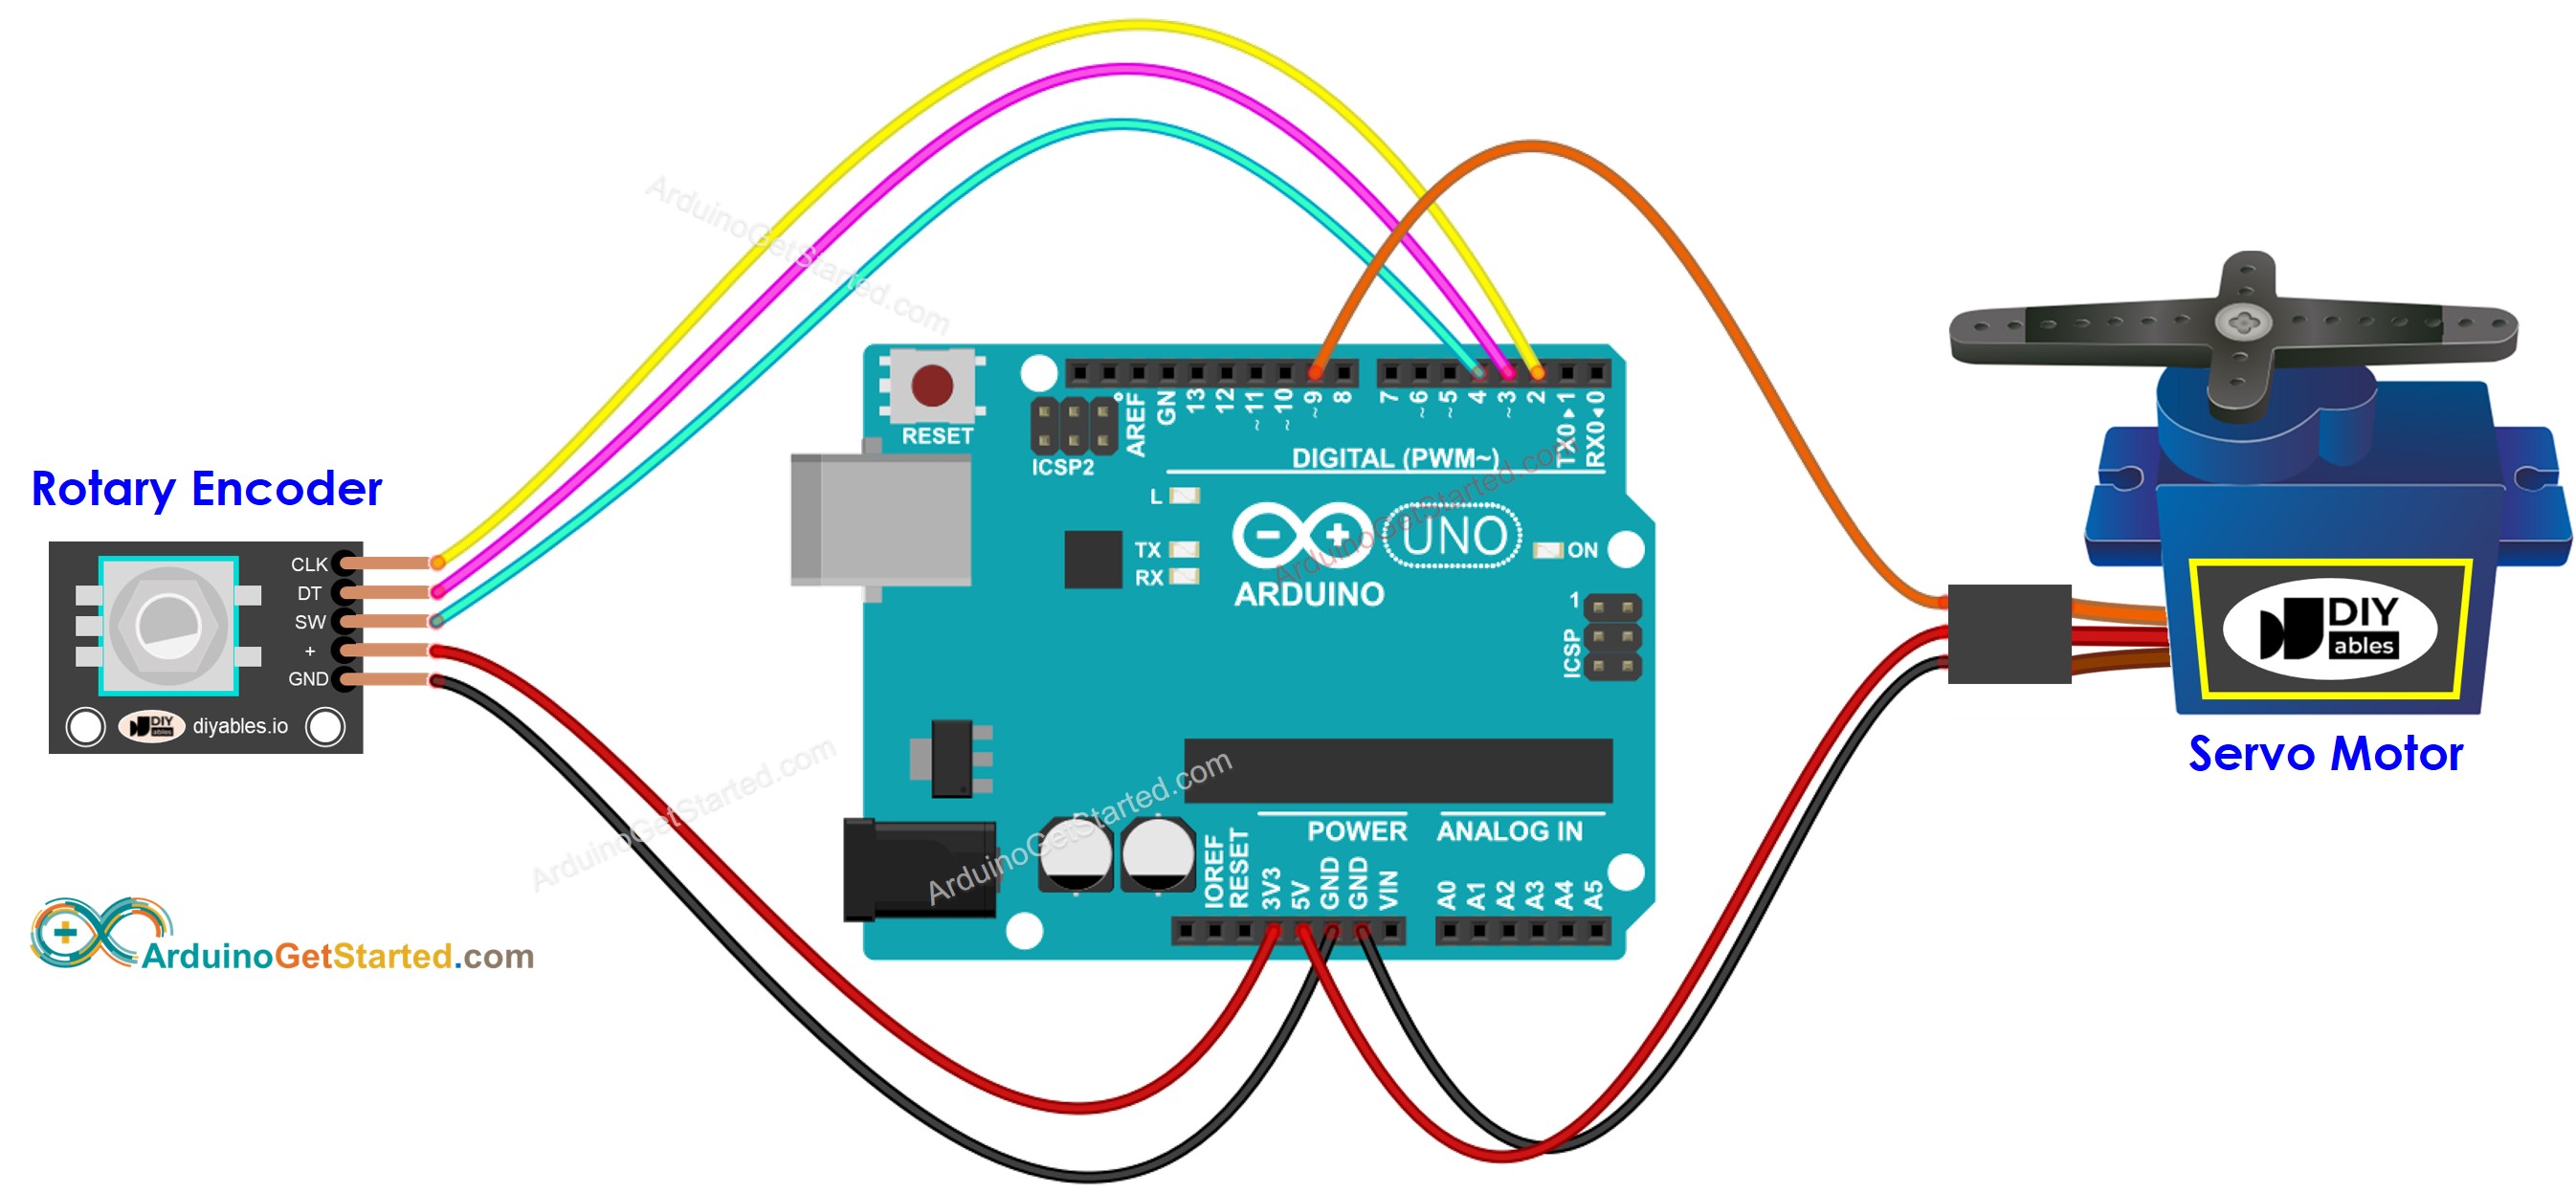
Deze afbeelding is gemaakt met Fritzing. Klik om de afbeelding te vergroten.
Arduino Code
Snel aan de slag
- Verbind Arduino met uw pc via een USB-kabel
- Open de Arduino IDE, selecteer het juiste board en de juiste poort
- Kopieer bovenstaande code en open deze met de Arduino IDE
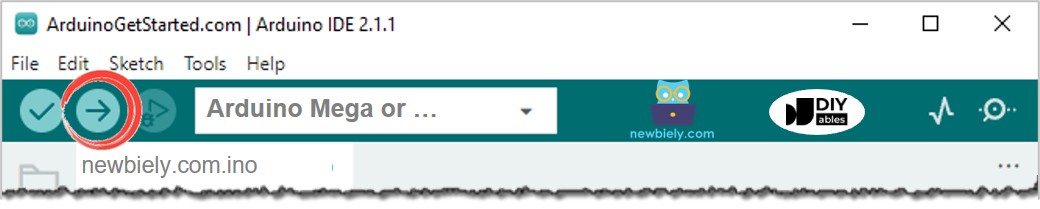
- Klik op de Upload-knop in de Arduino IDE om de code naar de Arduino te uploaden
- Open de Seriële Monitor
- Draai aan de rotary encoder
- Bekijk de beweging van de servo motor
- Zie het resultaat in de Seriële Monitor
Code Uitleg
Lees de regel-voor-regel uitleg in de commentaarregels van de broncode!
Video Tutorial
We overwegen het maken van videotutorials. Als u videotutorials belangrijk vindt, abonneer u dan op ons YouTube-kanaal om ons te motiveren de video's te maken.