Arduino - Knop - LED
We gaan leren hoe u:
- De LED aanzet wanneer de knop wordt ingedrukt.
- De LED uitzet wanneer de knop NIET wordt ingedrukt.
We leren hoe u de LED telkens laat wisselen van toestand bij het indrukken van de knop in de tutorial Arduino - Knop schakelt LED.
Hardware Benodigd
Of u kunt de volgende kits kopen:
| 1 | × | DIYables Sensorkit (30 sensoren/displays) | |
| 1 | × | DIYables Sensorkit (18 sensoren/displays) |
Openbaarmaking: Sommige van de links in deze sectie zijn Amazon-affiliate links. We kunnen een commissie ontvangen voor aankopen die via deze links worden gedaan, zonder extra kosten voor u. We waarderen uw steun.
Over LED en Knop
Als u nog niet bekend bent met LED en knop (pinout, werking, hoe te programmeren, enz.), leer er meer over in de volgende tutorials:
Bedradingsschema
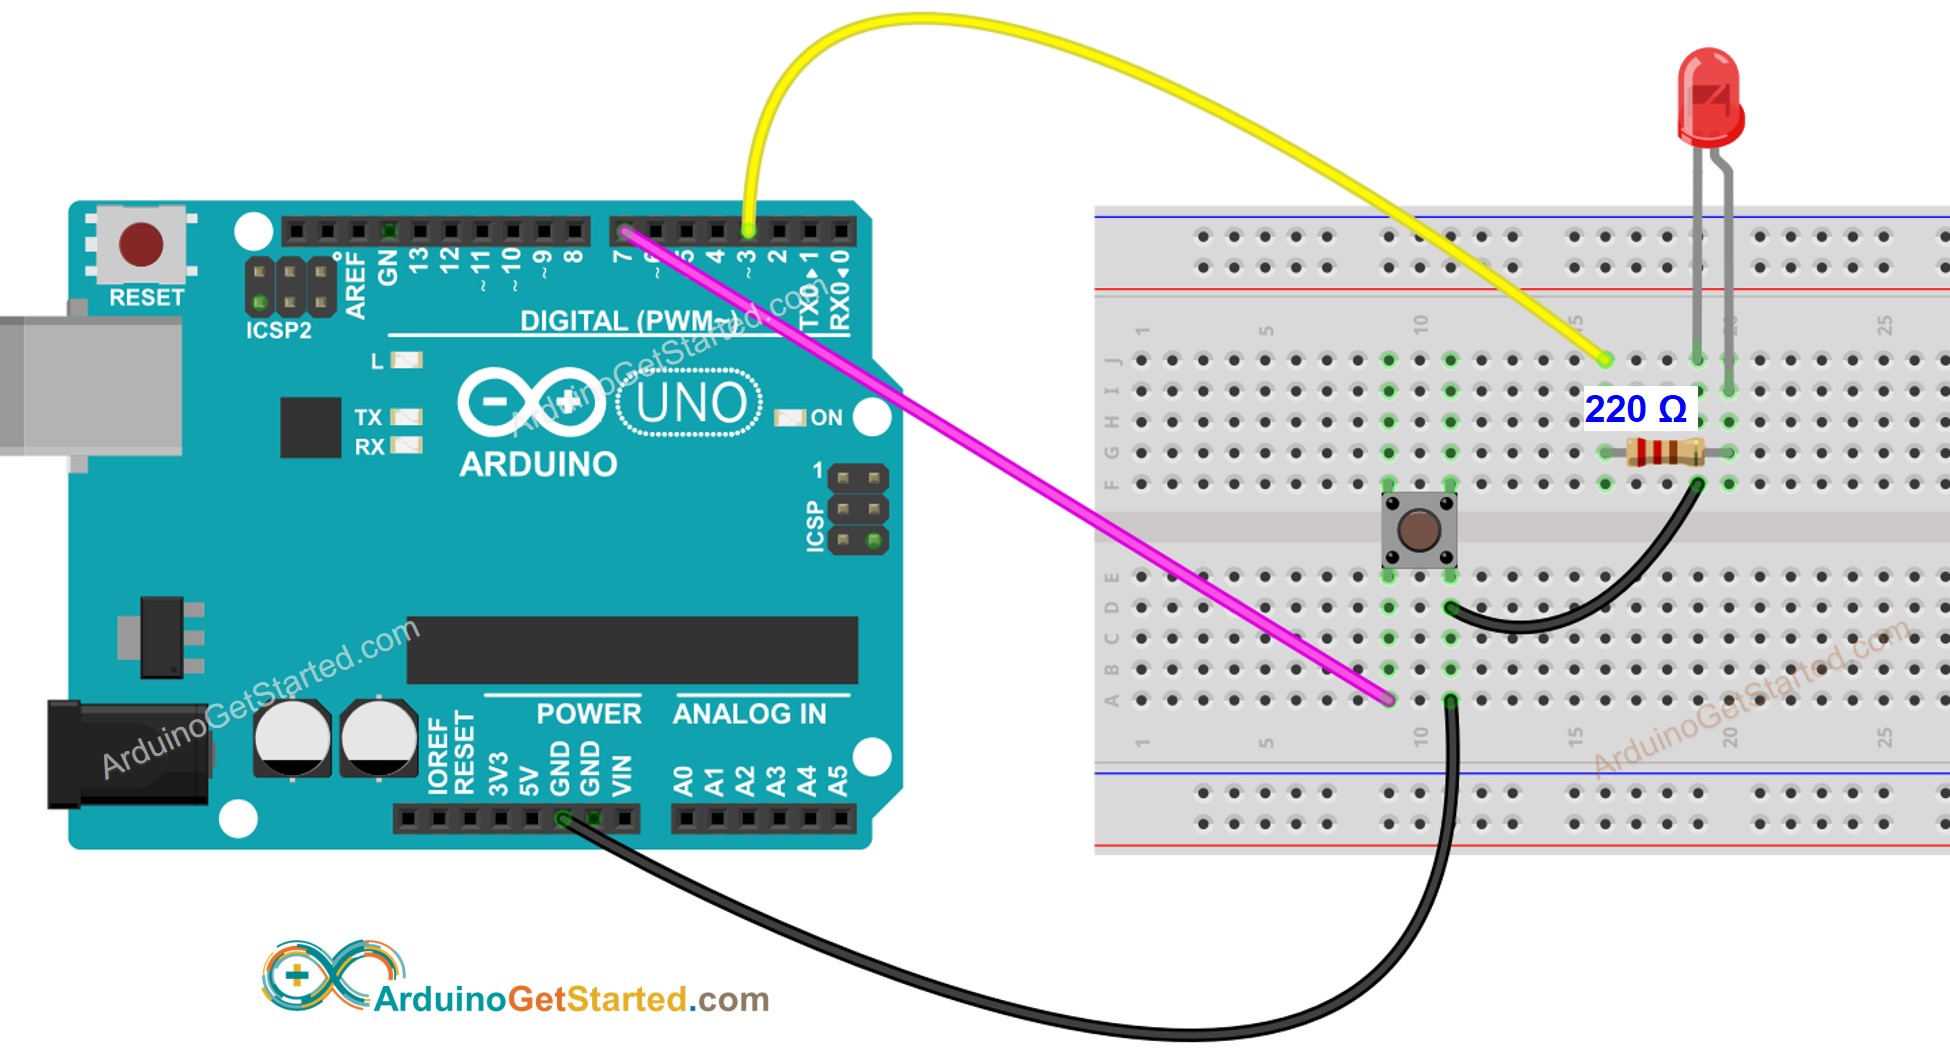
Deze afbeelding is gemaakt met Fritzing. Klik om de afbeelding te vergroten.
Arduino Code
/*
* Deze Arduino code is ontwikkeld door newbiely.nl
* Deze Arduino code wordt zonder enige beperking aan het publiek beschikbaar gesteld.
* Voor volledige instructies en schema's, bezoek:
* https://newbiely.nl/tutorials/arduino/arduino-button-led
*/
// constants won't change. They're used here to set pin numbers:
const int BUTTON_PIN = 7; // the number of the pushbutton pin
const int LED_PIN = 3; // the number of the LED pin
// variables will change:
int buttonState = 0; // variable for reading the pushbutton status
void setup() {
// initialize the LED pin as an output:
pinMode(LED_PIN, OUTPUT);
// initialize the pushbutton pin as an pull-up input:
// the pull-up input pin will be HIGH when the switch is open and LOW when the switch is closed.
pinMode(BUTTON_PIN, INPUT_PULLUP);
}
void loop() {
// read the state of the pushbutton value:
buttonState = digitalRead(BUTTON_PIN);
// control LED according to the state of button
if(buttonState == LOW) // If button is pressing
digitalWrite(LED_PIN, HIGH); // turn on LED
else // otherwise, button is not pressing
digitalWrite(LED_PIN, LOW); // turn off LED
}
Snelle Stappen
- Verbind de Arduino met de pc via de USB-kabel
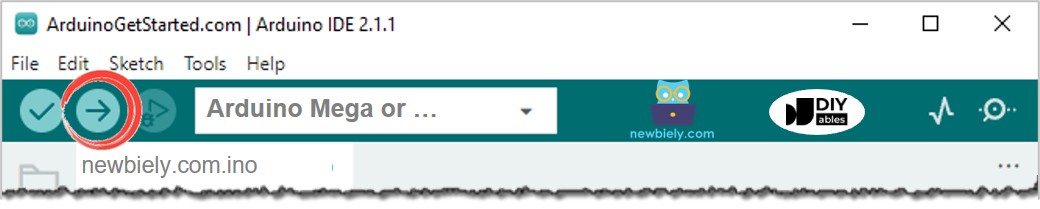
- Open de Arduino IDE, selecteer het juiste board en de juiste poort
- Kopieer bovenstaande code en open deze met de Arduino IDE
- Klik op de Upload-knop in de Arduino IDE om de code naar de Arduino te uploaden
- Druk de knop in en houd deze enkele seconden ingedrukt
- Bekijk hoe de status van de LED verandert
Code-uitleg
Lees de regel-voor-regel uitleg in de commentaarregels van de broncode!
Video Tutorial
We overwegen het maken van videotutorials. Als u videotutorials belangrijk vindt, abonneer u dan op ons YouTube-kanaal om ons te motiveren de video's te maken.