Arduino - Temperatuur- en Vochtigheidssensor - LCD
We leren hoe u:
- Temperatuur en vochtigheid uitleest van een DHT11 sensor en deze weergeeft op een LCD I2C
- Temperatuur en vochtigheid uitleest van een DHT22 sensor en deze weergeeft op een LCD I2C
Hardware Benodigd
| 1 | × | Arduino Uno R3 | |
| 1 | × | USB 2.0-kabel type A/B | |
| 1 | × | LCD I2C | |
| 1 | × | DHT11 Temperatuur- en Vochtigheidssensor Module | |
| 1 | × | Jumper Draden |
U kunt de DHT22 sensor gebruiken in plaats van de DHT11 sensor.
Of u kunt de volgende kits kopen:
| 1 | × | DIYables Sensorkit (30 sensoren/displays) | |
| 1 | × | DIYables Sensorkit (18 sensoren/displays) |
Aankoopadvies: Een andere optie is om het LCD I2C-display te maken door LCD 1602 Display en PCF8574 I2C Adapter Module te combineren.
Over DHT11, DHT22 en LCD
Als u nog niet bekend bent met de DHT11, DHT22 temperatuursensor en het LCD-display (pinout, hoe het werkt, hoe te programmeren ...), leer hierover in de volgende tutorials:
Bedradingsschema
Arduino - DHT11 Module LCD Bedrading
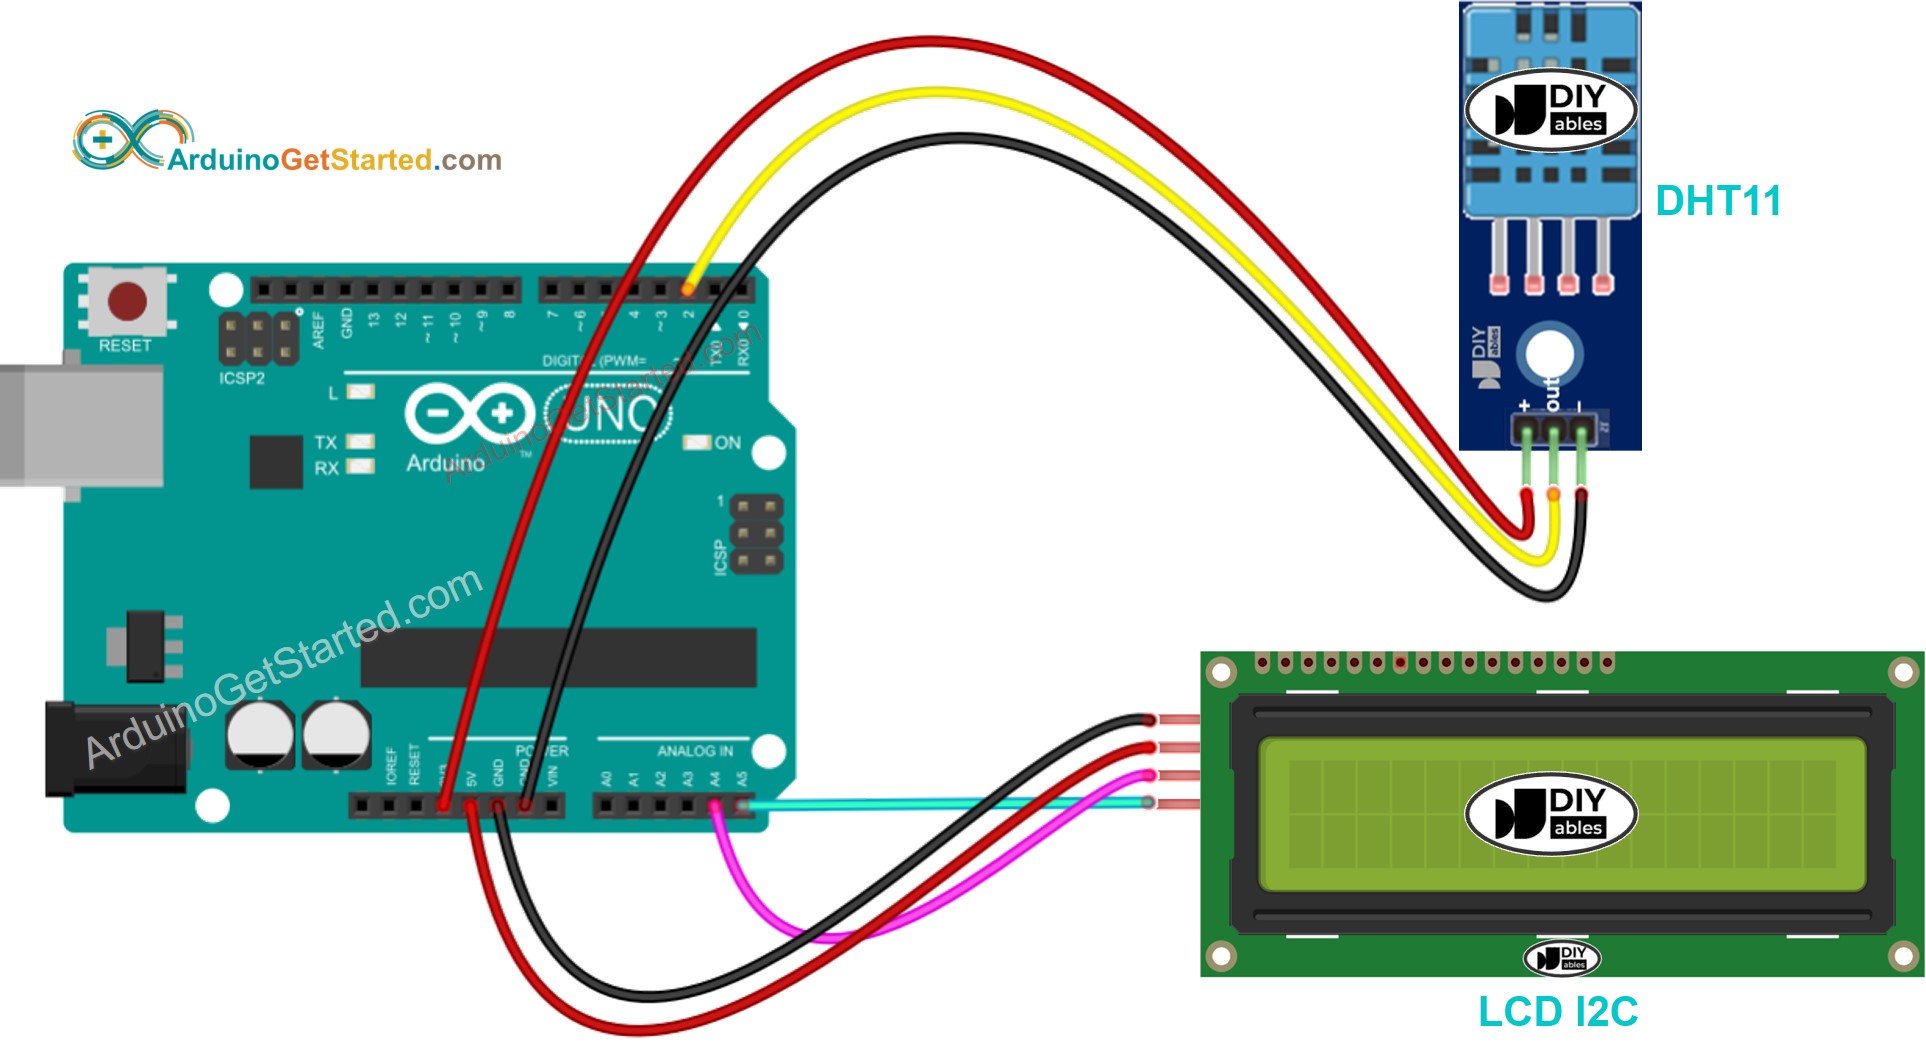
Deze afbeelding is gemaakt met Fritzing. Klik om de afbeelding te vergroten.
Arduino - DHT22 Module LCD Bedrading
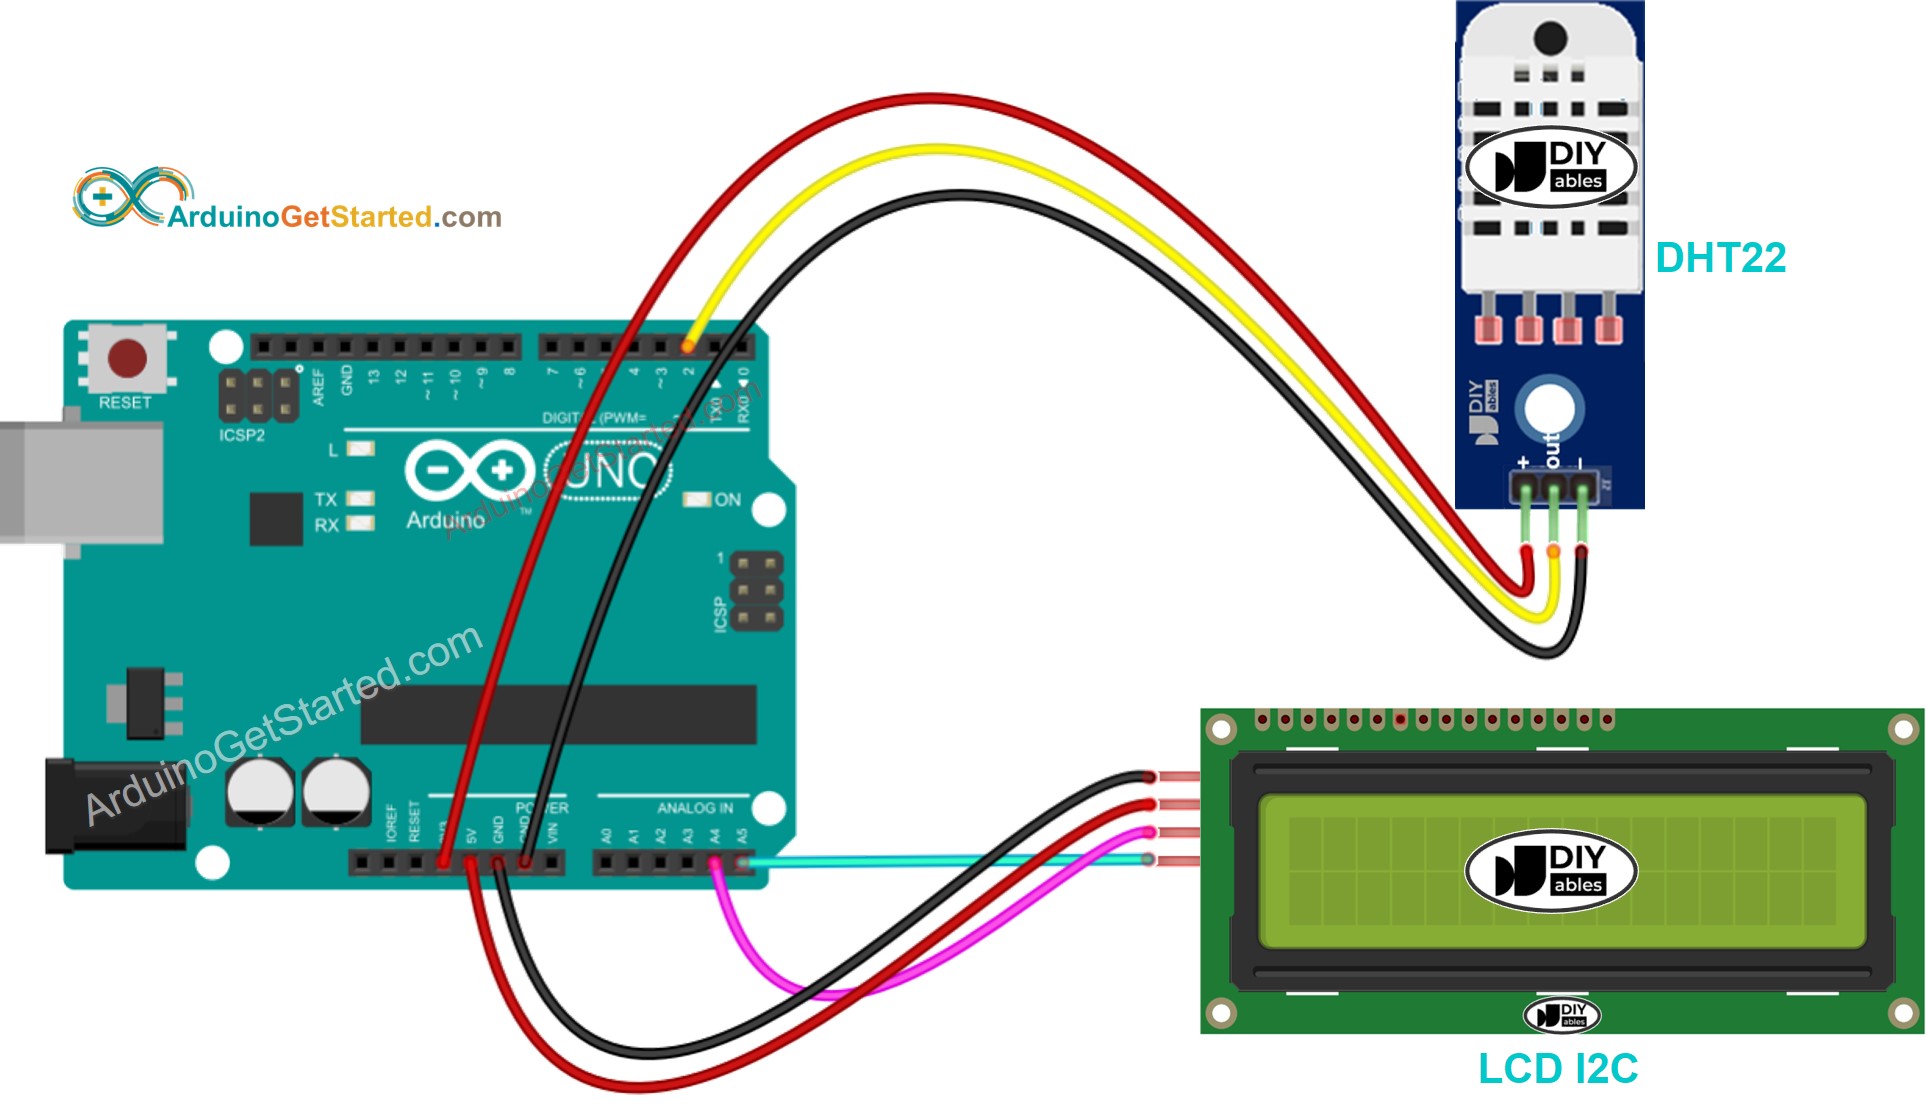
Deze afbeelding is gemaakt met Fritzing. Klik om de afbeelding te vergroten.
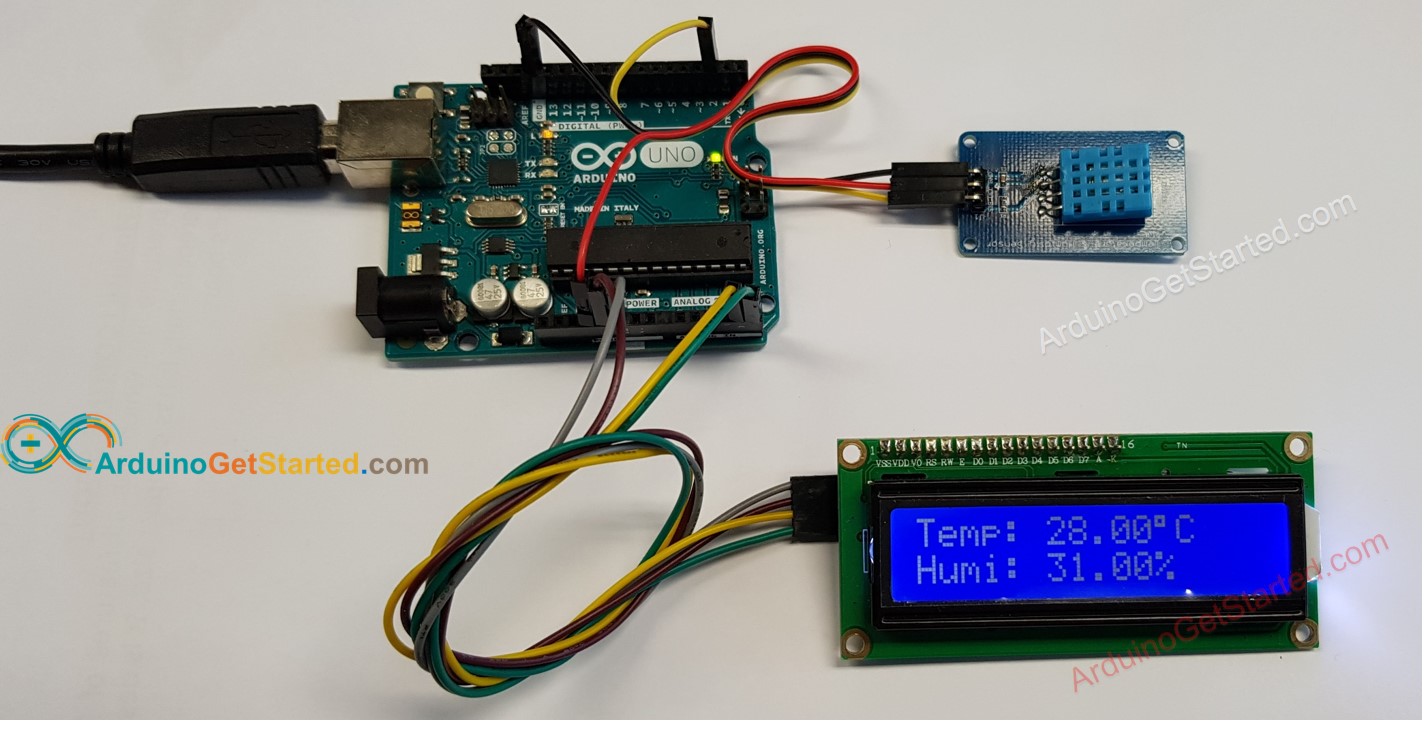
Echte bedrading voor DHT11
Deze afbeelding is gemaakt met Fritzing. Klik om de afbeelding te vergroten.
Arduino Code - DHT11 Sensor - LCD I2C
※ Notiz:
Het I2C-adres van het LCD kan verschillen per fabrikant. In de code gebruiken we 0x27, dat wordt gespecificeerd door de fabrikant DIYables.
Snelle stappen
- Verbind de Arduino met de PC via de USB-kabel
- Open de Arduino IDE, selecteer het juiste board en de juiste poort
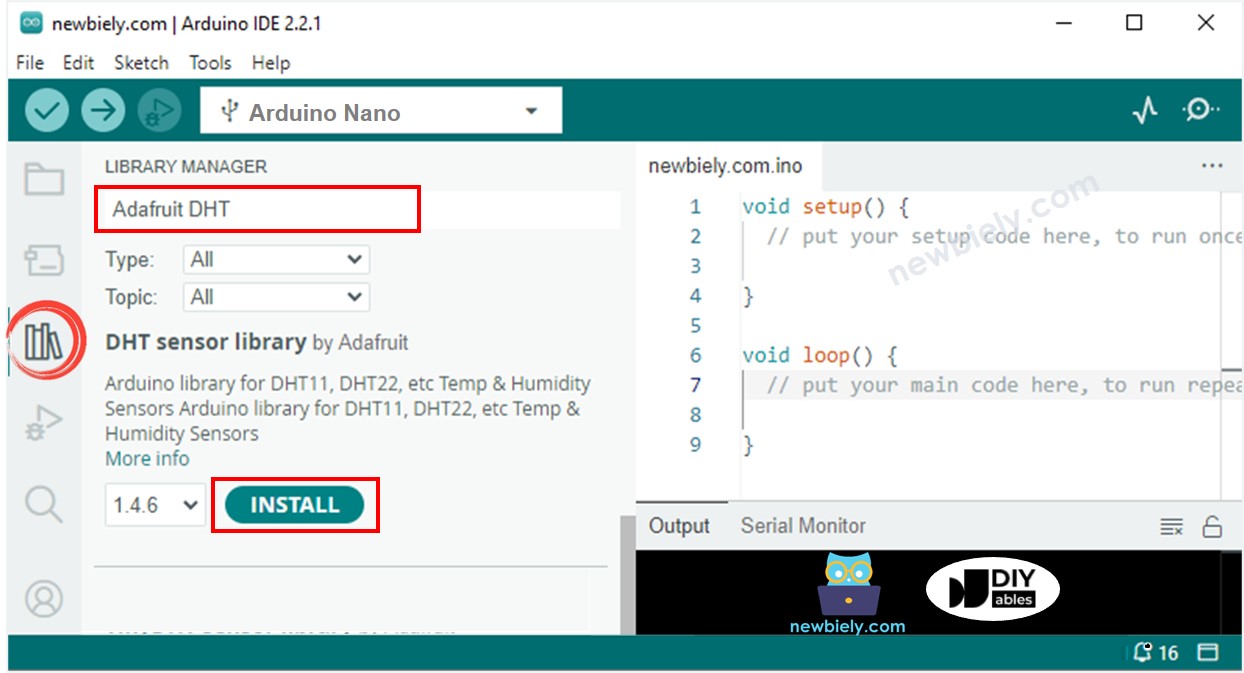
- Navigeer naar het Bibliotheken icoon in de linkerzijbalk van de Arduino IDE
- Zoek op “DHT”, en vind de DHT sensor bibliotheek van Adafruit
- Klik op de knop Installeren om de bibliotheek te installeren
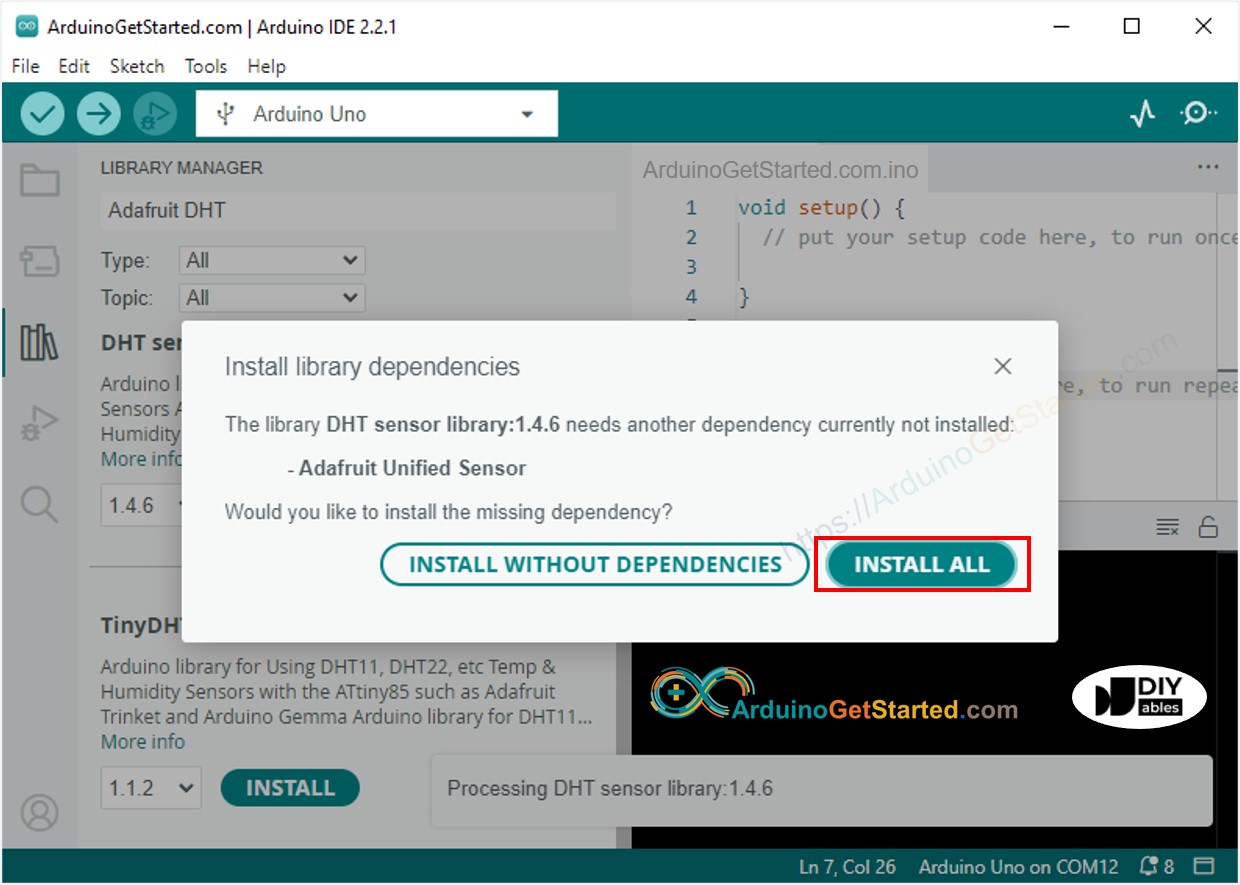
- U krijgt mogelijk de vraag om andere afhankelijkheden te installeren
- Klik op de knop Alles Installeren om alle bibliotheek afhankelijkheden te installeren
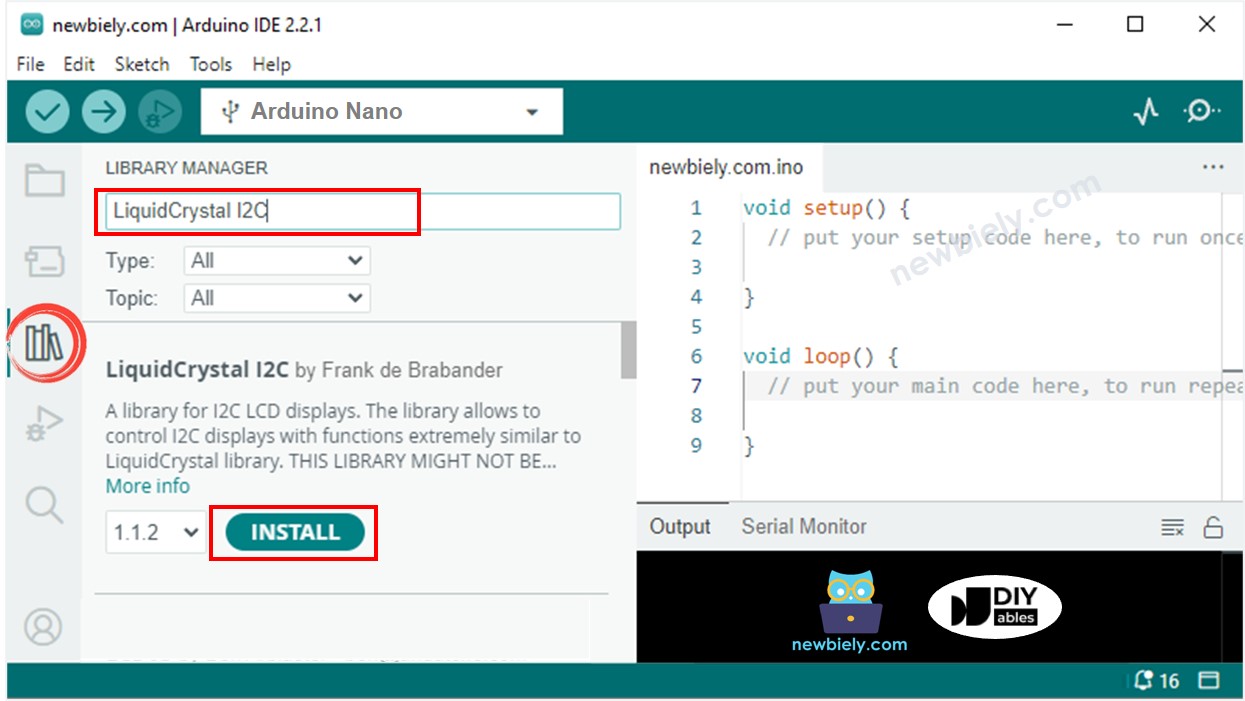
- Zoek op “LiquidCrystal I2C”, en vind de LiquidCrystal_I2C bibliotheek van Frank de Brabander
- Klik op de knop Installeren om de LiquidCrystal_I2C bibliotheek te installeren
- Kopieer bovenstaande code en open deze met Arduino IDE
- Klik op de knop Uploaden in Arduino IDE om de code naar de Arduino te uploaden
- Maak de omgeving rond de sensor warmer of kouder
- Bekijk het resultaat op het LCD
Deze afbeelding is gemaakt met Fritzing. Klik om de afbeelding te vergroten.
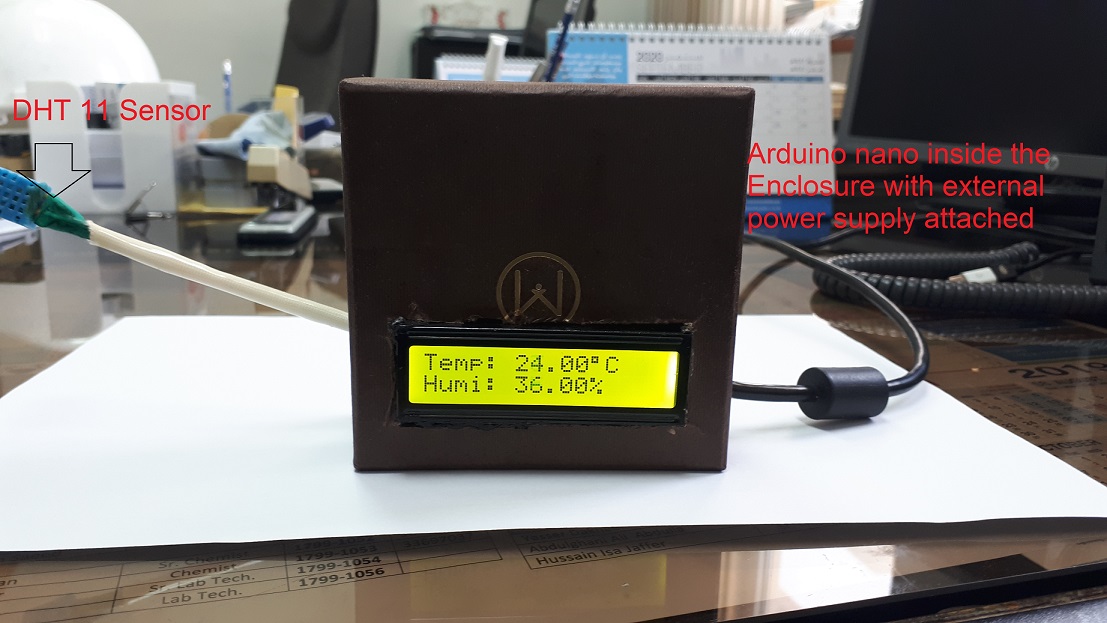
De bovenstaande code werkt ook voor de Arduino Nano. Een grootvader die via deze tutorial zijn kleinkind begeleidt, heeft deze code getest met Arduino Nano en stuurde ons het onderstaande resultaat:
Als het LCD niets weergeeft, zie dan Probleemoplossing bij LCD I2C
Arduino Code - DHT22 Sensor - LCD I2C
※ Notiz:
De code voor DHT11 en DHT22 is identiek behalve één regel. De bibliotheek voor DHT11 en DHT22 is dezelfde.
Video Tutorial
We overwegen het maken van videotutorials. Als u videotutorials belangrijk vindt, abonneer u dan op ons YouTube-kanaal om ons te motiveren de video's te maken.