Arduino - TCP Client
In deze handleiding leert u hoe u de Arduino Uno R4 WiFi programmeert als een TCP Client en data uitwisselt met een TCP Server.

Hardware Vereist
Of u kunt de volgende kits kopen:
| 1 | × | DIYables Sensorkit (30 sensoren/displays) | |
| 1 | × | DIYables Sensorkit (18 sensoren/displays) |
Openbaarmaking: Sommige van de links in deze sectie zijn Amazon-affiliate links. We kunnen een commissie ontvangen voor aankopen die via deze links worden gedaan, zonder extra kosten voor u. We waarderen uw steun.
Arduino Code
/*
* Deze Arduino code is ontwikkeld door newbiely.nl
* Deze Arduino code wordt zonder enige beperking aan het publiek beschikbaar gesteld.
* Voor volledige instructies en schema's, bezoek:
* https://newbiely.nl/tutorials/arduino/arduino-tcp-client
*/
#include <WiFiS3.h>
const char* WIFI_SSID = "YOUR_WIFI_SSID"; // CHANGE TO YOUR WIFI SSID
const char* WIFI_PASSWORD = "YOUR_WIFI_PASSWORD"; // CHANGE TO YOUR WIFI PASSWORD
const char* TCP_SERVER_ADDR = "192.168.0.26"; // CHANGE TO TCP SERVER'S IP ADDRESS
const int TCP_SERVER_PORT = 1470;
WiFiClient TCP_client;
void setup() {
Serial.begin(9600);
Serial.println("Arduino: TCP CLIENT");
// check for the WiFi module:
if (WiFi.status() == WL_NO_MODULE) {
Serial.println("Communication with WiFi module failed!");
// don't continue
while (true)
;
}
String fv = WiFi.firmwareVersion();
if (fv < WIFI_FIRMWARE_LATEST_VERSION) {
Serial.println("Please upgrade the firmware");
}
Serial.print("Attempting to connect to SSID: ");
Serial.println(WIFI_SSID);
// attempt to connect to WiFi network:
while (WiFi.begin(WIFI_SSID, WIFI_PASSWORD) != WL_CONNECTED) {
delay(10000); // wait 10 seconds for connection:
}
Serial.print("Connected to WiFi ");
Serial.println(WIFI_SSID);
// connect to TCP server
if (TCP_client.connect(TCP_SERVER_ADDR, TCP_SERVER_PORT)) {
Serial.println("Connected to TCP server");
TCP_client.write("Hello!"); // send to TCP Server
TCP_client.flush();
} else {
Serial.println("Failed to connect to TCP server");
}
}
void loop() {
// Read data from server and print them to Serial
if (TCP_client.available()) {
char c = TCP_client.read();
Serial.print(c);
}
if (!TCP_client.connected()) {
Serial.println("Connection is disconnected");
TCP_client.stop();
// reconnect to TCP server
if (TCP_client.connect(TCP_SERVER_ADDR, TCP_SERVER_PORT)) {
Serial.println("Reconnected to TCP server");
TCP_client.write("Hello!"); // send to TCP Server
TCP_client.flush();
} else {
Serial.println("Failed to reconnect to TCP server");
delay(1000);
}
}
}
Snelle Stappen
Om dit te doen, volgt u de onderstaande stappen:
- Verbind de Arduino met uw PC via de USB Type-C-kabel
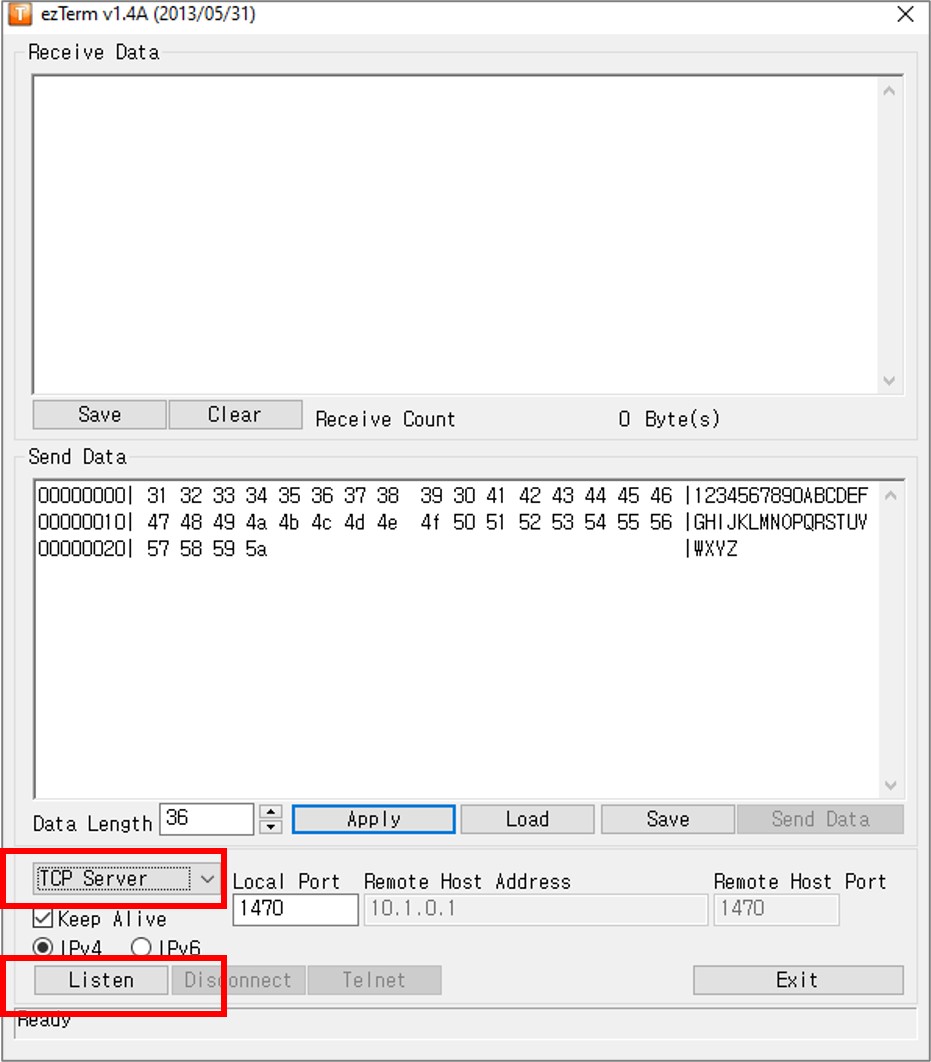
- Installeer een TCP server softwareprogramma zoals ezTerm
- Open het TCP serverprogramma en stel deze in als TCP Server, klik daarna op de knop Listen
- Open de Command Prompt op uw PC.
- Vind het IP-adres van uw PC door het volgende commando uit te voeren:
ipconfig
- De output ziet er ongeveer zo uit:
Command Prompt
C:\WINDOWS\system32>ipconfig
Windows IP Configuration
Ethernet adapter:
Subnet Mask . . . . . . . . . . . : 255.0.0.0
IPv4 Address. . . . . . . . . . . : 192.168.0.26
Subnet Mask . . . . . . . . . . . : 255.255.255.0
Default Gateway . . . . . . . . . :
- Pas het IP-adres van uw TCP Server (uw PC) aan in de Arduino code. In het bovenstaande voorbeeld is dit 192.168.0.26.
- Compileer en upload de code naar de Arduino door op de knop Upload te klikken in de Arduino IDE.
- Open de Seriële Monitor
- U ziet het volgende verschijnen in de Seriële Monitor:
COM6
Connected to WiFi YOUR_WIFI_SSID
Connected to TCP server
Autoscroll
Clear output
9600 baud
Newline
- Na verbinding met de TCP server stuurt de Arduino een "Hello!" naar de TCP server, en deze tekst is te zien in de TCP server software.
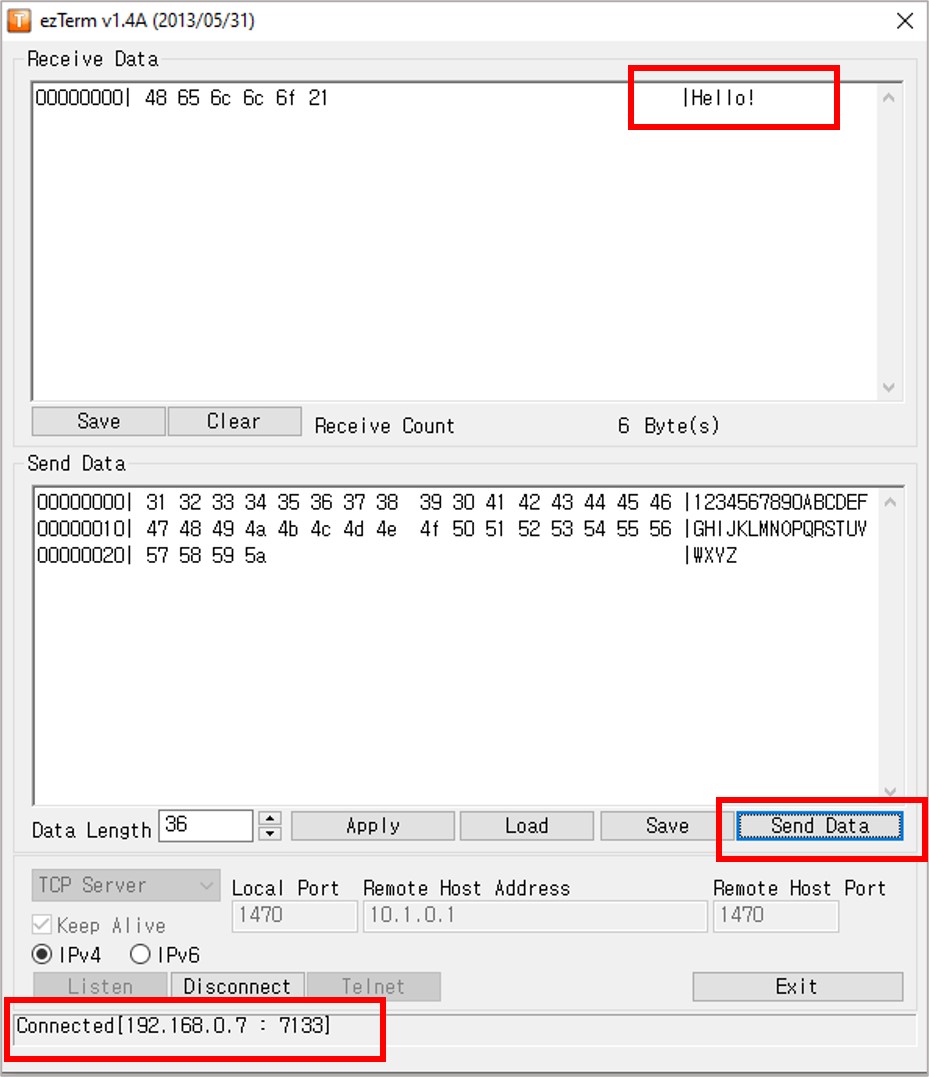
- Typ wat data in het TCP serverprogramma om dit naar de Arduino via TCP te sturen.
- Als het succesvol is, ziet u de data in de Seriële Monitor.
COM6
Connected to WiFi YOUR_WIFI_SSID
Connected to TCP server
1234567890ABCDEFGHIJKLMNOPQRSTUVWXYZ
Autoscroll
Clear output
9600 baud
Newline