Arduino - Knop LED Schakelen
In een vorige tutorial hebben we geleerd hoe we de LED kunnen inschakelen wanneer de knop wordt ingedrukt en de LED uitzetten als de knop wordt losgelaten. In deze tutorial gaan we leren hoe u de LED kunt schakelen (toggle) telkens wanneer de knop wordt ingedrukt.
De tutorial bestaat uit twee hoofdonderdelen:
- Knop schakelt LED zonder debouncing.
- Knop schakelt LED met debouncing.
Hardware Benodigd
Of u kunt de volgende kits kopen:
| 1 | × | DIYables Sensorkit (30 sensoren/displays) | |
| 1 | × | DIYables Sensorkit (18 sensoren/displays) |
Over LED en Knop
Als u nog niet bekend bent met LED en knop (pinout, hoe het werkt, hoe te programmeren ...), leer hier meer over in de volgende tutorials:
Bedradingsschema
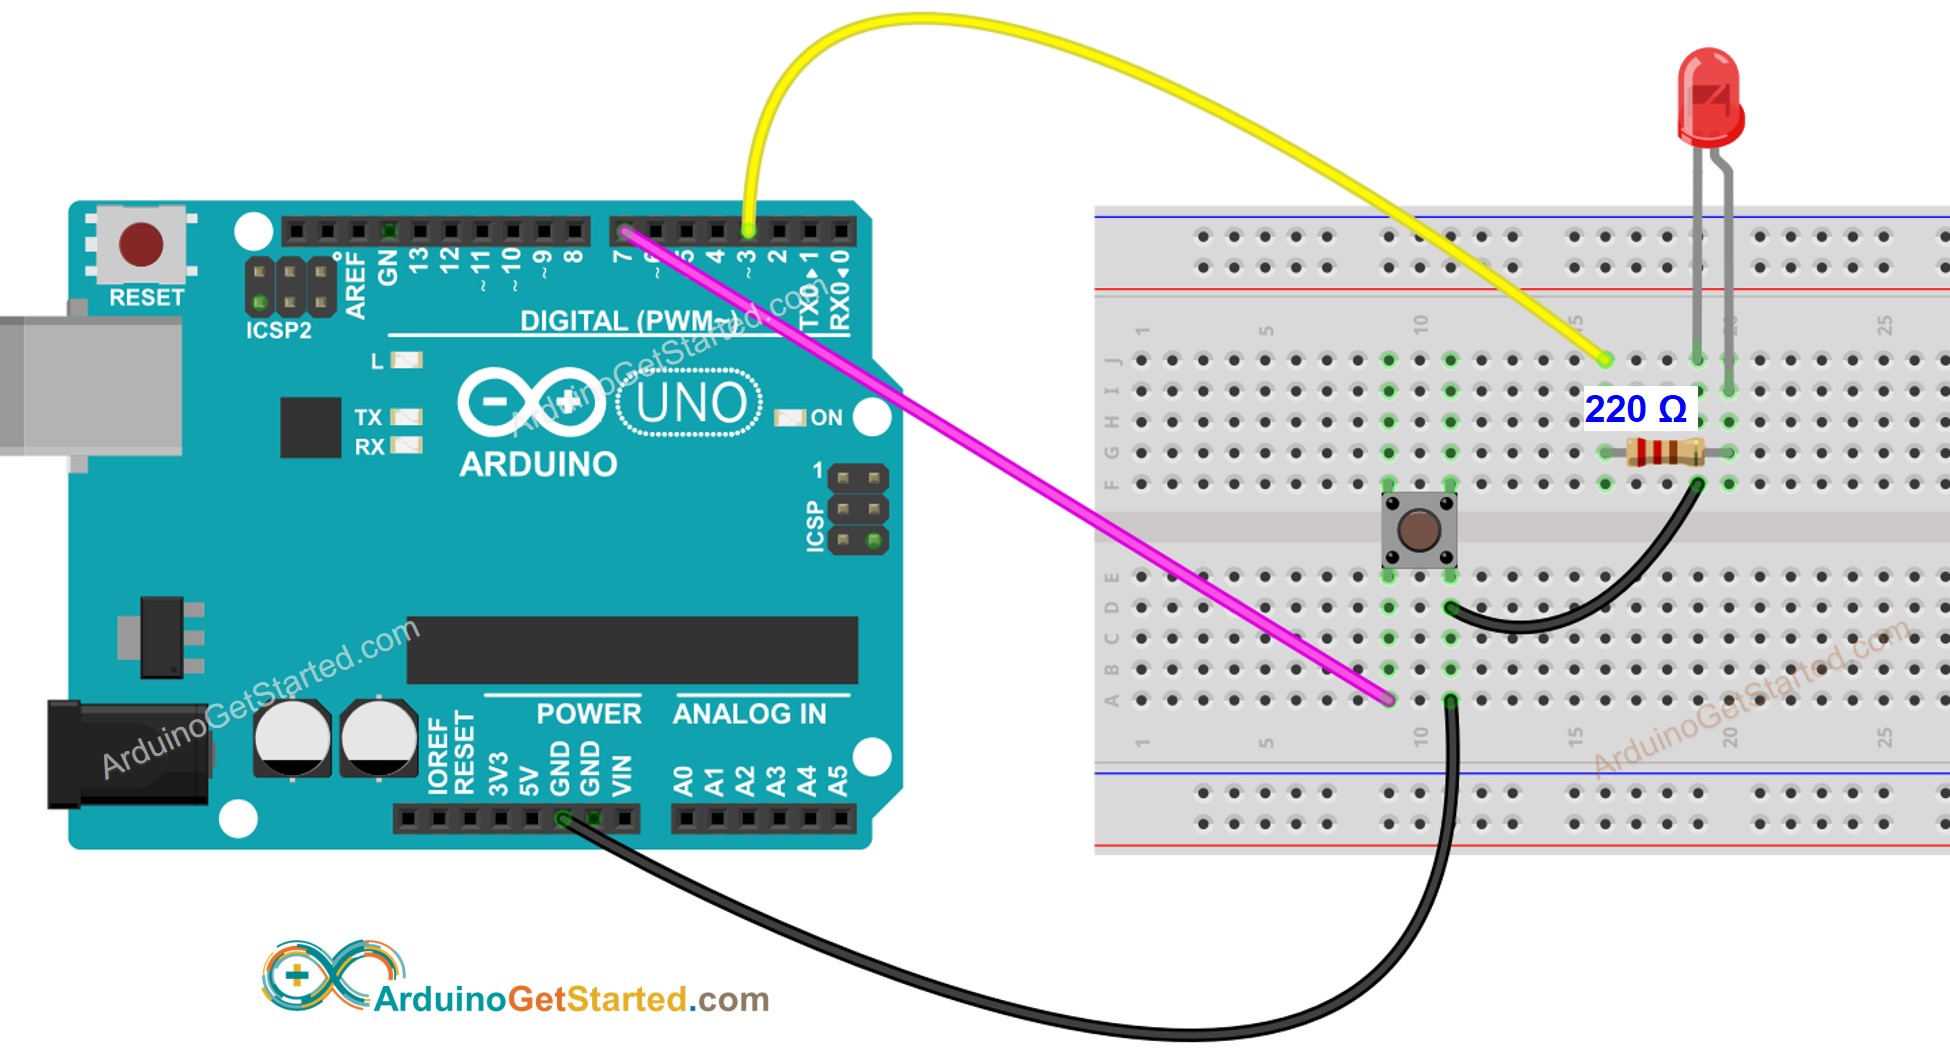
Deze afbeelding is gemaakt met Fritzing. Klik om de afbeelding te vergroten.
Arduino Code - Knop schakelt LED zonder Debouncing
Snelle Stappen
- Verbind Arduino met uw pc via USB-kabel
- Open de Arduino IDE, selecteer de juiste board en poort
- Kopieer de bovenstaande code en open deze in Arduino IDE
- Klik op de Upload knop in Arduino IDE om de code naar de Arduino te uploaden
- Houd de knop meerdere seconden ingedrukt en laat dan los
- Zie de verandering van de toestand van de LED
Code Uitleg
Lees de regel-voor-regel uitleg in de commentaarregels van de code!
In de code is ledState = !ledState gelijk aan de volgende code:
※ Notiz:
In de praktijk werkt bovenstaande code soms niet correct. Om het altijd correct te laten werken, moeten we debouncing toepassen op de knop. Debouncing voor de knop is niet makkelijk voor beginners. Gelukkig kunnen we dankzij de ezButton bibliotheek dit eenvoudig doen.
Arduino Code - Knop schakelt LED met Debouncing
Waarom is debouncing nodig? ⇒ zie Arduino - Knop Debounce tutorial
Snelle Stappen
- Installeer de ezButton bibliotheek. Zie Hoe Te Doen
- Kopieer de bovenstaande code en open deze in Arduino IDE
- Klik op de Upload knop in Arduino IDE om de code naar de Arduino te uploaden
- Druk meerdere keren op de knop
- Zie de verandering van de toestand van de LED
Video Tutorial
We overwegen het maken van videotutorials. Als u videotutorials belangrijk vindt, abonneer u dan op ons YouTube-kanaal om ons te motiveren de video's te maken.
Bekijk onze video-tutorial voor een visuele begeleiding bij dit project! De video biedt extra inzichten in de implementatie en helpt u stap voor stap.